
When you are a network engineer or a developer, you may want to test your skills in a virtual environment rather than playing with your machine or production environment. Because you never know what could go wrong.
What is VMware Workstation pro?
VMWare workstation pro is a Software program that would let you install different operating systems, be it a Windows or Linux virtually on your physical machine. The resources your physical machine (host) has, that would share among the VM’s.
There are free versions of the alternate products out there as well, VirtualBox for example. But that doesn’t support many features which Workstation provides, hardware acceleration is one such feature.
What is VMware fusion used for?
For those who use the MAC machine and looking for virtualization software, you shouldn’t be using a VMware workstation; instead, you should use VMWare fusion pro. Both software is very identical, and the steps performed here are almost the same for both workstation pro and the fusion pro.
I know some of my friends and colleagues personally who love MAC Operating systems but wanted to use Windows OS as well at times and they are using VMware fusion pro to run windows VM in MAC machine. That way they can switch between the host machine (MAC OS) and the guest machines(windows) anytime they want.
Creating Ubuntu VM in a VMware workstation is easy, and In this tutorial, we are going to see how to install ubuntu in VMware Workstation Pro 16, even though we use the Ubuntu version 20.10, the steps mentioned here are the same for the older version of ubuntu as well.
If you are looking for a free option then I have covered the installation of Ubuntu on VirtualBox steps here.
Prerequisite.
- VMware workstation Pro 16 for windows and Linux – Click here to download.
- If you are MAC user – VMware Fusion for MAC – Click here to download.
- Ubuntu latest image – Download the Ubuntu 20.10 here.
In case other versions use the below links.
How to install Ubuntu using VMware in windows 10?
The Ubuntu machine is a popular Linux based operating system used by many. There are some enterprise users as well who use this as the primary operating system. so let’s take a look at how you can install Ubuntu using VMware workstation in windows 10.
- Creation of the VM
- Attach the Ubuntu ISO image to Workstation
- Setup the account for your Ubuntu machine.
- Name the VM and Finalize the installation location.
- Configure the Hard Disk.
- Customize Hardware
- Choose the VM network as Host-only
- Begin the Ubuntu installation.
- Enable the internet.
- Install the VMware tools in Ubuntu.
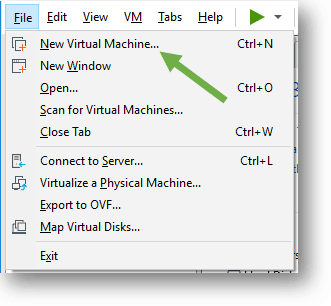
1. Creation of the VM.
I hope you have downloaded and installed VMware workstation on your machine. Open VMWare workstation pro and Click on File and click New Virtual Machine. A new Virtual machine wizard now opens.

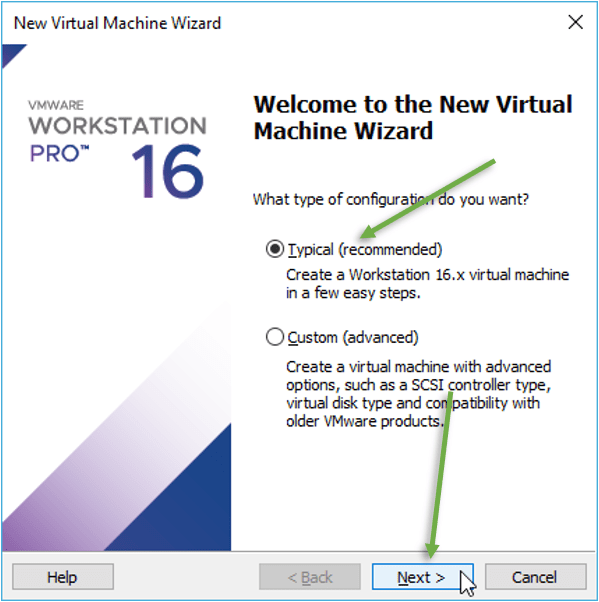
In the new VMware installation wizard we have to choose the method of installation.
Since we are not looking for any advanced method, let’s check Typical and click Next

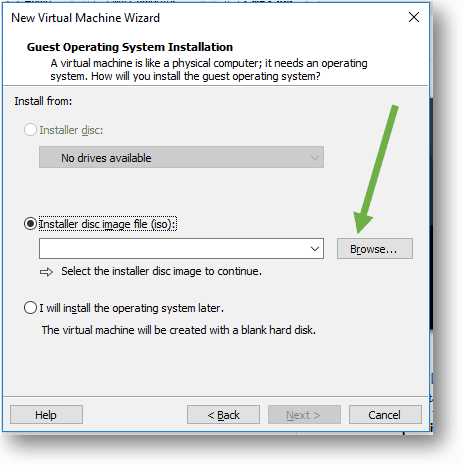
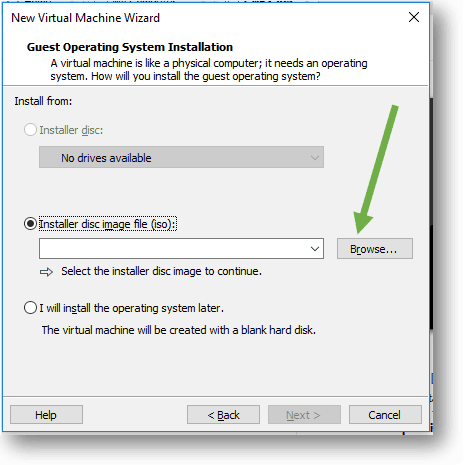
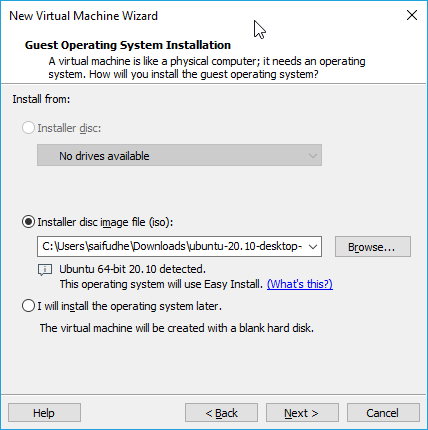
2. Attach the Ubuntu ISO to Workstation.
We are now going to attach the Ubuntu ISO that you have downloaded earlier.
Check the option that says, Installer disk image file (iso): and browse for the ISO image.
As you can see I have attached the image on the VMware workstation Virtual machine wizard.

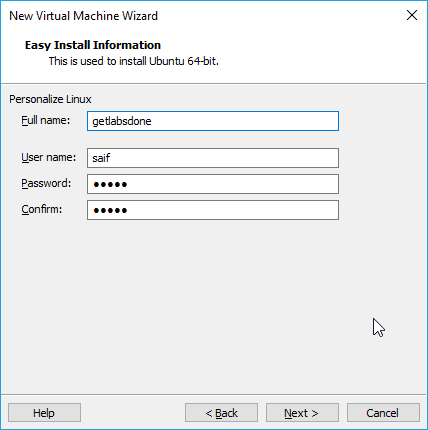
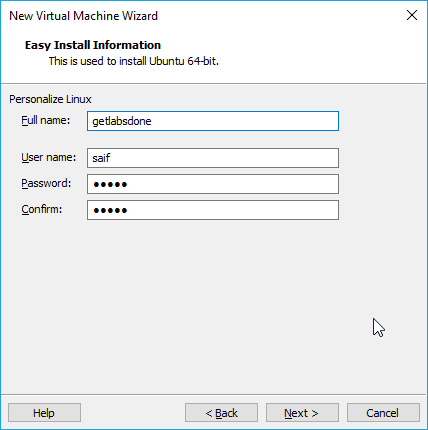
3. Setup the account for your Ubuntu machine.
One good thing about the VMware workstation is that, it would ask you to setup the credentials in the Virtual machine Wizard itself, rather than doing it in the Ubuntu machine.
You may enter the details here, remember to make a note of these credentials, as you need it later to login to the Ubuntu machine.
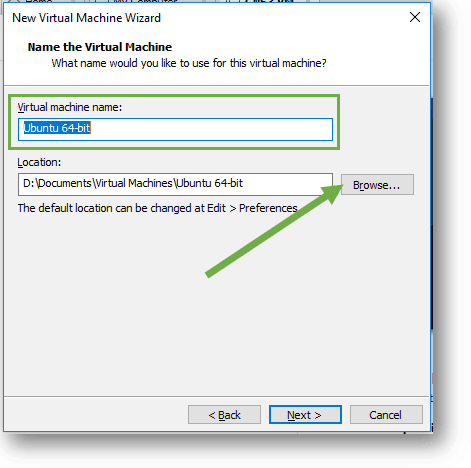
4. Name the VM and Finalize the installation location.
On the next screen, you may go ahead and name the VM, as well as the location where you are going to install the Ubuntu machine.
I have named the VM as Ubuntu 64-bit.
And for the location, It is always better to just leave it as default. But you can choose a different location if you want to.
Since I have more space on D drive, I am keeping it there.
If you would like, you can change the location by clicking browse.

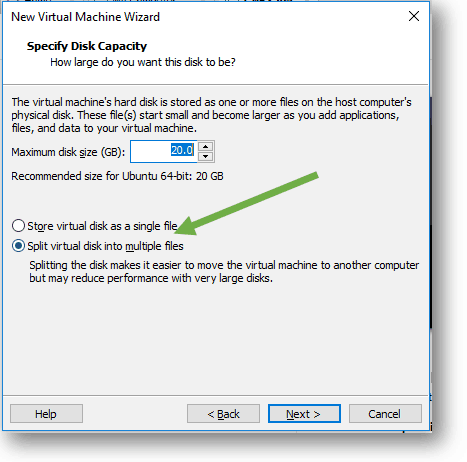
5. Configure the Hard-Disk
You need to define the storage space for the VM harddisk, by default it would pick up Maximum Disk size as 20GB.
You may change it depends on your hard disk space and your usage.
Also choose the Split virtual disk into multiple files.
6. Customize Hardware
Now you are ready to create a Virtual machine. Here you can see the properties that you are going to use for this VM. If you want to make changes to any of the details, then click on Customize Hardware.
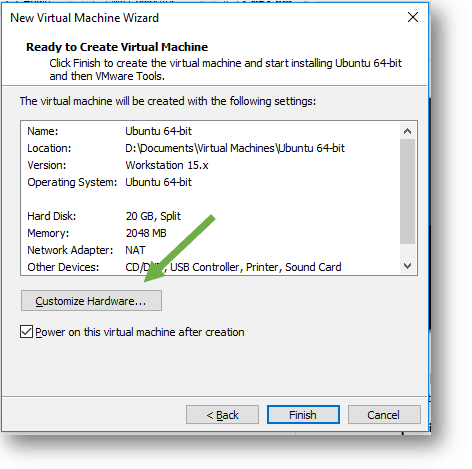

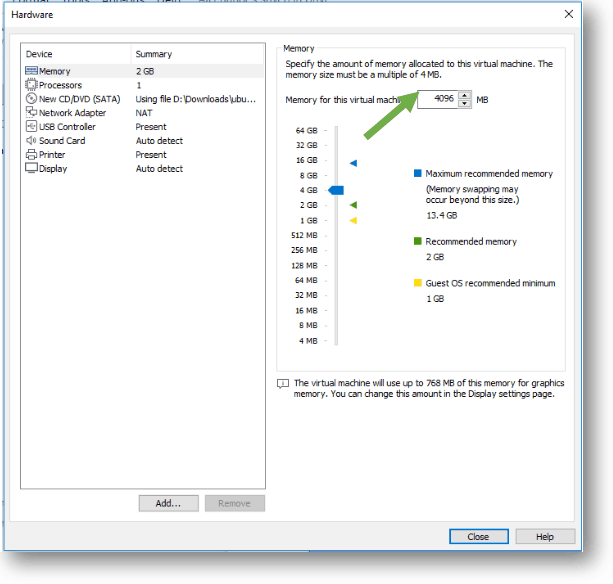
I wanted to change the RAM for this VM from 2GB to 4GB, so I clicked on customize hardware option.
A new hardware wizard now pop up, click on Memory and changed the memory to my required size.
You can also change the CPU cores as well, by clicking on the Processors, however I am leaving the default value.

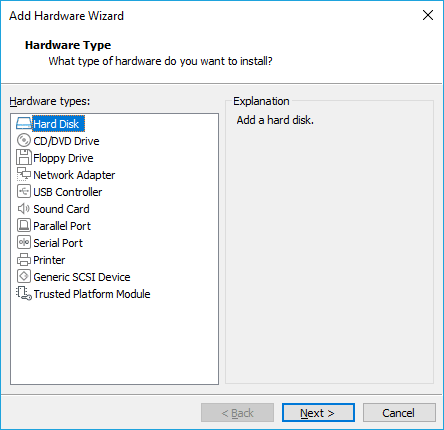
In case if you are planning to add more virtual hardware for example a new network virtual adapter, you may click on Add and you can add the required hardware.
Below is how adding a new hardware wizard looks like.

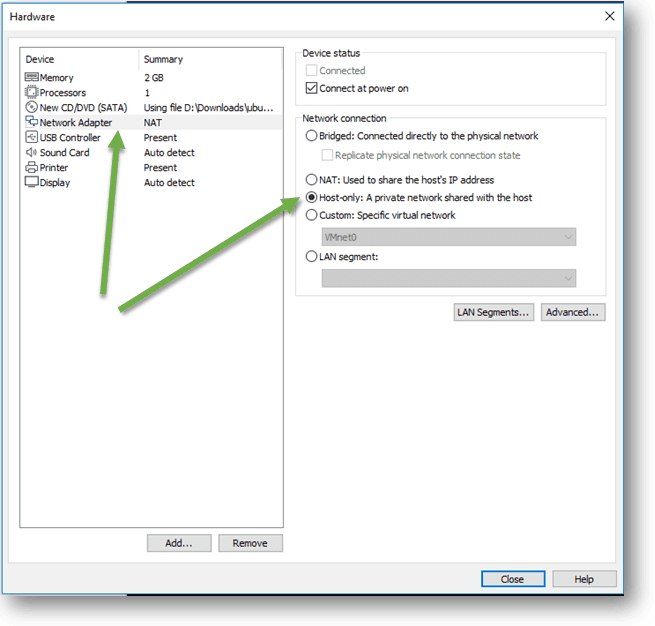
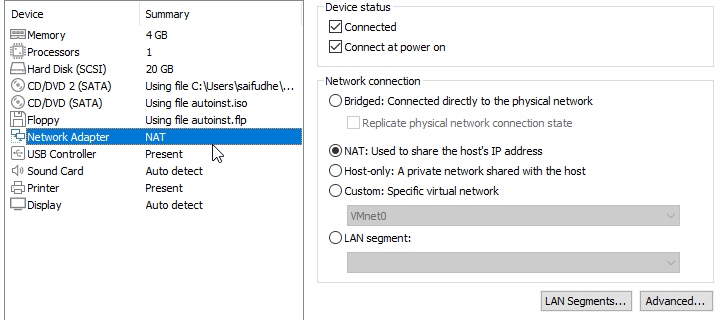
7. Choose the VM network as Host-only
Also, change the Network adapter from NAT to host-only adapter.
This will not let the VMware guest VM connect to the host internet during the installation, and that would avoid the Ubuntu VM to download the updates automatically using the internet.
TIP# If you are opting for an automatic update right now, that would take a long time to finish the installation.

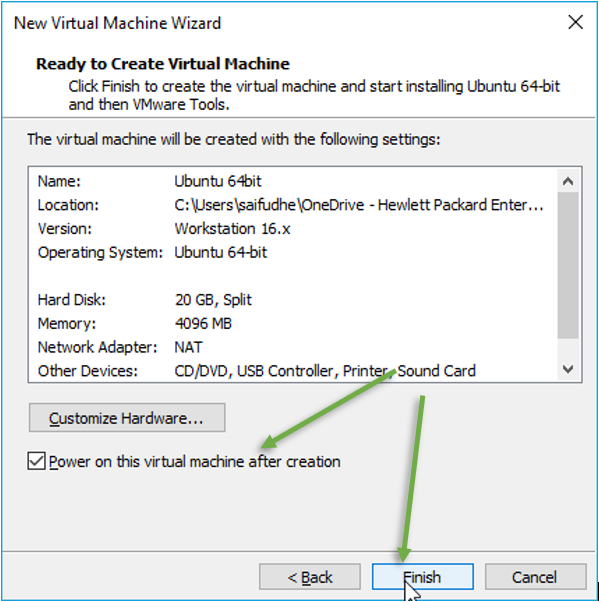
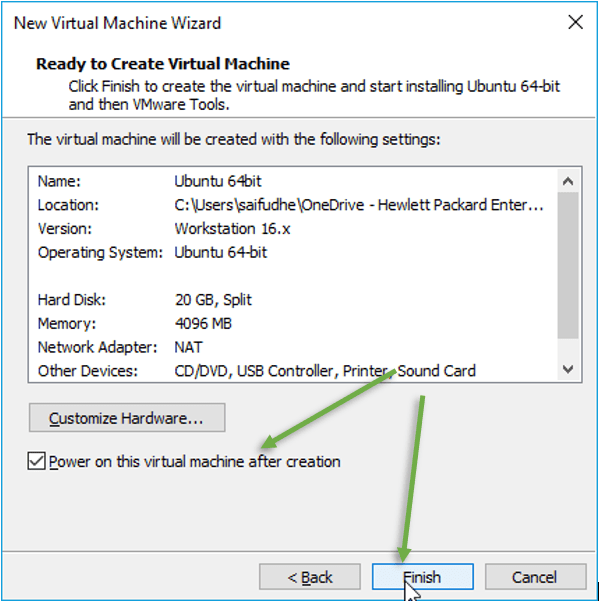
8. Begin the Ubuntu installation.
After you customized the hardware make sure the option Power on this virtual machine after creation is checked. And you can click on Finish.
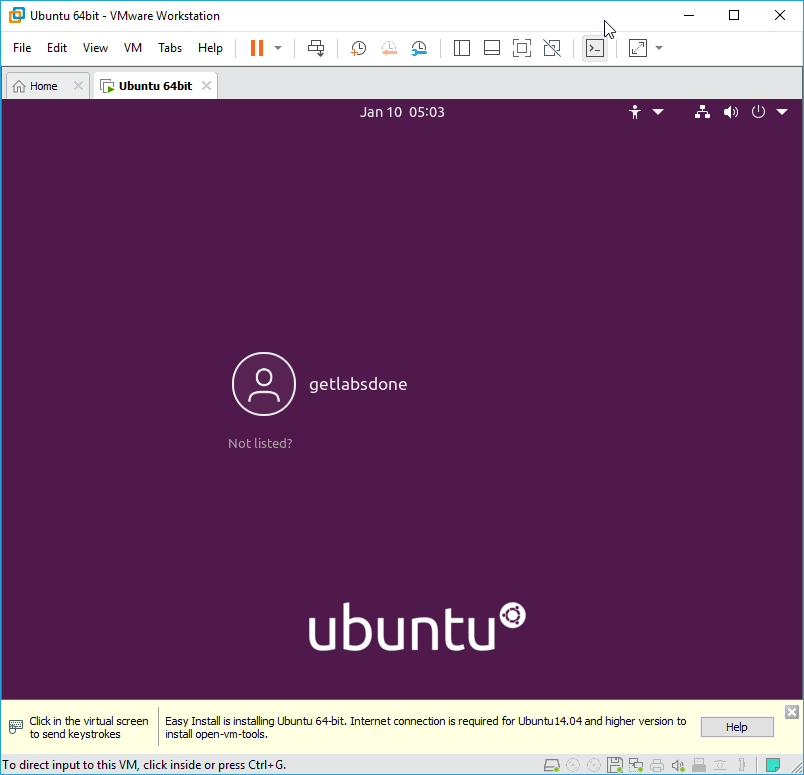
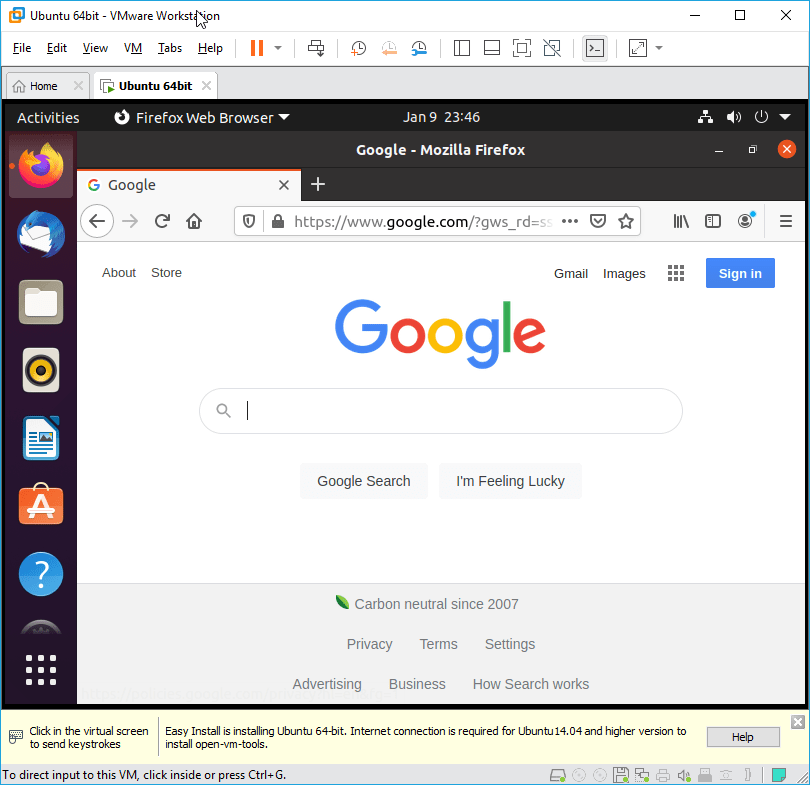
Once you click finish on the virtual machine wizard, the Ubuntu installation would start automatically.
The installation procedure will take some time to finish
Once completed, You should be able to see the Ubuntu login screen.

9. Enable the internet.
Remember prior to the installation of Ubuntu VM, we had disabled the internet connection. Lets go ahead and enable the internet access to the Ubuntu VM.
To enable the internet you need to choose NAT interface in VMware workstation.
On the top of the VM menu, click on VM and settings..

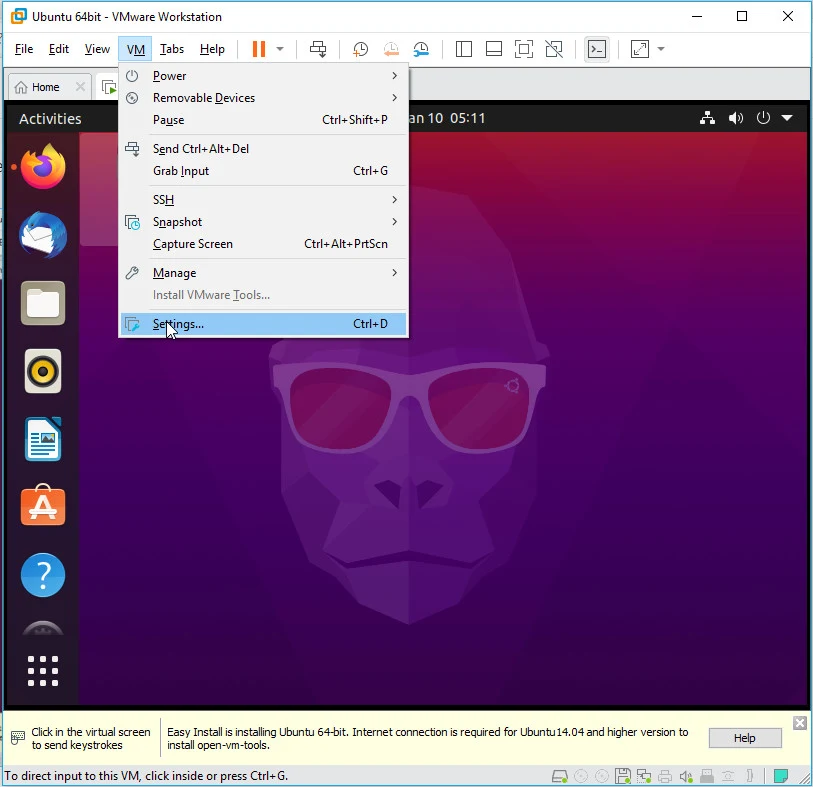
Change the VM host only adapter to NAT interface and click on OK.

The Ubuntu VM will now, disconnect the wired connection and connect back.
After the it is connected back, you now will be able to access the internet.

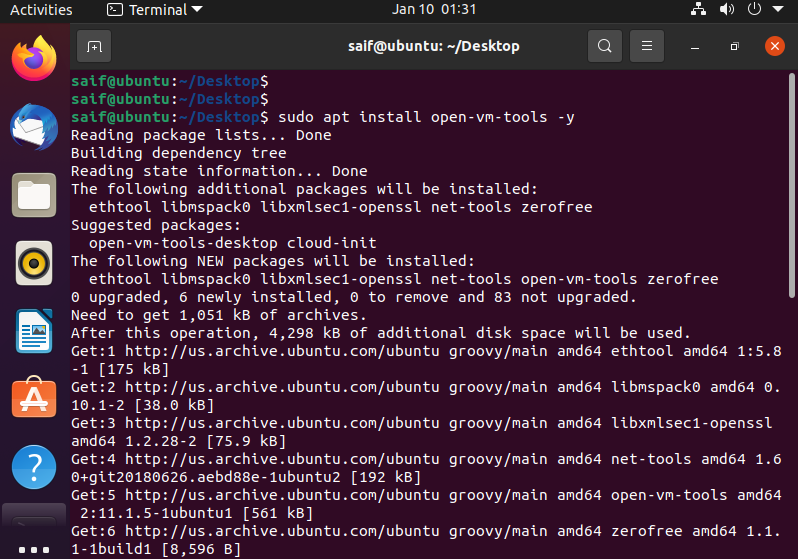
10. Install the VMware tools in Ubuntu.
Finally, we are going to install the VMware tools in Ubuntu. The VMware tools is a utility program that enhance the performance of the VM and enable the easy management for the end user.
It is important that you enable the internet before you proceed with the next step.
You can install the VMware tools by typing the following commands.
sudo apt update
sudo apt install open-vm-tools -y

After the installation, you can test by resizing the VM windows and when you resize the window the Ubuntu VM display resolution would automatically adjust as well.
basically you really no need to adjust display resolution manually in Ubuntu.
That’s it you have now successfully installed Ubuntu on VMware workstation pro.