When windows 11 came out, I was so excited to try it out. Unfortunately, Microsoft didn’t publish the official windows 11 image to the public after the official launch. Some windows 11 images were floating around on the internet. Still, I didn’t really want to reimage my laptop with the unofficial ISO image. So I decided to test windows 11 on my machine. The only way I can get my machine to get upgraded from windows 10 is by being part of the windows insider program. After joining the windows insider program, you will also get the latest windows 11 beta operating system to your machine. So I joined the program, and I got my laptop upgraded to windows11.
One update from Microsoft that I am happy about is that Windows 11 will be made available for free for those using the existing windows 10 licensed software, Provided your computer hardware compatible with windows 11. I have heard people complaining that they cannot install windows11 on their 3-year-old laptop due to the windows 11 TPM requirement.
So you need to make sure you have the licensed software before we begin, and you have the compatible hardware as well. If you have bought your PC or laptop in the last two years, you should be good to go, and I am confident about that because I purchased my machine two years back 😊
Windows 11 is still going through development, so you need to make sure that you are not upgrading your primary laptop if you plan to upgrade. Because you might hit with some bugs while working on something. With that in mind, let’s get started.
In this blog, we are going to perform a windows 10 upgrade to windows11 step by step.
Read also,
Windows 11 on VMware workstation – How to install it?
Windows 11 on KVM – How to Install Step by Step?
Note: When I performed the upgrade, it was very smooth and I didn’t really have any challenges, though I didn’t not lose any data during the upgrade, it is recommended that you take a backup of your files before you proceed with the upgrade.
1.Join the windows insider program.
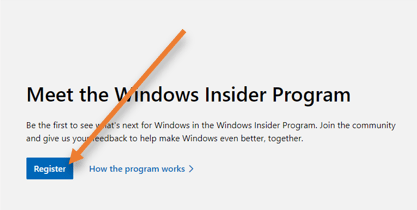
The first step in the process is to join the windows insider program. Click on the link here to the windows insider program page.
And click on Register.
Note: You must have a Microsoft account to join the windows insider program.
If you have not logged in, you will be asked to sign in now.
Once signed in, you will get a terms agreement page, accept the agreement and click on Register now.

You will get a banner that says, ” Welcome to the windows insider program, ” Which confirms that you have registered with Windows insider Program. Click on Flight now.

2. Link Microsoft account with windows insider program.
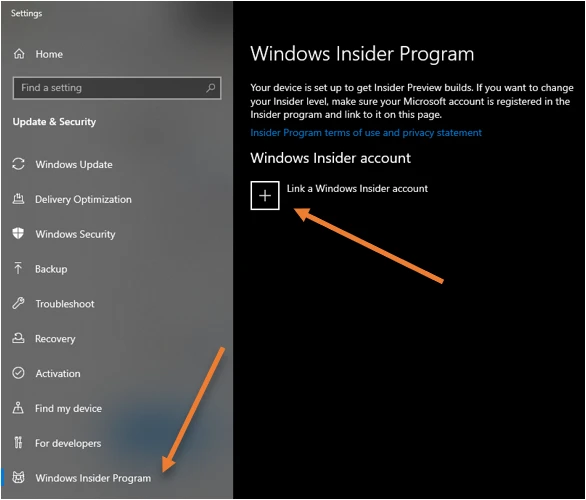
To link your Microsoft account with the insider program, click on Settings > Windows insider program or simply click on Open settings.
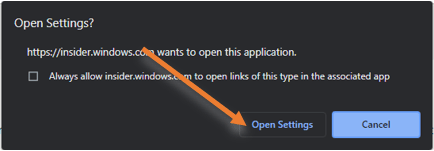
When you click on Open settings, you will get a prompt. Click on Open settings. It will take you to the windows insider program settings on your Windows 10 machine.
Click on Link a Windows insider account.
Enter the Microsoft email ID and password. You need to make sure that you use the same account you have used while registering for the Windows insider program.
3. Choose the windows insider program settings.
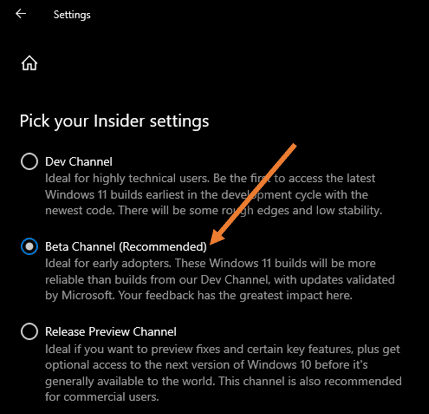
After you added the account, you will get multiple options. Under Pick your insider settings. Choose the channel of your choice. By default, it has picked up the Beta channel.
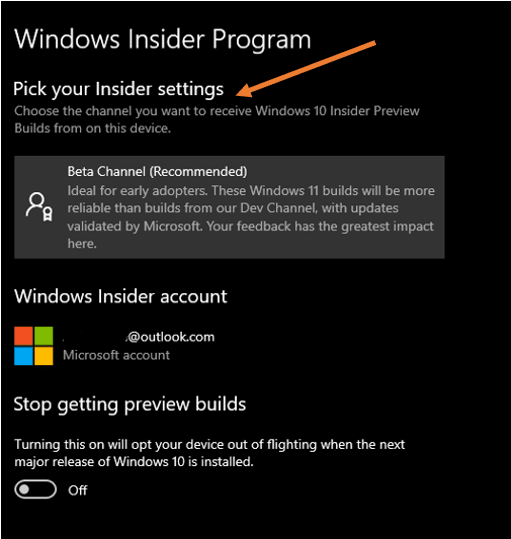
I won’t recommend you choose the Dev channel because it is an early release.
At the time of this writing, only Dev and beta channels are available to install. If you want to go for a more stable version, it will be under the Release preview channel. Unfortunately, Windows 11 is not available under this channel yet. I will update this article as in when it is available.
Choose the Beta channel and click on the back button.
4. Upgrade to Windows 11.
Under windows 10 settings, Head over to windows update and check for windows updates. Windows will start checking for updates.
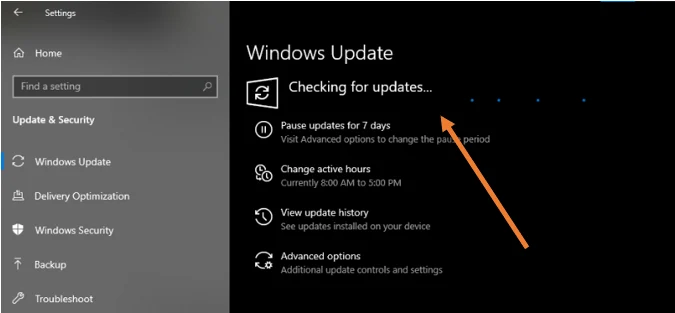
After few minutes, you should see Updates available, and Windows 11 insider preview started to download automatically.
You need to keep in mind that this update is a huge file and depends on your internet speed, the download will take some time to complete, so you may take a break and come back.
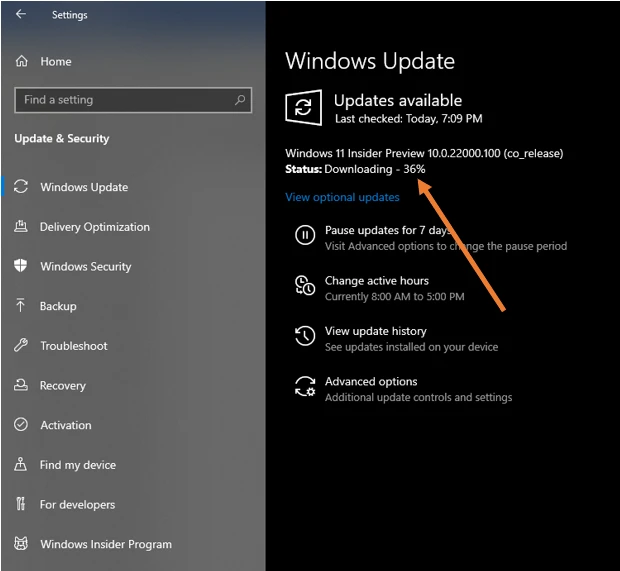
After the download is completed, you should see the installation started in the background.
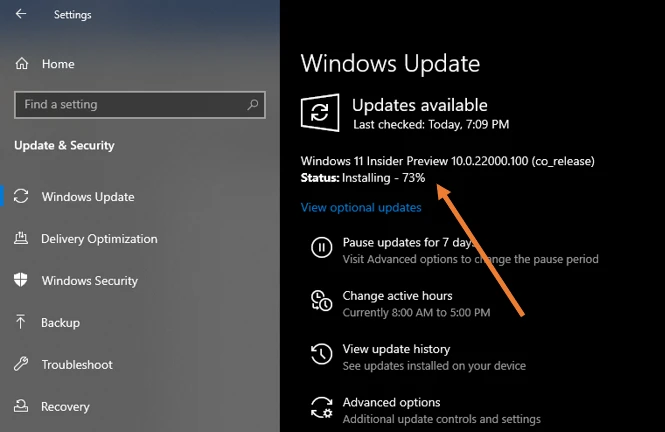
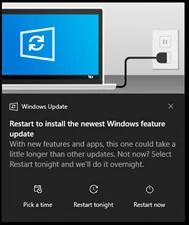
After windows 11 completed the installation, you will get a notification on the right bottom of the screen and the update screen asking you to restart windows 11.
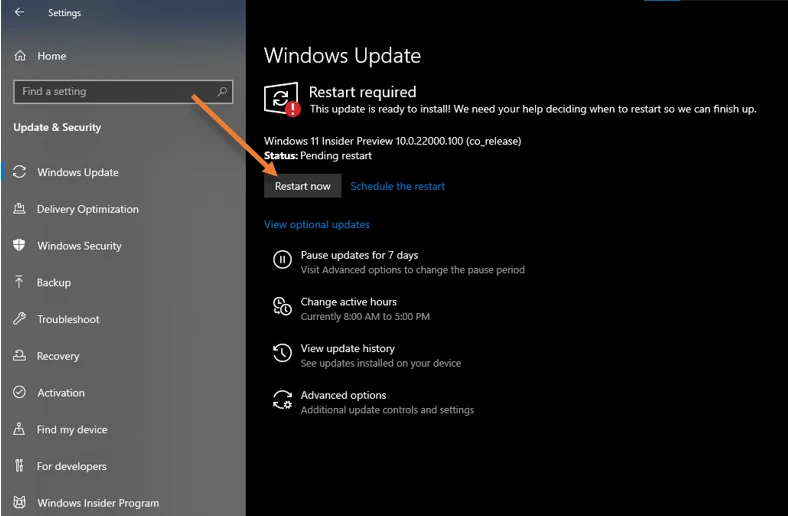
If you are in the middle of something, you may choose to restart later by selecting a different time. I clicked on Restart now.
Notification on the bottom right corner.
And on the update screen.
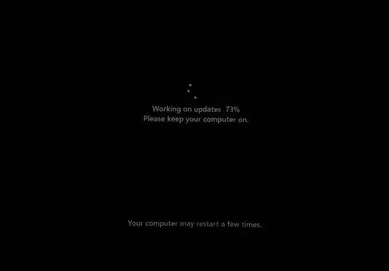
The windows will restart, and during the process, you will see Working on updates. Please keep your computer on.
Your computer may restart a few times.
After update is completed, you will be taken to the Windows 11 login screen.

5. Validate the version.
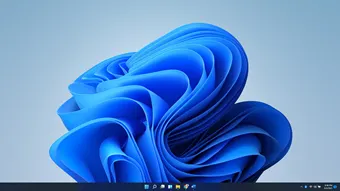
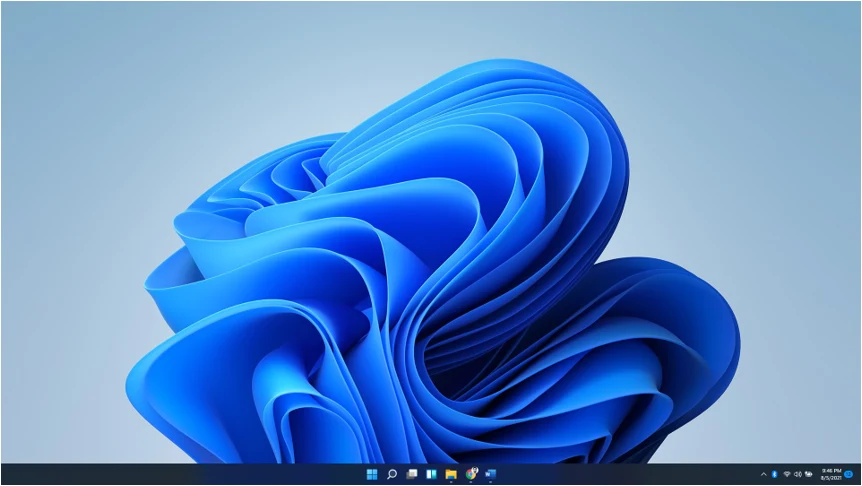
Validating the windows 11 installation is pretty easy. Once you logged in, you should see the Windows 11 desktop as below.
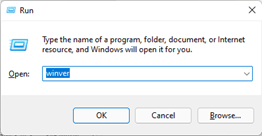
To check the Windows 11 version, click on start, click on Run or CTRL + RUN, and type winver and hit enter.
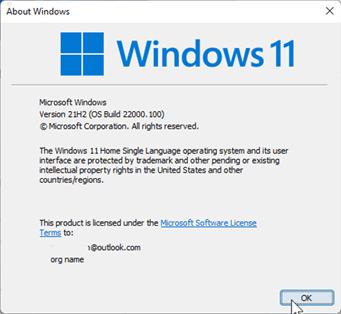
As you can see, we have successfully installed Windows 11 on your machine.
From my experience the installation was smooth and I never had any issues while upgrading, if you are worried that you might lose some files on your machine, it is recommended that you take a backup of your data before you proceed with the upgrade.
