I like to work on physical equipment when it comes to networking, but what if I cannot afford to own one, then the only option is to Virtualise them.
I have been running a virtualized environment for both my Network POC’s and the Labs for years now using Gns3. Since Gns3 supports a lot of different ways you can create a multivendor networking lab, I love to work on it, moreover, it’s open-source, and it’s free too!
Sometimes you may want to test the end-user machine in your Lab in Gns3. or you wanted to get some network devices that are available as VM to integrate with GNS3.
There are multiple ways you could do that. If you want to get the best performance, I would recommend you use Vmware workstation pro along with Gns3 as it does support hardware virtualization.
Also, if you are looking for a completely free solution, don’t worry. I am going to cover that as well.
Read also,
How to Install Palo Alto in GNS3?
Gns3 Common Errors And How To Fix Them.?
How To Install Pfsense Firewall On GNS3?
How I have setup my GNS3 | 10 Easy steps.
How To Install Checkpoint Firewall In Gns3?
How To Connect GNS3 Devices To The Local Machine?
Easy way to connect GNS3 to the internet on Windows host.
Multiple ways of Adding VM’s in Gns3
In this blog, I am going to cover how to integrate Virtual Machines in the below hypervisors and connect them into Gns3.
And of course, I am going to use Ubuntu as my VM on all the hypervisors.
Below are the different methods through which we can connect a variety of hypervisors to gns3.
- Connect Vmware VM to Gns3’s
- Connect Virtualbox VM to Gns3
- GNS3 Integration with Qemu/kvm VM’s
- How to verify Gns3 VM’s connectivity?
1. Connect Vmware VM to Gns3’s
Step 1. I already covered how to install ubuntu 19.04 in VMware workstation Pro 15 in the last blog, follow this guide and complete the ubuntu VM installation steps and come back here.
You have now installed Ubuntu VM in the Vmware workstation pro.
Note: The example steps I am performing here with an Ubuntu machine, following this instruction you can add other types of virtual machines as well not just the Ubuntu.
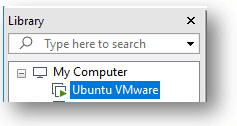
Step2. Next, you would have to attach this VM to Gns3 so that you can drag and drop them to your networking topologies.
Goto Edit→ preferences→ click on VMware VM’s
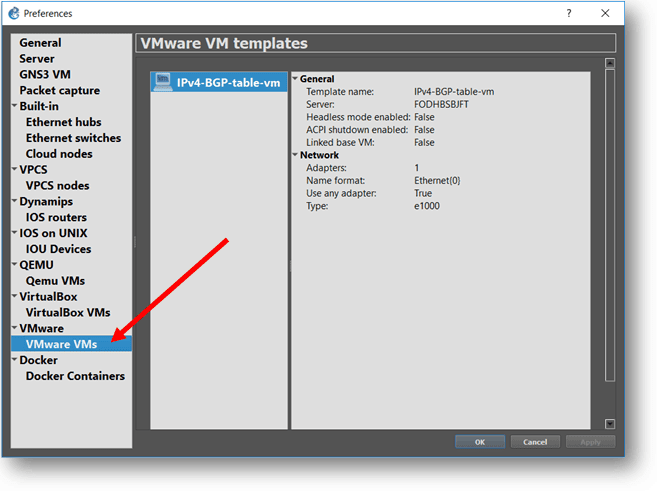
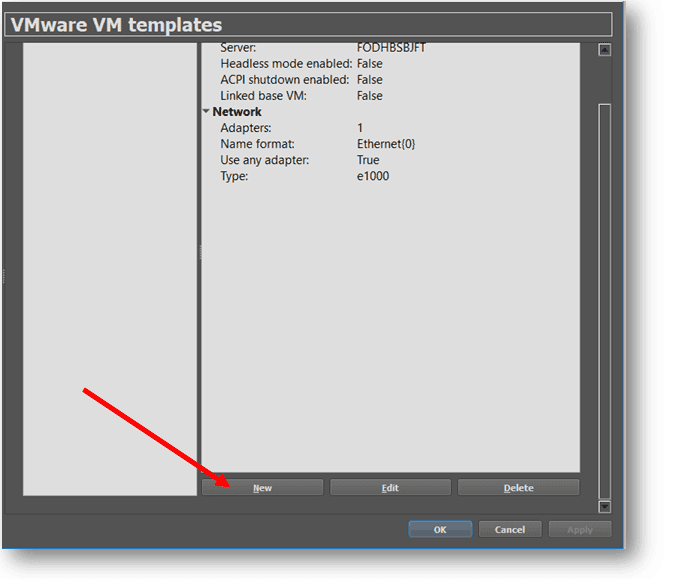
Scroll down, and you can see an option called New, click on that.
Check the option which says Run this VMware VM on my local computer, and click next.
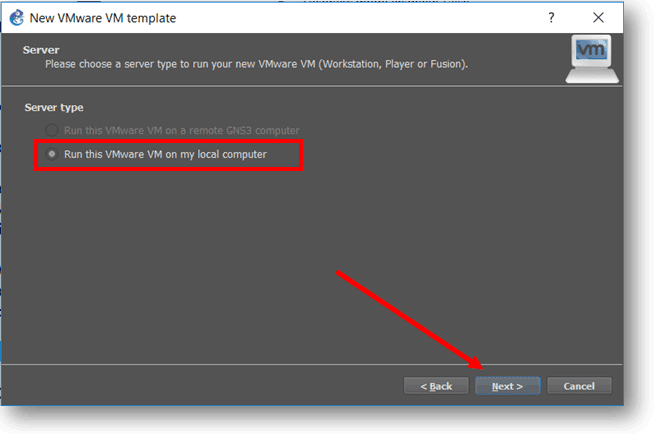
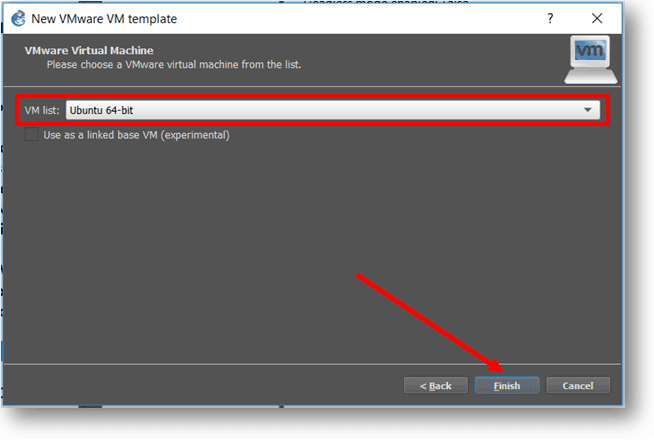
You can see a list of VM’s that you have already installed on the VMware workstation pro, Gns3 can identify the VM’s installed in the VMware workstation pro and show it in the GNS3.
Click on the VM list and select the Ubuntu VM.
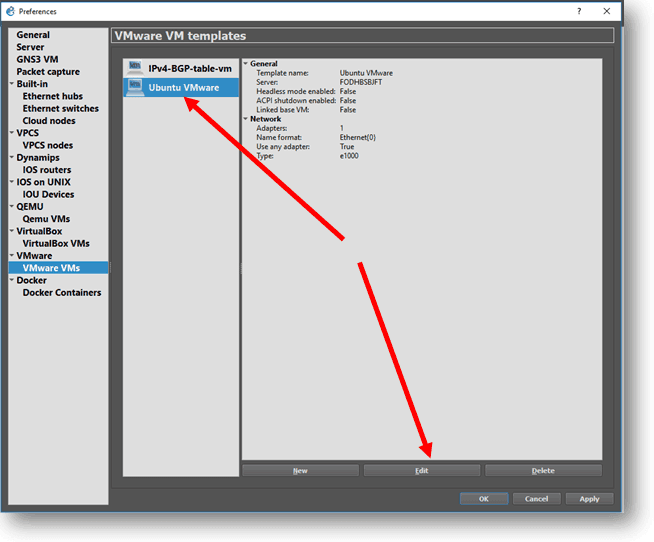
While you are at it, select the VM you just added and click on Edit.
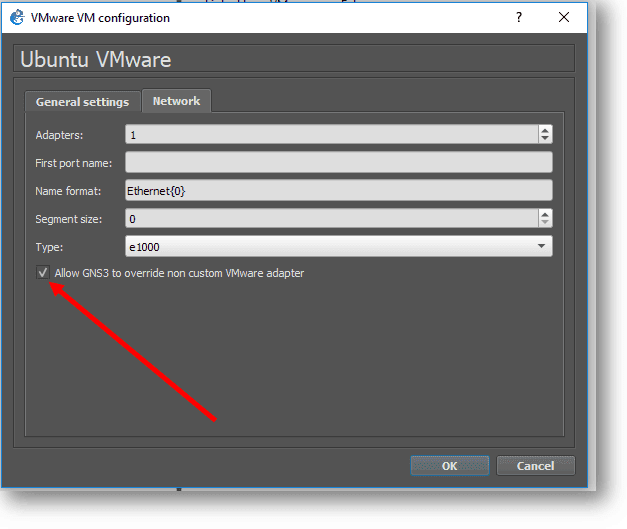
Click on Network and check the option Allow GNS3 to override non custom VMware adapter.
Now goto VMware on the same window and click on Advanced local settings, we have to create interfaces that the VM’s are going to use with Gns3 topologies, by default the value would be from vmnet2 to vmnet 19, I am changing it to vmnet6, if required I would create later.
Once you decided on the virtual interface, click on configure. It would start creating these interfaces on the command prompt windows. Once completed, you can click on Ok.
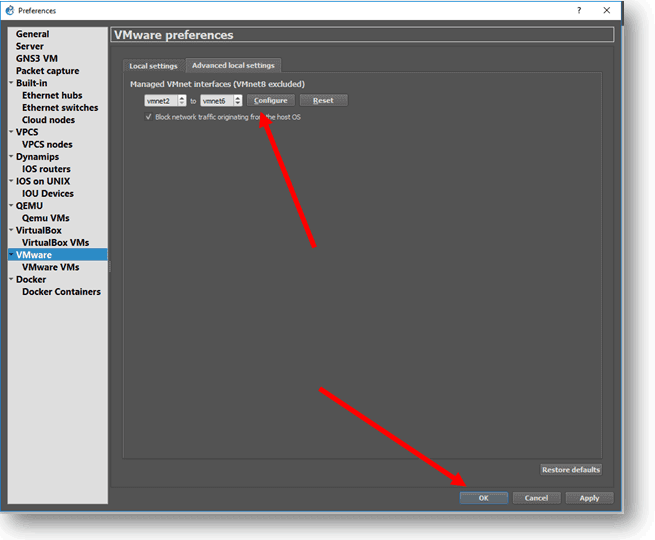
That’s it, you just added Ubuntu VMWare VM to Gns3, now you can create topologies and drag and drop the Ubuntu VMware VM that we just added.
2. Connect Virtualbox VM to Gns3
Compared to VMware workstation pro the VM performance on the Virtualbox won’t be excellent, Anyways it’s free, so why don’t we give it a try.
Step1. Follow this guide on how to install Ubuntu VM in VirtualBox.
Step2. Once you have installed Ubuntu VM in VirtualBox Go to Gns3 and click on Edit–> preferences and head over to VirtualBox VM’s and click on New.
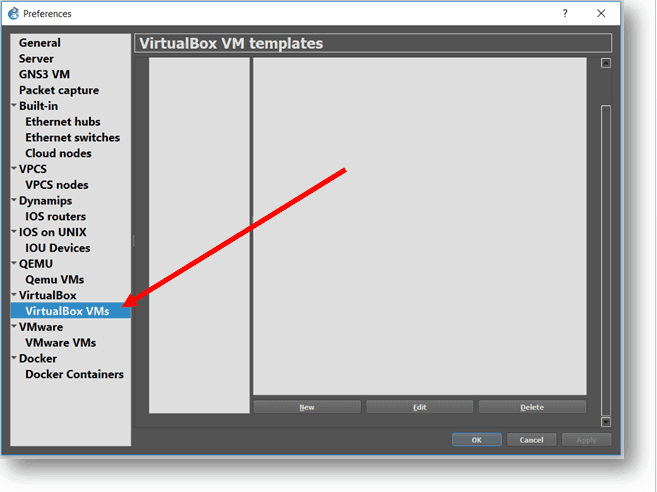
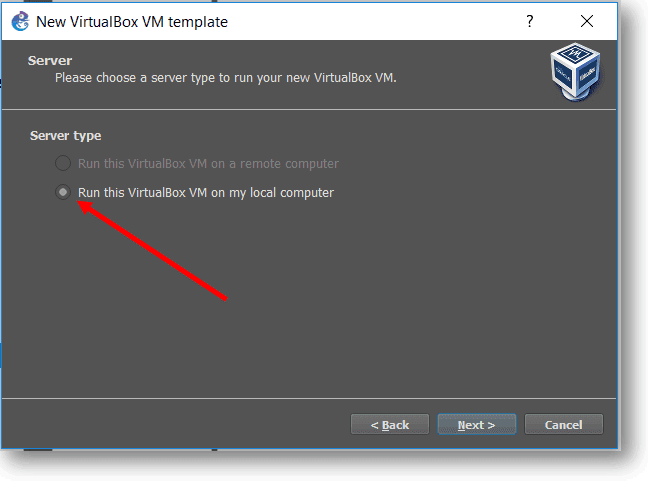
Step3. Click on New to and select Run this VirtualBox VM on my local computer, click next.
Step4. You can see a list of VM’s under the VM list, click the drop-down and select Ubuntu from it and Finish and click Ok on the main window.
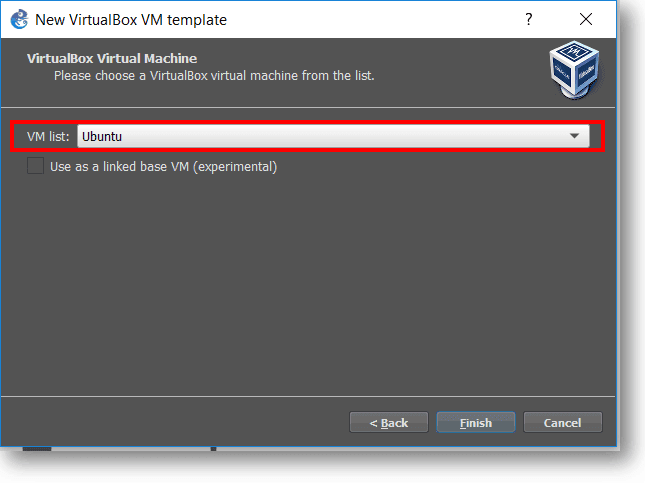
Adding Ubuntu VirtualBox VM is now complete.
3. GNS3 Integration with Qemu/kvm VM’s
Step1. Download Ubuntu cloud VM here
Step2. Go to Edit -> Preferences and Qemu VM section in GNS3 and click on New.
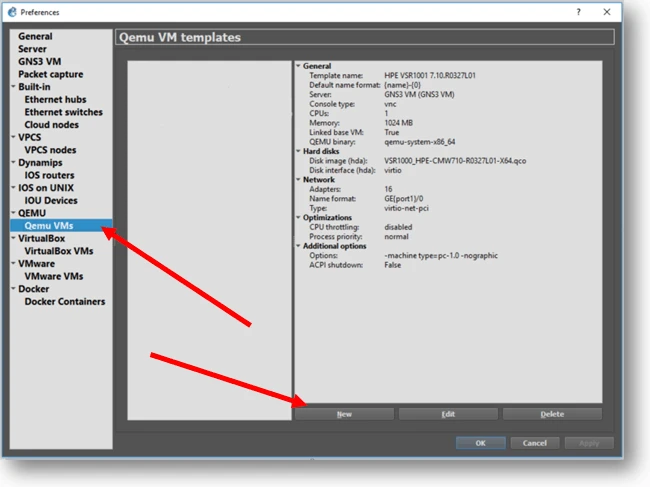
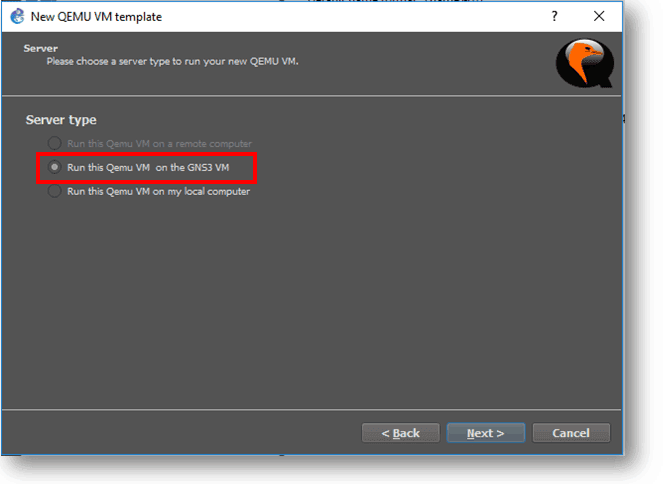
Step 3. Check the option which says Run this Qemu VM on the GNS3 VM, and click Next.
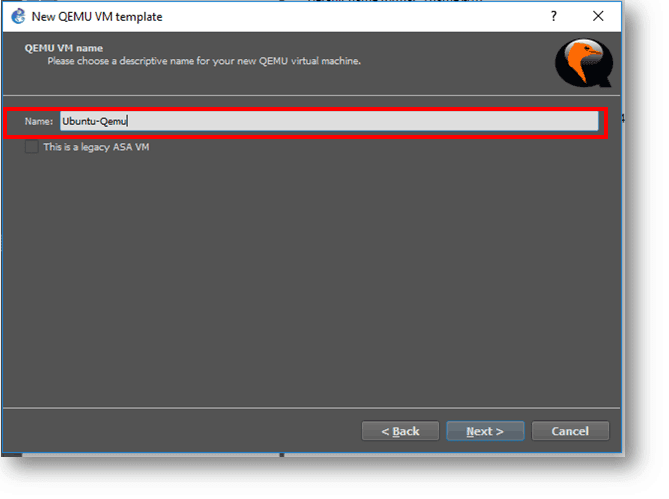
Step 4. Name the qemu VM and click next.
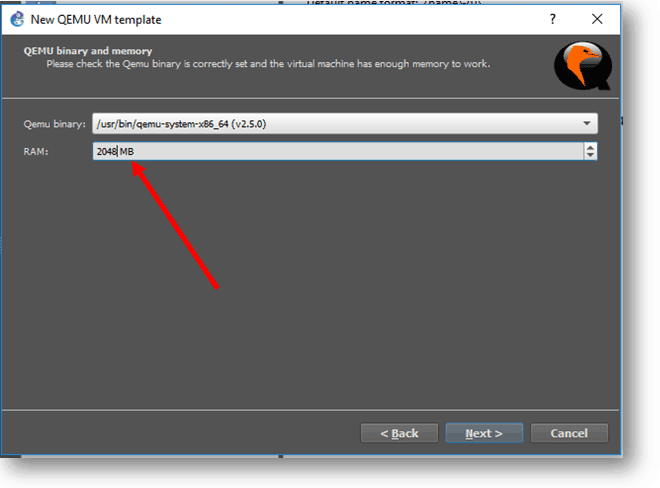
Step 5. You may assign the RAM as needed, and I am assigning 2048MB for this VM and click Next.
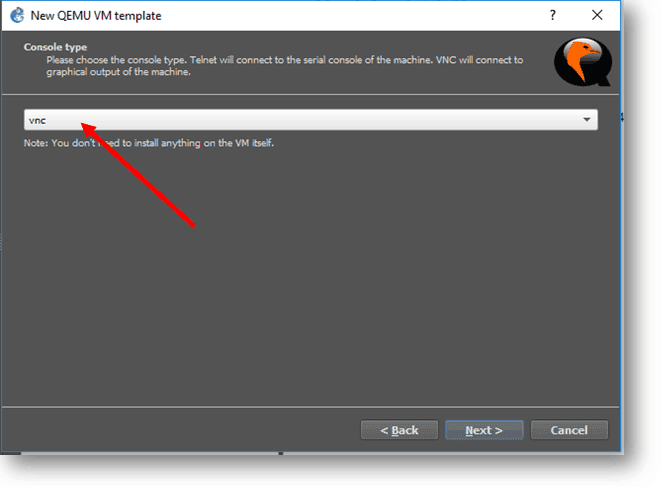
Step 6. Select the console type as VNC from the dropdown and click Next.
Step 7. Now you need to browse the Ubuntu qemu VM you just downloaded and click Finish. Gns3 would start uploading the image to the GNS3 VM. You may need to wait for some time to finish this.
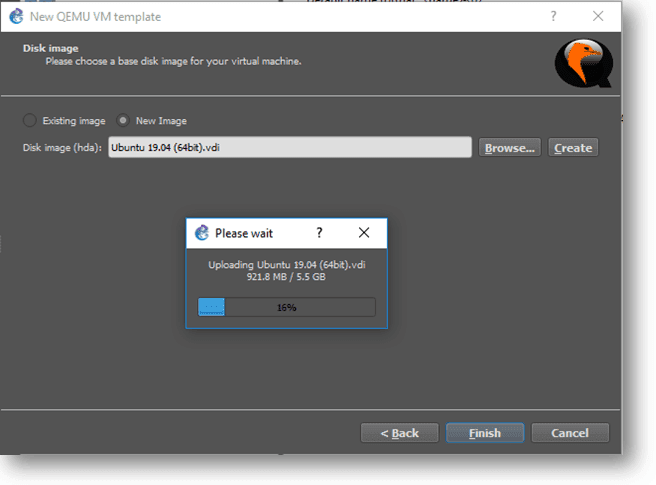
That’s it. You just added qemu VM in Gns3 as well, and you are all set.
How to verify Gns3 VM’s connectivity?
We have now added three Ubuntu VM’s in each hypervisor, one is Vmware workstation, and the second one is Virtualbox, and the last the qemu KVM VM.
Let’s connect these multiple VM’s on the same network and test its connectivity using a simple lab in Gns3.
Step1. Let’s add a basic ethernet Gns3 switch to the topology.
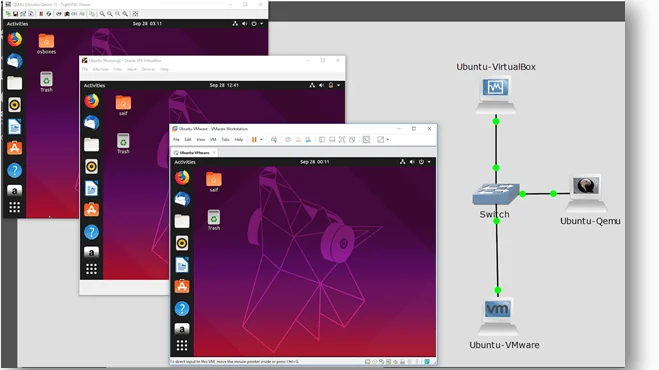
Step2. Add each VM that we just created to the topology and connect it to the switch, this would create a topology that would look like below.
Looking cool, isn’t it? 🙂
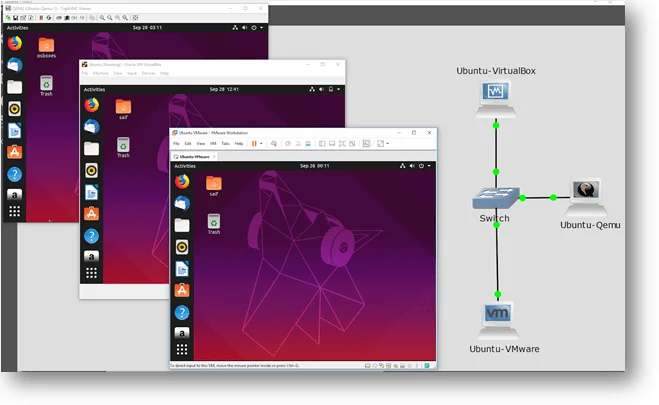
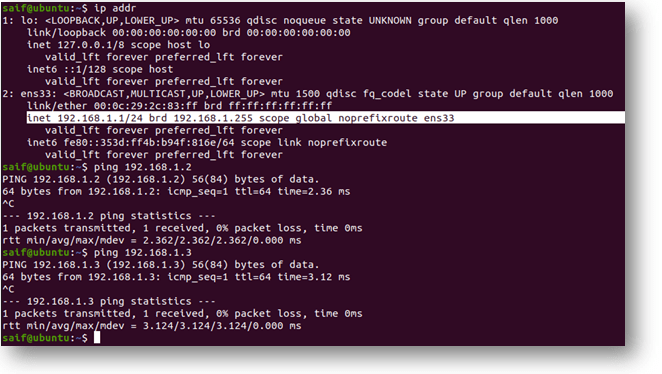
Step3. Let’s give the IP addresses to each VM from the 192.168.1.0/24 subnet range.
Vmware VM = 192.168.1.1
VirtualBox VM = 192.168.1.2
Qemu VM = 192.168.1.3
Step4. Go to network settings in each Ubuntu VM and click on IPv4, and assign an IP address and Mask.
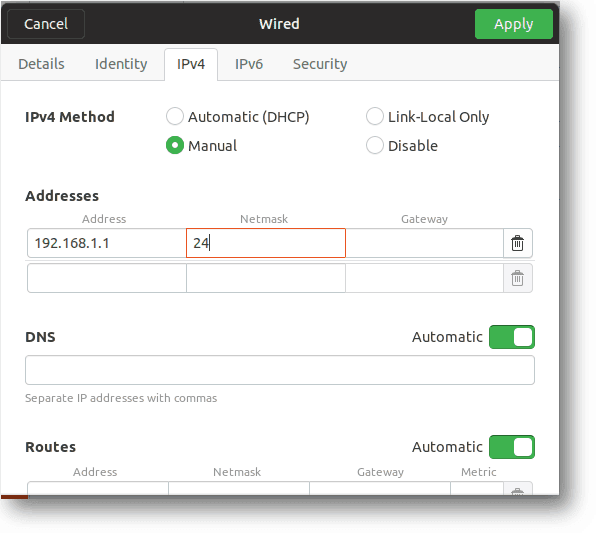
Since this is a broadcast network and we don’t have a router in place, you can leave the default gateway as Blank.
If you are planning to connect this VM to the other network, you need to define a default gateway.
Step 5. Let’s ping all the other VM’s from VMware workstation VM as you can see you can reach all the VM’s in the network.
Conclusion: In this method, I have shown you how to add multiple format VM’s in gns3. This method is great when you have a multivendor environment. Because sometimes all the network vendors won’t have all the virtual appliances formats available, some would have a KVM image. Some would have a VMware image. At that time, you can use this approach and connect all the VM’s irrespective of the format.
One drawback I have experienced with Gns3 is that at times you may experience some errors
First of all, it’s opensource second there is no support other than the community forum, if you can work around that, then Gns3 is awesome!
There are some errors and the troubleshooting method I covered here. You may check them out in case if you come across any of those errors.
