I like working with Linux, especially Linux mint. At the same time, I also need to use the latest Windows 11 operating system on my computer because of the wide range of features it brings along with it. Since I like both operating systems, I could virtualize either of the operating systems. The main advantage is that you can use both operating systems simultaneously. The problem with this setup is that you cannot take full advantage of the virtualized operating system because it runs on top of another operating system as virtualized. So it cannot get the same level of performance as the physical machine. The solution should be to use Linux mint alongside windows 11 machine as dual boot. So when you are working on either of the operating systems, you can take advantage of the entire physical hardware, which provides good performance. One disadvantage of this setup is that you cannot use both operating systems simultaneously. Suppose you are working on Linux mint and decided to switch to windows11, then you have to shut down the Linux mint and choose windows 11 during the reboot.
Read also;
How to Install Linux Mint On VirtualBox?
10 Easy Steps To Install Linux Mint On VMware Workstation.
Can windows 11 dual boot with Linux mint?
The Linux Mint is based on Debian and Ubuntu. To install Linux mint alongside windows 11 as dual boot, some prep work needs to be done inside the windows 11 operating system to avoid any conflict. Once done, we can install the Linux mint on the same PC where windows 11 is currently running. You won’t delete the windows files during the Linux mint installation. Post-installation, the Linux mint boot loader will be installed on the machine. That will be loaded during the system reboot. When the system starts, in the Linux mint boot loader, you will have to choose which operating system you would like to load, whether Linux mint or windows 11. You can choose windows 11 from the list of operating systems. However, by default, it would take you to the Linux mint if you don’t make any choice, so you need to be mindful whenever you reboot windows 11.
Sometimes you may have remote into the Windows machine using RDP, the same dual boot machine. In between, there was a need to reboot the Windows 11 OS, but when you rebooted, you no longer can get back to windows 11 ended up losing the connection to RDP. That would be not a good experience when you are not near the system. You lost access to windows because it would take you to Linux mint boot loader when the system starts, and It would load Linux mint automatically instead of windows 11, while we expect the RDP to respond.
To make Windows 11 the primary operating system, you must change the boot loader from Linux to windows. Afterward, when you reboot the Windows operating system, it will always load the windows boot loader at the system start. And it would take you to windows 11 if you don’t make any choice. So based on your requirement, you need to choose the boot loader.
In this blog, we would use a Linux mint boot loader. We will install Linux Mint on a PC where Windows 11 is already running. After the installation, log in to the Linux mint, and show you how you can switch to windows 11. We will keep Linux mint and the windows 11 hard disk partition separate during the installation so both will not have any conflict and delete the files.
Before you begin, you need to have;
A Linux mint ISO file – you can download that from here. We are going to use Linux mint 20.3 Cinnamon Edition for this install.
Rufus software – Click here to download.
USB Storage – To create the bootable image.
1. Make the LinuxMint a bootable USB.
We will make the USB storage bootable. You need to ensure all the data in the USB storage has a backed-up cos while creating the USB as bootable. We will format the entire USB drive.
- Plugin the USB storage.
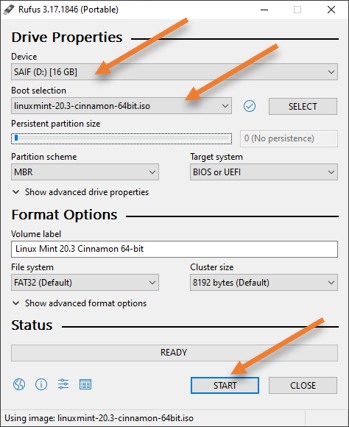
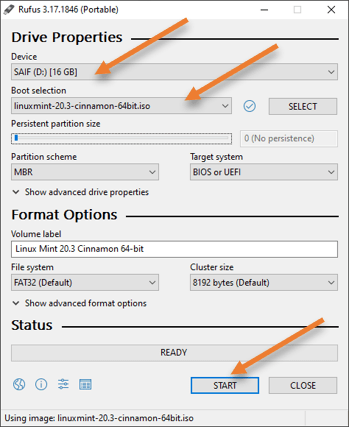
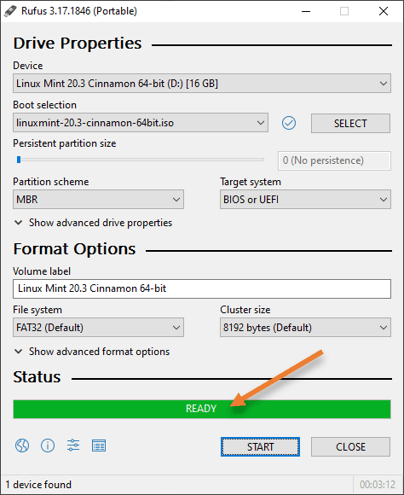
- Open the Rufus software.
Device: Choose the USB storage that you just plugged in.
Boot selection: Click on Select to choose the iso image you downloaded.
Leave everything else default, and click on Start.
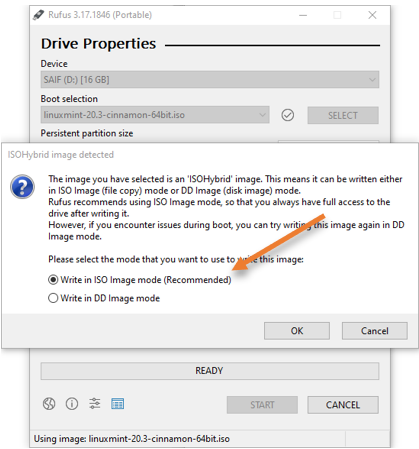
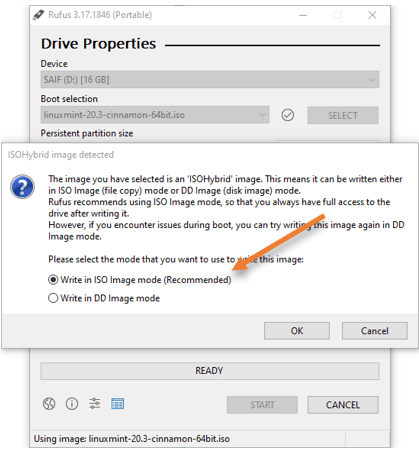
You will get an option that says, ISOHybrid image detected, choose Write in ISO image mode and click on okay.
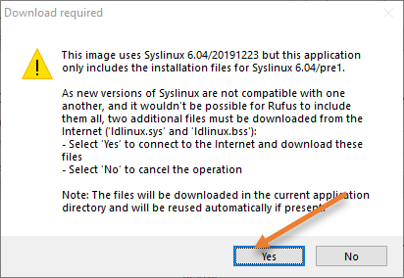
You will get another prompt asking you to download another file *.sys click on Yes for that.
This will download the required files.
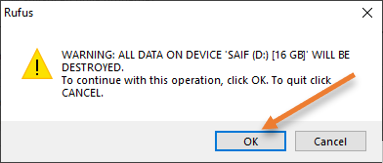
Next, a warning will pop up, saying all the files will be destroyed if you continue. Since I have already taken a backup of the USB drive, I should be okay.

The Rufus software would start formatting the USB drive and copy the ISO image to the USB drive. Once completed, you would get a message that says Ready.

2. Reserve space for Linux Mint in Windows 11.
We will install the Linux mint on windows 11. The safest way to do that is by reserving some storage for the Linux mint using the windows 11 disk manager.
In my setup, I have 500GB of storage. I would reserve 200GB of storage for Linux mint rest for windows 11 machine. That way, both the files systems reside separately without any conflict.
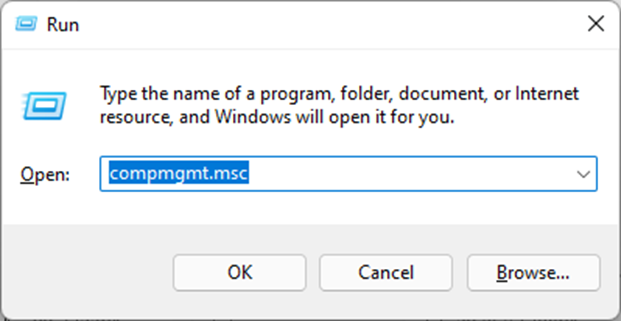
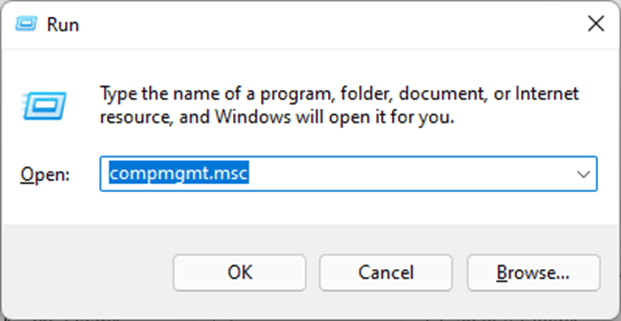
In windows 11 open computer management by clicking Start->RUN-> Type : compmgmt.msc and hit enter.
Click on Device Manager.
Here, you will see the list of hard disks and its partitions available for your windows machine.
As you can see, almost all the storage of C drive is occupied by the windows operating system. In my case 476.03GB.


Right-click on the C drive and click on Shrink Volume.
You will get a pop-up to shrink the volume.
Enter the amount of space to shrink in MB, enter 204800, which is 200GB.
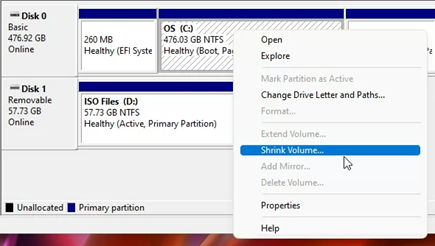
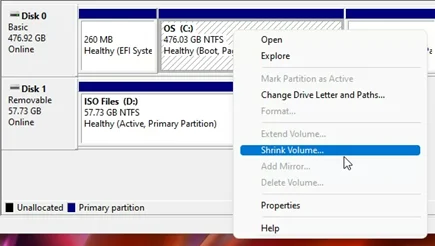
And click on Shrink.
After a few seconds, you will see the 200GB of storage got shrunk from a total of 500GB and shows as unallocated, which means windows 11 cannot read this drive, which is good.


3. Make the USB bootable drive as the primary Boot disk.
With the current setup, your PC would load its operating system from your hard disk by default. We need to tell the machine to start using the newly created bootable USB.
Plugin the USB and reboot the machine.
During the reboot screen, keep pressing f2 to get into the bios.
Note: Each motherboard vendor has different ways to get into the bios, so I am using the Asus machine; hence I need to press f2 to get into the bios. If you are using other vendors, the key would be different.
Make the newly created USB storage drive the boot’s primary drive in the boot selection. Click on Save and exit.

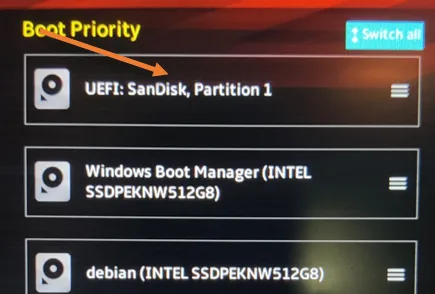
The changes that we just made will ensure to boot the machine from the USB.
4. Proceed with the Linux Mint installation.
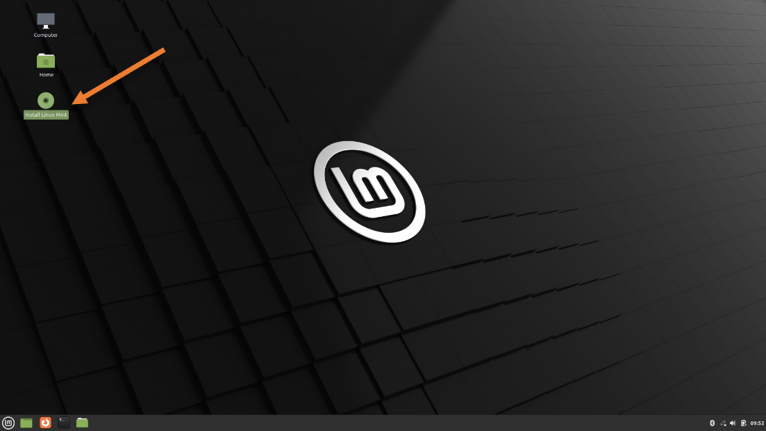
Once the system starts it will take to the Linux mint desktop. This is the live desktop, not the actual Linux mint desktop, because we have not installed the operating system yet. Some users get confused, thinking they have already completed the installation.
You will have to double click on the Install Linux mint CD on the desktop to install the operating system. That would open up the Linux mint installation wizard.

Choose the language of your choice and the keyboard layout.
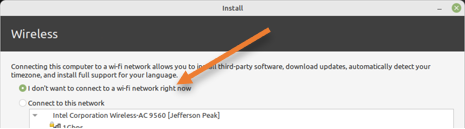
I don’t want to connect to a wifi network in the network connectivity right now. This is to avoid downloading the updates during the installation, which we can do it later and continue.

Check the option that says install multimedia codecs and continue.
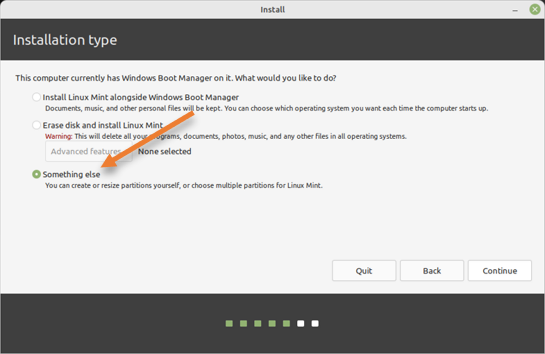
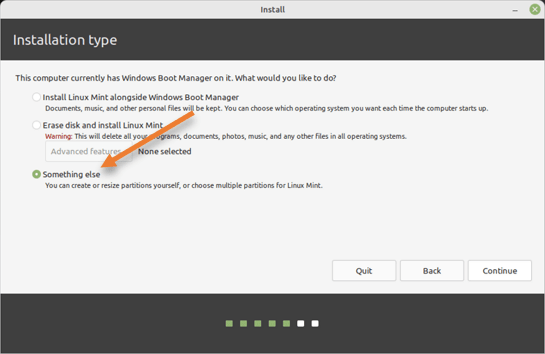
5. Choose the installation type.
When you install the Linux mint while you already have another windows OS, it will detect the windows boot loader and identify that you already have windows; hence by default, it will choose the Install Linux mint alongside the windows boot manager. This is better for the normal user; however, for advanced users to have more control on the hard disk partition, choose Something else.
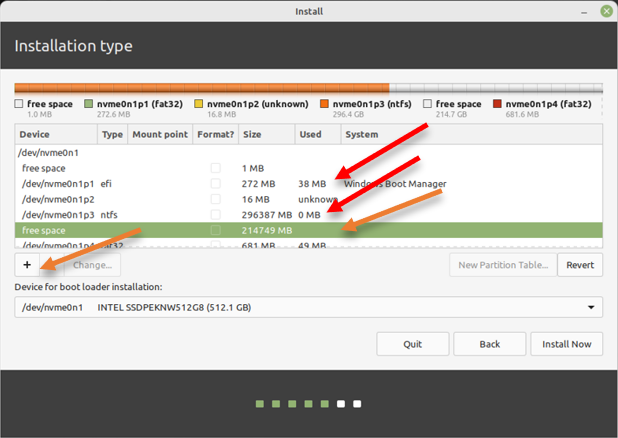
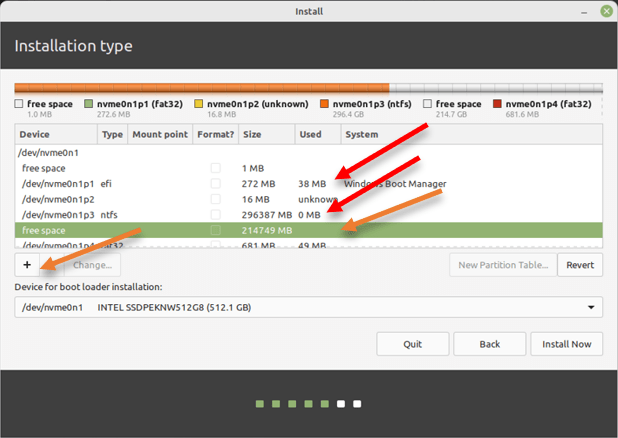
6. Partition the hard disk.
You can see Windows Boot manager and the NTFS storage in the disk partition wizard, do not touch on that.
Instead, we will play with the free space that we allocated in the windows disk manager.
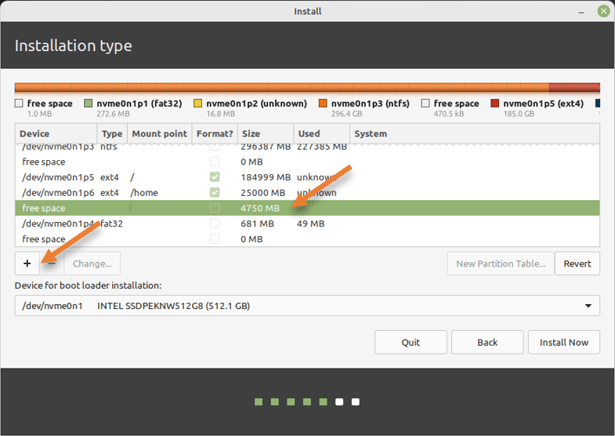
We would give 185GB of storage for the root, 25GB for the home directory, and the rest for swap.
Click on the plus icon on the Freespace.
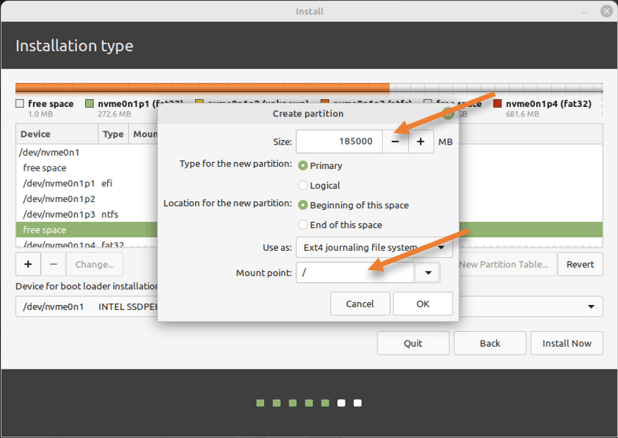
Configure the root partition.
In the create partition pop up
Size: 185000MB
Mount Point / (This will be the root directory.)
And click on okay.

Configure the home partition.
Press plus icon again on the free space.

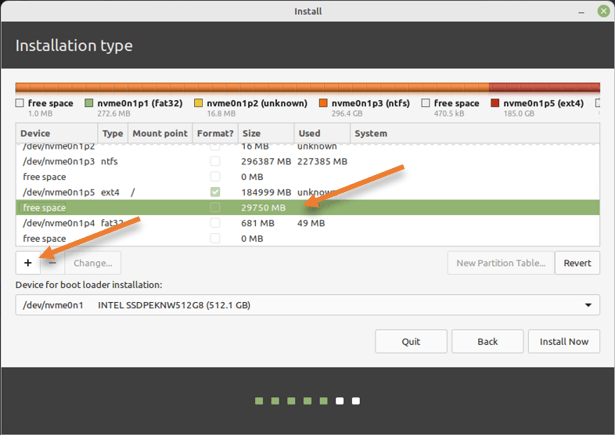
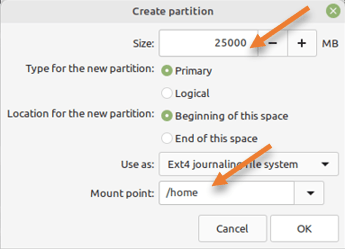
In the create partition pop up,
Size : 25000Mb
Mount point: /home directory.

Configure the swap memory partition
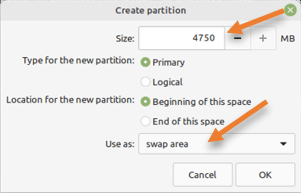
Finally we are left with 4750MB. Click on the plus icon again to add the swap memory.
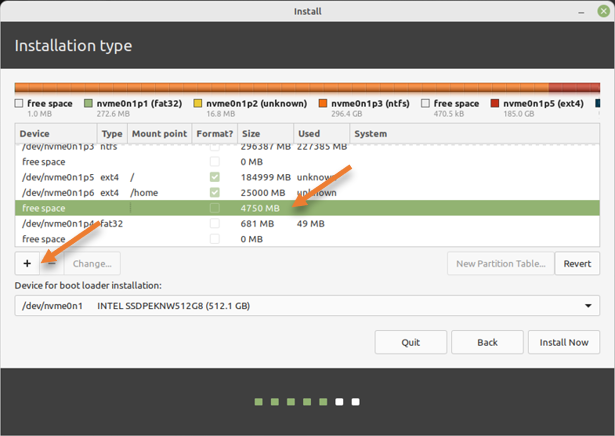
In size, choose the leftover storage for swap, in use as drop down – choose swap area and then click on OK.

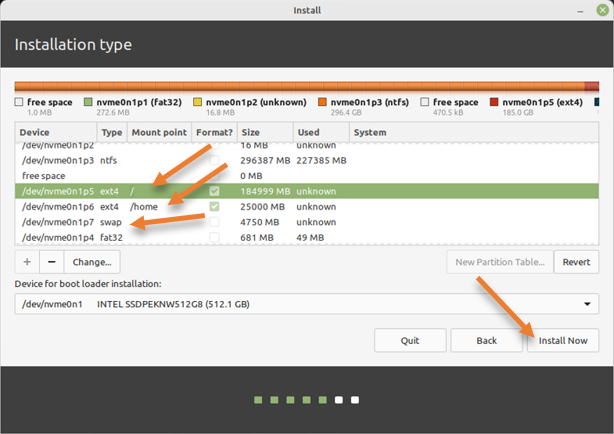
Now, root, Home, and swap partitions are defined, choose the root directory and click on install now.

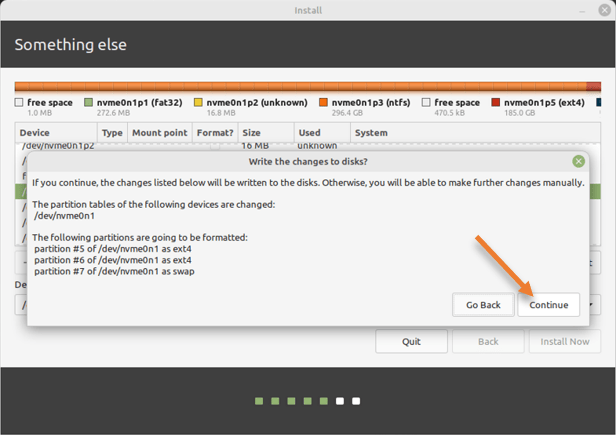
You will get a notification that tells you that the drive is going to be formatted. Click on continue here.

Choose the timezone based on your location.
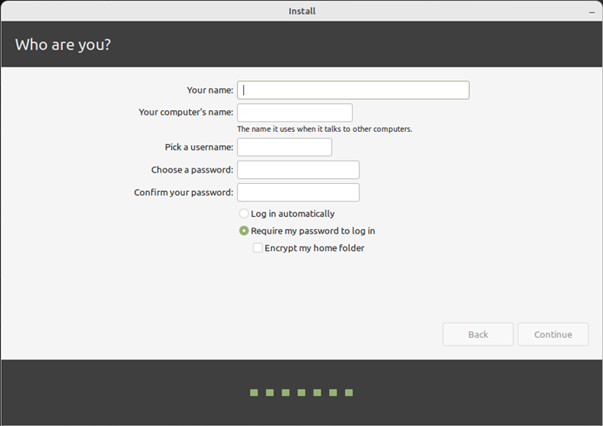
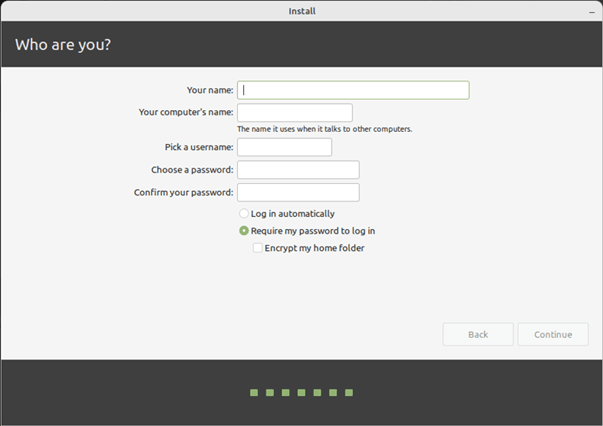
7. Setup the user account.
You have now required to set up a user account for the Linux mint.
Enter your name, computer name, username, and set the password, and continue.
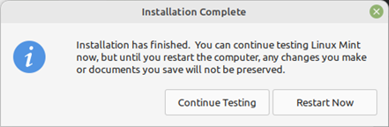
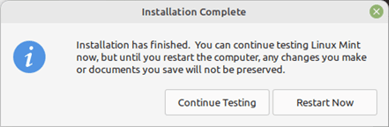
The installation will now begin.
After the installation is complete, you will get a below screen, in that choose Restart now.
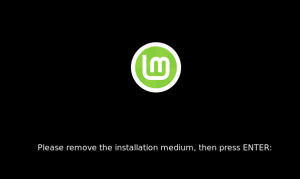
8. Remove the installation media.
You will be asked to remove the installation media, our USB drive, unplug the USB drive, and hit enter.

9. Boot into Linux mint.
The Linux mint boot loader will now load; choose Linux mint from the screen.

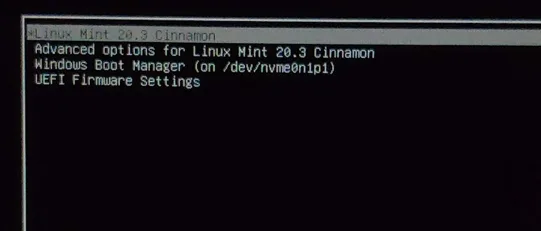
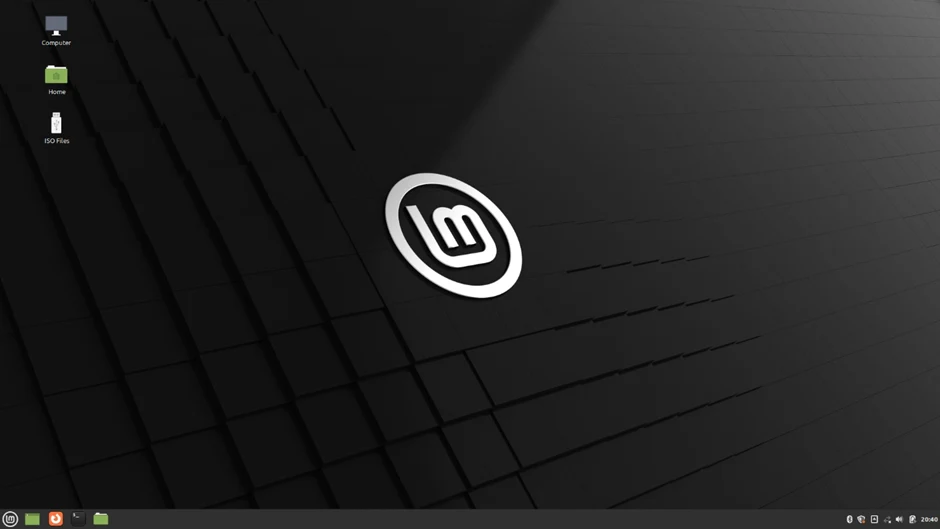
After the selection, your Linux mint desktop will load. That’s it. We have now successfully installed the Linux mint alongside windows. If you would like to switch to windows, you have to reboot Linux mint and in the boot loader selection, choose Windows boot manager to get into the windows.