In the last blog, we have spun up a pfSense firewall in KVM and made it work as a consumer router replacement. Though it worked fine, the performance was not so great. Hence, I decided to build an old spare laptop to work as a pfSense firewall.
And when you convert your old pc to for the pfsense build, you might wonder how the performance would be. Though my system configuration is not so good, I am getting good performance with this setup. Read on to learn more.
Can I build pfsense with 1 NIC?
I got a hp laptop with a Celeron processor and 2 GB of RAM.
The challenging part about this setup is that the laptop has only one single interface with 100Mbps. So can I still install the Pfsense on a single network interface and use both WAN and the LAN?
Yes, we can, and the way we do it is by splitting the network using VLANs on that single interface, which we will do on this blog.
Moreover, my internet bandwidth is 100Mbps, so single nic pfSense performance with this setup won’t be so good. I cannot take full advantage of the 100Mbps bandwidth that my ISP provides. However, I still get about 87Mbps on the speed test, which is pretty neat.
If you are lucky and you got 1Gbps NIC, then that’s the best. you can get the full performance with single NIC that way.
So the performance of the Pfsense firewall on a single NIC will be good. That again depends on your internet speed. Meaning, If your internet speed is around 50Mbps, then the 100Mbps NIC would work just fine, but beyond that, you need 1Gbps NIC, which is pretty common nowadays on a laptop.
Is pfsense compatiple with intel NUC?
The Intel NUC is the small PC form factor from intel. It is just a tiny machine that can place in smaller areas. It has a single 1Gbpse NIC, so you can spin up the pfsense following the guide here without having to worry about the bandwidth issue. It should work great.
As I mentioned above, since the Intel NUC has only a single interface, you have to use VLAN to split the interfaces. Some of you might be wondering I can use the primary NIC for the LAN and USB to ethernet adapter for WAN.
I won’t recommend you to do that. I have done the case study with the USB adapter on pfsense and you may check out the article here to find out how did it go.
The bottom line is if you have any PC that has at least 1GB of ram, decent CPU, and single NIC you can run Pfsense on it.
Prerequisite.
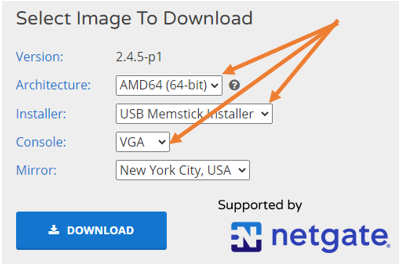
- Download the PfSense firewall image here.
While downloading make sure you select the file as ‘USB Memstick installer’ and the console is VGA.

- Download the Rufus tool here.
Rufus is a program that will help you to create a bootable USB. - A USB drive with a minimum of 2GB storage.
- An old PC – below is the configuration from my laptop. Now you know any old laptop or PC will do the work.😊
- Intel(R) Celeron(R) CPU N2840 @ 2.16GHz
And 2GB of Ram.
- Intel(R) Celeron(R) CPU N2840 @ 2.16GHz
- A layer 2 switch – I am using TPlink layer2 managed switch, and that works just fine.
Any layer2 switch you may have should work, provided it should support 802.1Q trunking.
How to install Pfsense firewall on an old computer step by step?
- Setup the network switch.
- pfSense USB install.
- How to reimage your computer with pfSense?
- Configure pfSense with 1 nic.
- pfSense initial setup wizard.
- How to configure PPPoE on pfSense?
- The speed test results from the firewall.
1. Setup the network switch.
The first step to building a firewall network is to set up the underlay network.
Below is the physical setup that I am using.
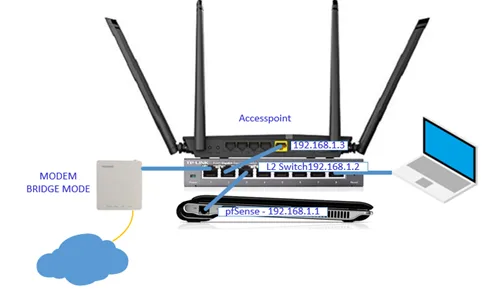
Looking pretty neat huh? below is the actual look 😀
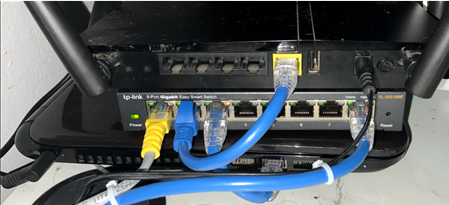
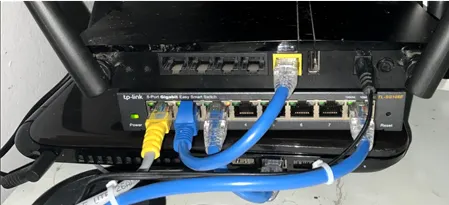
We are going to use the TPlink layer2 switch for this lab, you may use whichever layer2 switch that is available to you.
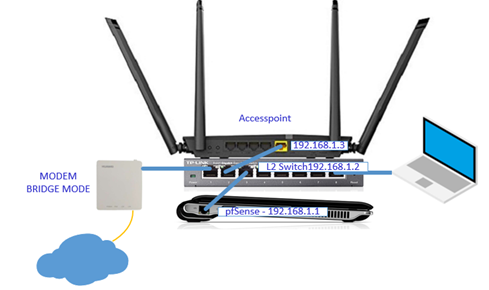
Below is the logical diagram.

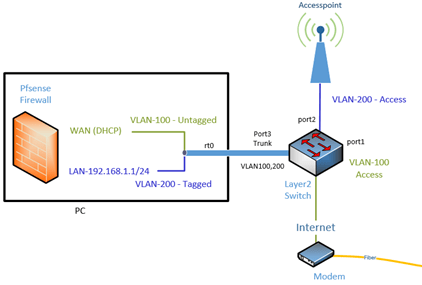
As you can see above,
- the internet is connected via modem using a fiber link.
- The modem connected to the switch on port 1 using the default VLAN 1.
- The second port on the switch connected to the Access point via VLAN 200 as untagged.
- Port 3 is connected to the old laptop as trunk, that carry the default VLAN as untagged and 200 as tagged.
- Finally, all other ports (port 4- 8) are on VLAN 200 as untagged (access ports.) where we can connect the end user machine via wired.
How to configure tp link managed switch?
The TP-link smart switch is a basic layer 2 switch, which can do 802.1Q VLAN trunking, meaning you can configure multiple VLANs and send those VLANs via other devices over a trunk interface. You need to remember that it is just a layer 2 switch and if you require two VLANs to talk to each other, you need a Layer 3 switch, which is a little expensive.
Any layer 2 switches will work with this setup and if you layer3 switch that should be fine however not mandatory.
To configure the switch, first, you need to log in to the default management IP via web browser, that is http://192.168.1.1.
When it prompts for the credentials, you may enter the username as admin, and the password as admin.
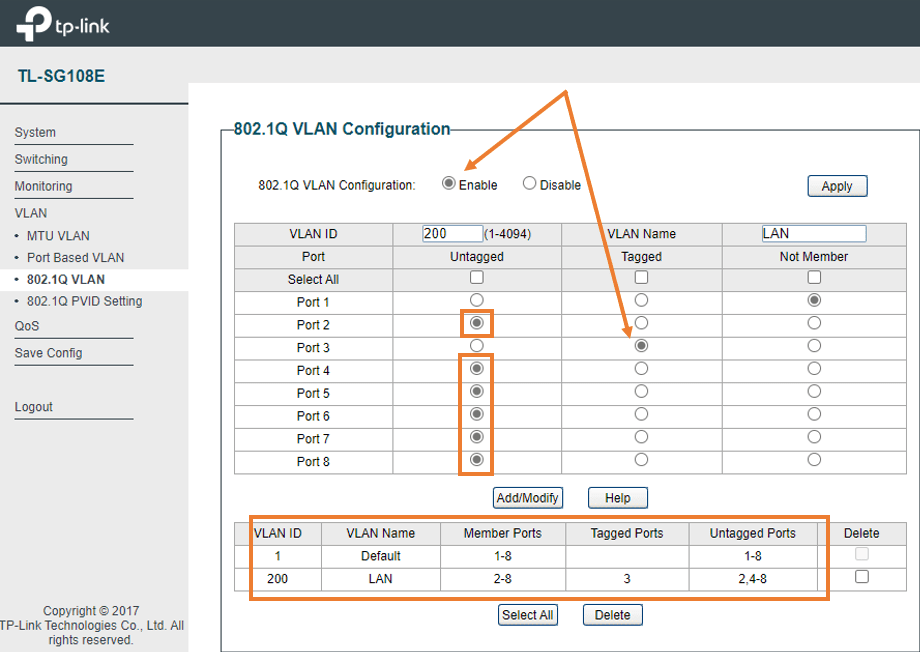
configure the 802.1Q VLAN’s.
- Enable 802.1q VLAN.
- Configure port 2 – port 8 except port3 as untagged vlan 200
- Configure port 3 as tagged to VLAN 200.
- The default VLAN is configured as untagged already for all the port 1-8.

You also need to make changes on the PVID settings, usually in enterprise-level switches you just have to make them untagged (as an access port) but I couldn’t get the LAN side to work just by untagging them.
Hence I changed the PVID information as below.
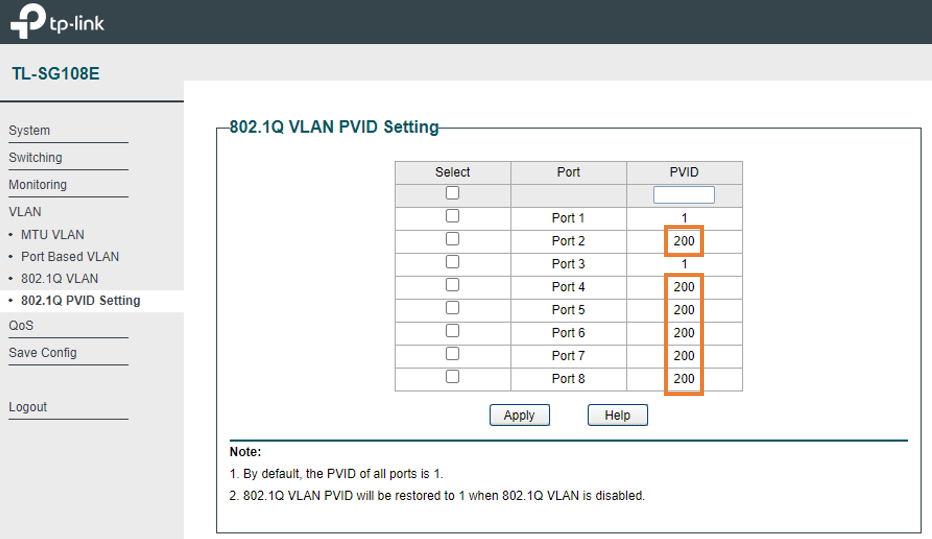

Alright, the configuration of the switch is completed.
2. pfSense USB install.
You can install the pfsense just like any other operating system on your PC, For this step, we are going to create a Bootable pfsense USB and we can reimage the machine with it.
We have downloaded the PfSense image already, follow the steps below to make the pfSense bootable USB with the pfSense image.
Extract the PfSense image file.
The first step is to extract the image that you downloaded using any zip extractor.
Once done, you will have a file called “pfSense-CE-memstick-2.4.5-RELEASE-p1-amd64”
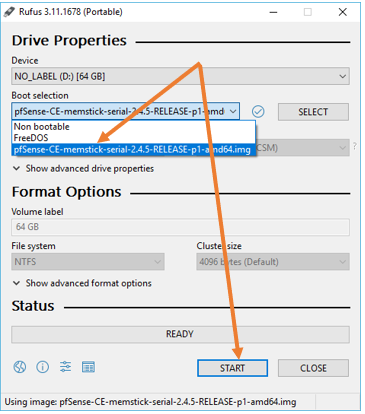
Make the bootable USB.
Attach the USB storage to your machine and open the Rufus Utility.
Under boot select, attach the pfSense image. And click on Start.
You don’t really need to make any other changes here.

When you get a warning, you may click on OK.
Once completed, you may unplug the USB from your laptop. And the USB is ready to boot.
3. Reimage your computer with pfSense.
We got our USB ready with the pfSense image in it, and we are ready to boot the old computer with the pfSense image.
a. Plugin the pfSense bootable USB.
You may now plug in the USB to the old laptop/PC that you are trying to reimage with pfSense
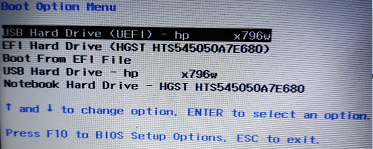
b. Change the boot sequence use USB.
You need to tell your computer to start to boot from the USB from the Bios setting.
Each vendor has different settings, on my hp box, I had to press f9 during the boot and change the settings there.

c. Begin the PfSense installation.
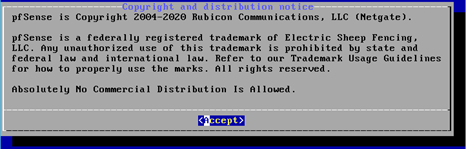
Once the PC is started it would detect the pfSense image from the USB and the installation now will begin.
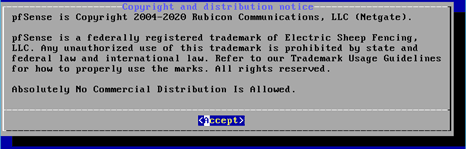
- You may Accept the copyright notice.
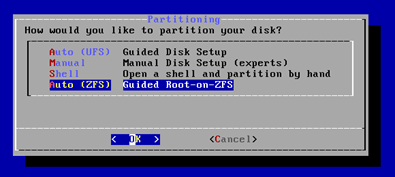
In the Disk partition selector, you may choose the final option which is Auto (ZFS), and click OK.

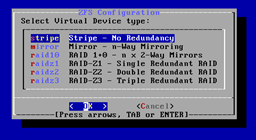
Since I don’t have the storage redundancy hence I chose stripe.

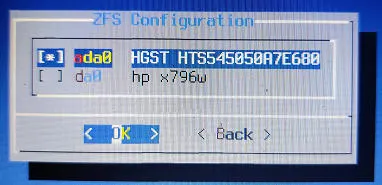
- Choose the installation disk.
Be a little careful here, since I have one hard disk that is ad0 on this machine and another USB drive da0 plugged in for the pfSense installation, you need to choose the hard disk on your computer where you wanted to install the pfSense.
Use the space bar to select it and click on Ok.
Note: In my case, the hard disk selection was fairly easy, however, if you have multiple hard disks then you need to choose the right one.

You will get a warning that this drive is going to be formatted, I am okay with that hence I clicked on Yes.


After a minute the pfSense will be installed on your PC, again the installation would take time-based on your PC performance. Once done you would get a prompt to reboot the pfSense, you can go ahead and reboot.
You are ready to configure the PfSense once it is back.
4. Configure pfsense with single NIC.
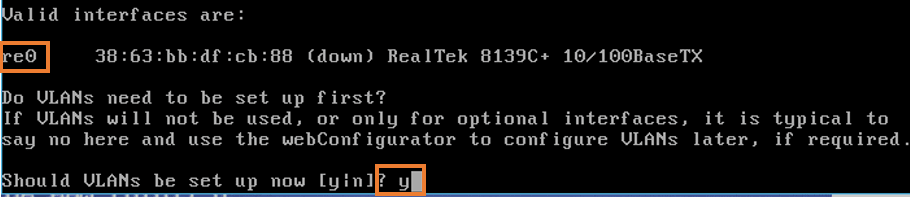
Once installed PfSense will detect all the interfaces that are on the PC, as you can see it detected the valid interfaces re0. And I have only a single interface which we will split into WAN and the LAN using VLAN’s.
it will ask you whether you wanted to create the VLAN or not. Since we need to create VLAN for the LAN network, we need to type y for yes.

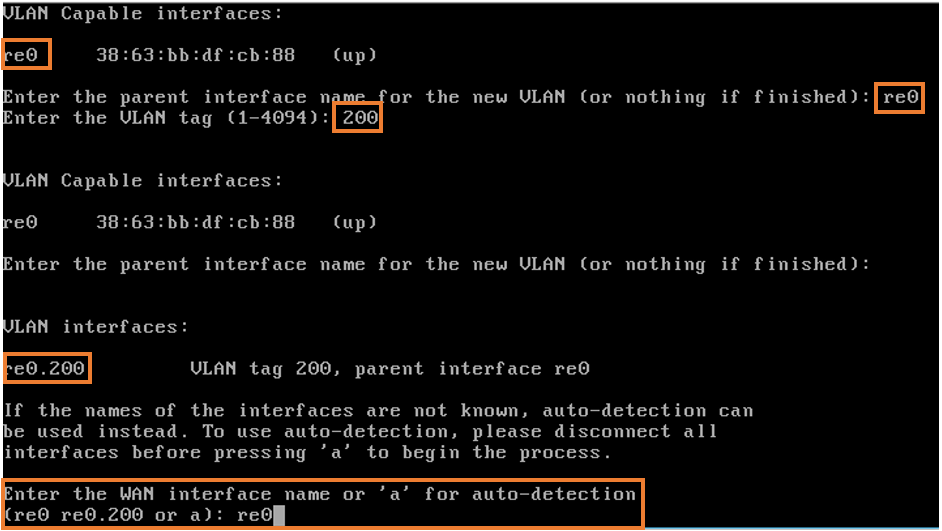
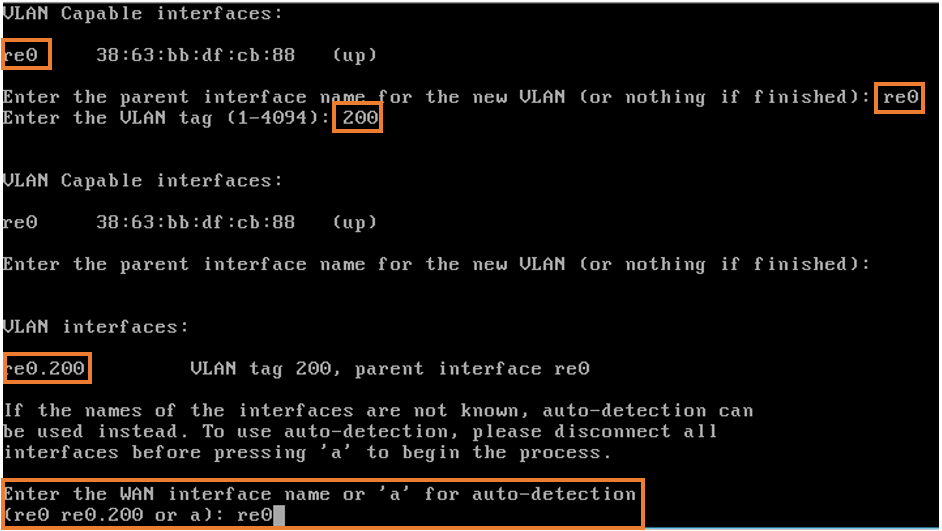
Since our single interface is re0, we need to make the parent interface as the same.
Type re0 as the parent interface.
And for the LAN VLAN, you need to type VLAN 200 as tagged.
As we don’t require another VLAN to be created, we just have to hit enter for the next prompt asking to type the parent interface.
You now should be able to see the interface re0.200 as the VLAN interface which is our LAN interface.
For the WAN selection you may now enter re0 as the interface, as it would act as plain untagged VLAN from the switch.
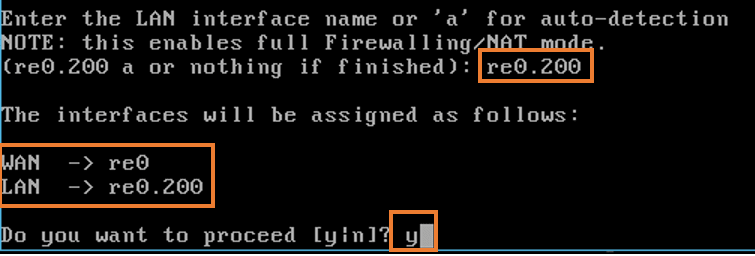
Next it would ask you to select the LAN interface, you may type re0.200 as the LAN interface and hit enter.
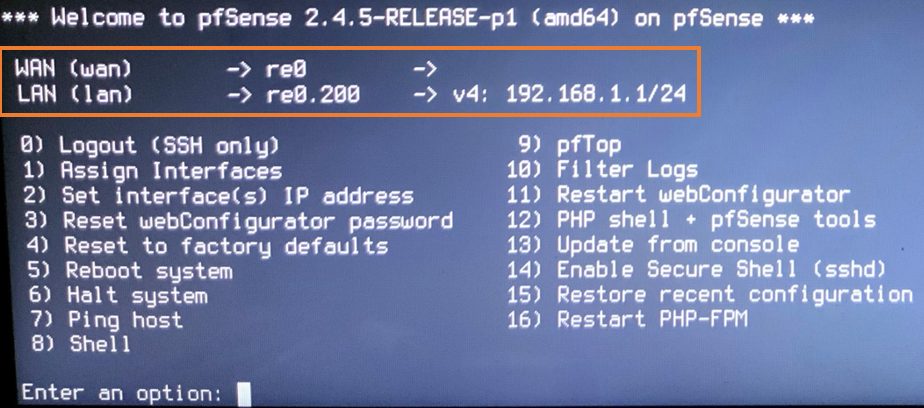
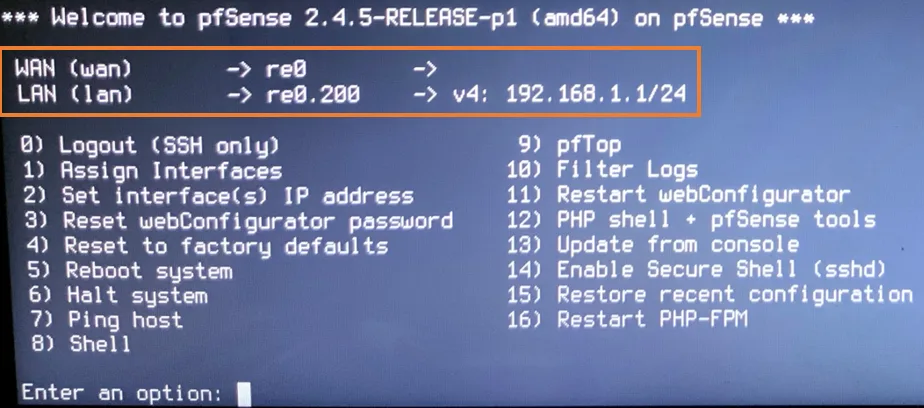
You can see as below, the WAN interface is re0 and the LAN interface is re0.200, you may proceed with the configuration by typing y and hit enter.

After few minutes, you now will be able to see PfSense CLI screen, by this time the PfSense will start acting as DHCP server and all the LAN users should be able to get the IP address from the DHCP server.
5. pfSense initial setup wizard.
As you can see from the above, we don’t have any IP address assigned to the WAN link of the PfSense yet, if in case you are using this behind the NAT with DHCP the WAN would have received the IP address automatically. But we are going to configure to use the Public IP with PPPOE configuration, which will not come up by default, until you make the configuration via the Web GUI.
let’s go ahead and perform the initial configuration via the web GUI.
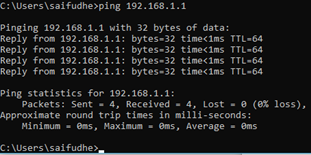
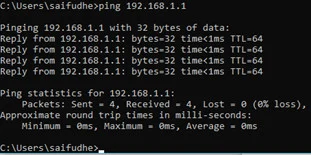
At this moment, if you configured everything successfully, the computer connected to the port8 as well as the wireless users should start receiving IP addresses from the PfSense DHCP server.
As you can see, I am able to ping the LAN side IP address of the PfSense, which is good.
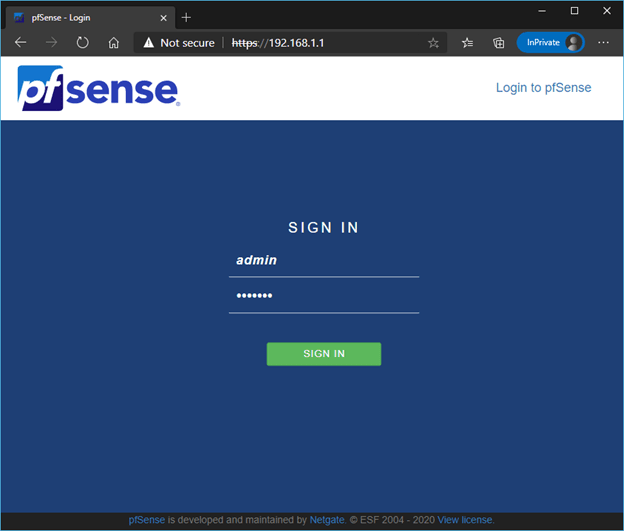
Let’s access the PfSense Web GUI from the laptop by typing https://192.168.1.1 on your address bar.
As you can see, I am able to access the PfSense web GUI from my local machine, you may now enter the default username and password to login to the firewall.
PfSense default credentials.
Username: admin
Password: pfSense

You will be presented with the initial setup wizard, I am choosing the default settings and clicking on next, you may change the configuration depends on your environment.
This is what I am going to do.
- Configure the WAN interface using PPOE.
Note: here we are configuring the internet WAN using PPPoE, so if it is different for you then you might have to configure it differently as per your setup.
- Change the Admin credentials.
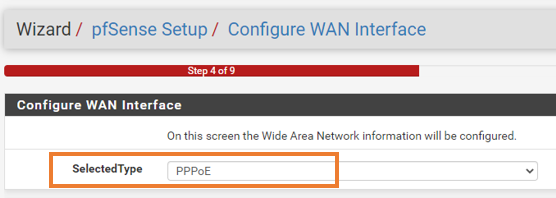
6. How to configure PPPoE on pfSense?
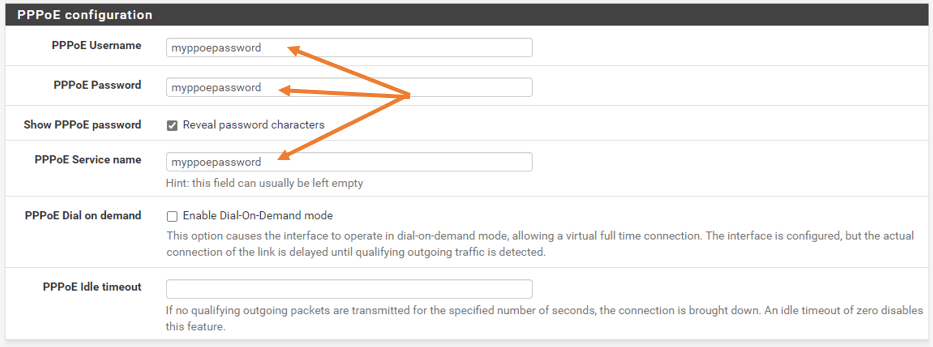
During the initial setup, On step4, you will be asked to configure the WAN side, you may select the type as PPPoE from the drop-down list.
In case if you have already configured the firewall, and you are not at the initial setup wizard then you can go to the dashboard and click WAN and follow the step below or You can also go to interfaces and click on WAN to configure it as well.

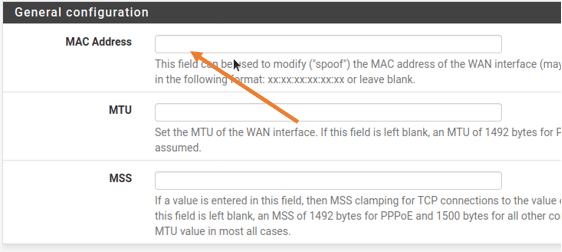
If you have been using this internet connection already with this ISP, the ISP will have the MAC address of your router cached, you may have to call them to reset the MAC address or get the old MAC address from them and fill it under the MAC address column.
If this is a brand-new connection, you may leave this field blank.

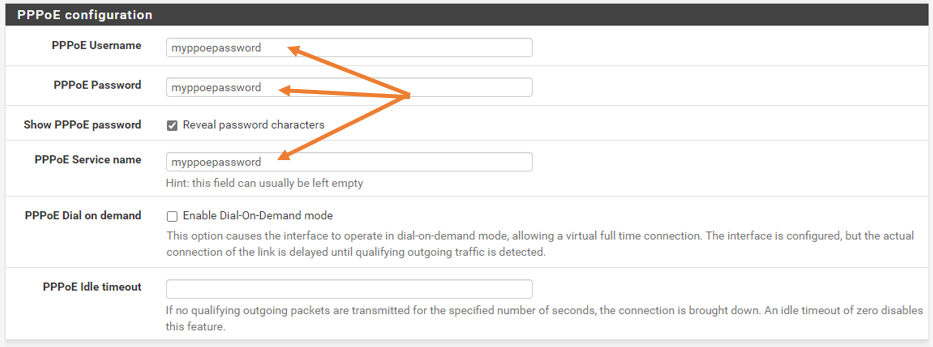
In the username and password field, you may enter the credentials from the ISP.
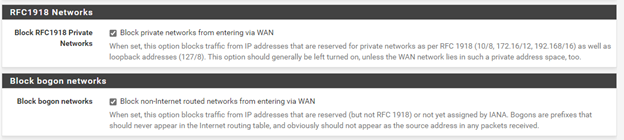
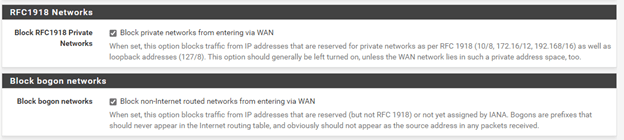
You can block the RFC1918 which the private IP ranges as well as the bogon networks.
Note: If you are using the pfSense behind the NAT and using the private IP ranges for the WAN connectivity you shouldn’t check the option to block the RFC1918 private networks.
That’s it for the WAN connectivity, you can continue to the setup wizard.
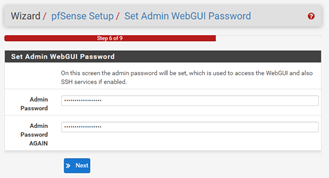
Eventually, PfSense would ask you to enter the password of your choice on Step 6.
You may set them up and click on Next.

After you click on Next, you will be asked to reload the page.
Once done, you will get a page, that says
Congratulations! pfSense is now configured.
Click on Finish on that.
You should be able to see the PPPOE WAN link is down at the moment which is expected.
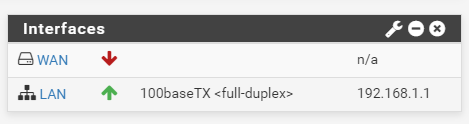
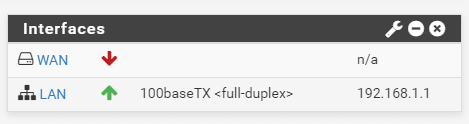
If you notice the LAN interface speed, you can see it is 100Mbps, as I said earlier, that’s because this interface only supports 100Mbps.
You may now go ahead and reboot the firewall by going to CLI and press 5 or Diagnostic tab and click on reboot.
After the PfSense is rebooted, you may go back to the web GUI again.
After a couple of seconds, you should be able to see the WAN interface come up.


If you still see the WAN interface as down the Just give it about a minute or two, and it should come up just fine.
You can further check the system logs, under status and click on PPP to get the logs related to PPP.
Remember one thing, the WAN interface of the PC should be able to reach the modem, and the modem should be configured to use as a bridge mode.
After the WAN connection comes up, the end-user should be able to automatically access the internet as there is a default NAT policy on the firewall. And you don’t really need any rules to access the internet.
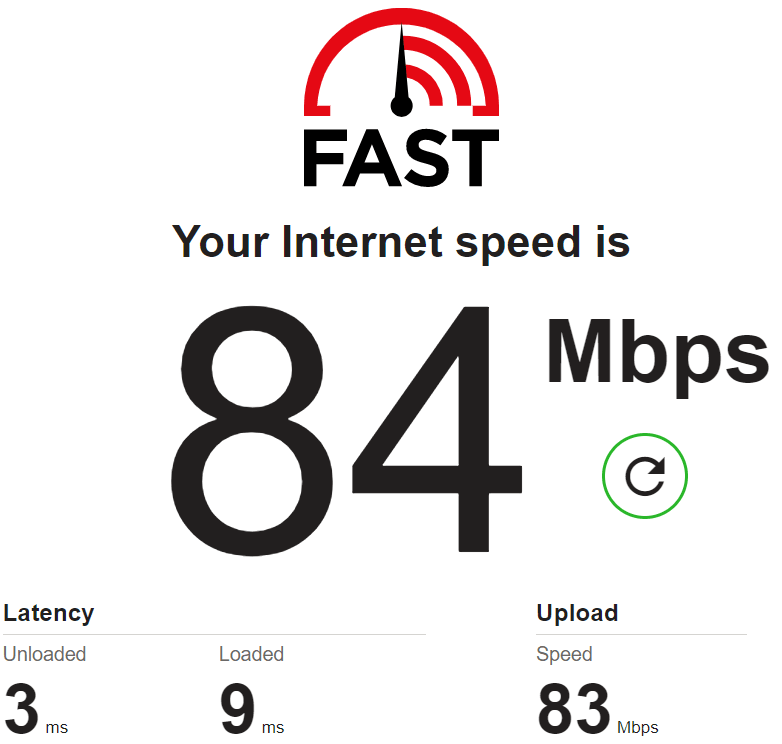
7. The speed test results from the firewall.
Alright, I am now connected to my pfSense firewall LAN side using a wired connection, and as you can see from the output below, I am getting 84Mbps Download and 83Mbps upload on my pfsense machine that has 100Mbps NIC with VLAN enabled.
To get maximum bandwidth from my ISP, I will have to replace my PC with 100Mbps NIC with 1Gbps NIC.