If you are using a MAC or Windows 10 as your operating system and wanted to try out a Linux operating system. And you are wondering what is the best Linux distribution out there that you can start with.
The answer is Ubuntu desktop, it is a very popular Linux distribution that you can try out if you want to be familiar with Linux.
Most of the developers also use Ubuntu Desktop 20.04 for the development work. An alternate option you could also try out is the Linux Mint operating system on VirtualBox as its UI is a bit identical to windows 10.
For some, they wanted to use Ubuntu as the primary operating system but they don’t want to ditch their current operating system if that’s the case if you are using a windows machine then you can do a dual boot. However, the problem with the dual boot is that you cannot use the same operating system at the same time.
You can either use Windows 10 or Ubuntu at the same time.
Instead of switching completely from your primary operating system, be it Windows, Mac, or even Linux. It is recommended that you try out Ubuntu in a virtualized environment.
In this blog, we are going to install Ubuntu Desktop 20.04 on a VirtualBox in Windows.
The steps performed here are the same for all the older versions of Ubuntu machines as well. Even if you are using a MAC or a Linux machine with the VirtualBox installed, the steps mentioned here are the same.
What is VirtualBox?
A VirtualBox is a free and open-source hypervisor that can be installed on any operating system such as Windows, MAC, or even Linux. Though it is open source it is developed under the oracle corporation.
Prerequisite
- You need to download and install the VirtualBox on your operating system.
- Download Ubuntu Desktop 20.04 – You can follow the article here to know how you can download the Ubuntu faster.
Steps to install Ubuntu 20.04 Dekstop on Virtualbox.
- Setup the Ubuntu VM instance.
- Configure the Virtual machine.
- Configure the Hard disk.
- Configure the CPU.
- Configure the Network.
- Attach Ubuntu desktop 20.04 CDROM
- Install the Ubuntu VM.
- Start the installation.
- Minimal or Normal installation.
- Format the virtual Hard disk.
- Setup the Time zone and create the account.
- Restart the Ubuntu Virtual machine to finish the installation.
- Install VirtualBox guest additions in ubuntu command line
1. Setup the Ubuntu VM instance.
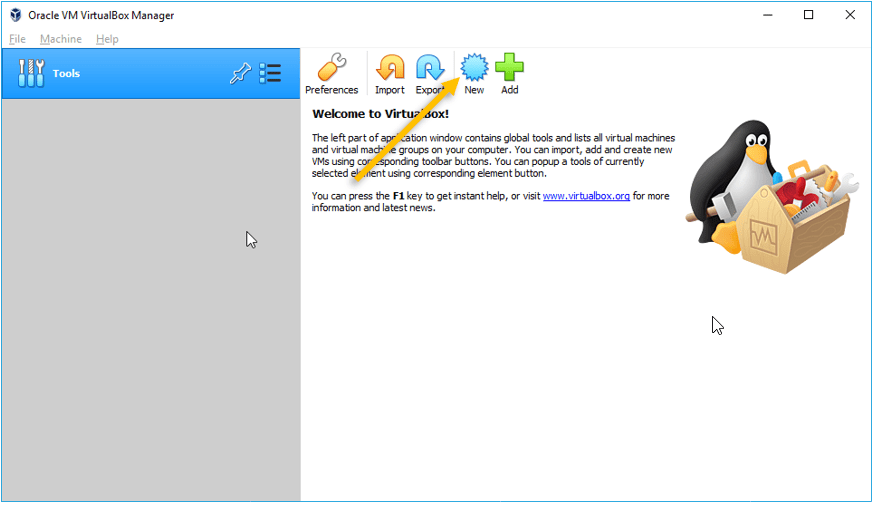
Open VirtualBox Manager and click on the New icon to create the new virtual machine.
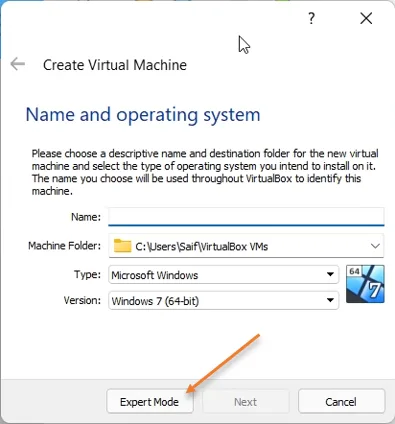
Choose the expert mode.
On the next screen, you can name the VM also the location where you wanted to save the VM. However this is a guided mode, I would recommend you go ahead and click on Expert mode to have full control of the VM configurations.
2. Configure the Virtual machine.
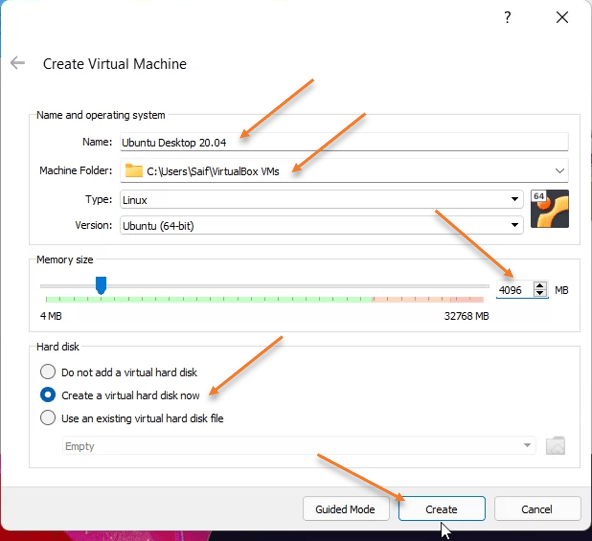
- Name the Virtual machine – Here I am naming it as Ubuntu Desktop 20.04.
- Location where you want to store the VM files.
- As you can see, as soon as I typed the Virtual machine name as Ubuntu, it picked up the Type as Linux and the version as Ubuntu (64Bit)
- Configure the Memory.- It is recomended to have atleast 4GB of RAM for your Ubuntu desktop virtual machine hence, configure that.
If your system doesnt have much resources, you could assing lessor memroy configuration, for example 2GB or even 1GB, It again depends on your requirement. - Check the option that says Create a virtual hard disk now and click on Creat.
Must read:
How to transfer files from windows to Ubuntu
How To Change Static IP In Ubuntu GUI and CLI ?
Enable SSH and Basic Network tools in Ubuntu.
3. Configure the Hard disk.
We are now going to configure the storage for this VM, in the storage configuration follow the below.
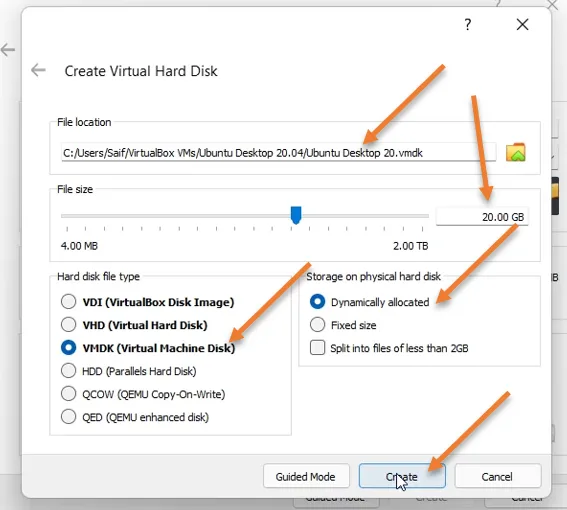
- Location of the virtual machine – I am choosing the default location, in case if you have another hard drive and wanted to spin up your VM from ther you can click on the folder icon on the right and browse for the location where you want to save your virtual machine virtual hard disk.
- Configure the size of the virtual hard disk – I am choosing 20GB of storage, which is enough for me at this point of time. If your require more size for your hard disk, you might increase or decrease the storage depends on your need.
- Hard Disk file type – by default virtualbox would pickup the virtual hard disk type as VDI, which is good in most of the cases, however if you are planning to move/copy this virtual machine to another hypervisor, such as VMware worksation. Then VMDK will be your hard disk file type.
- Storage on Physical hard disk.- Choose Dynamically allocated and then click on Create.
4. Configure the CPU.
When we created the virtual machine, we did not configure the CPU, network and attached the ISO image, lets go ahead and do that now. Right-click on the Ubuntu virtual machine and click on settings.
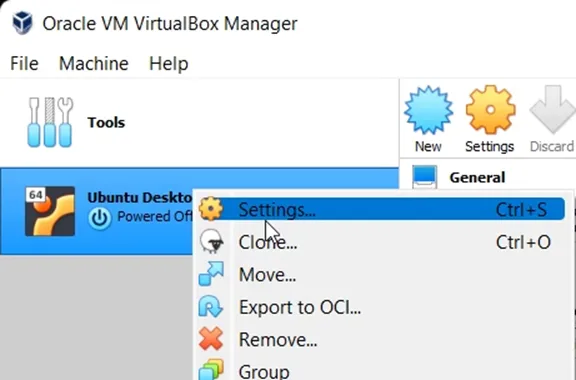
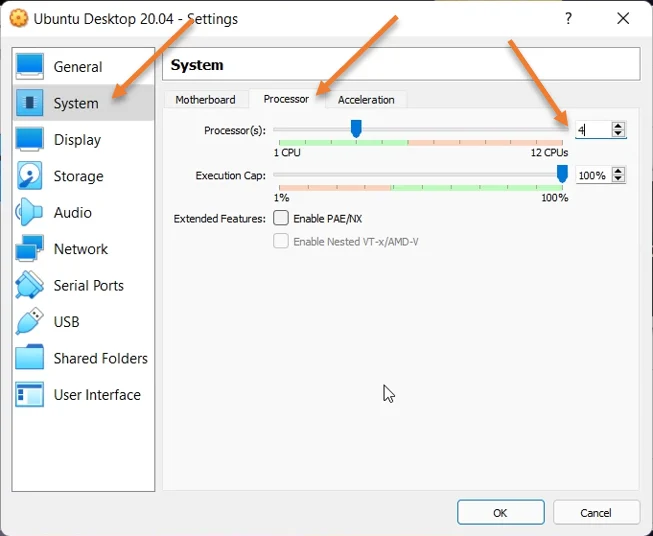
I am going to configure 4 CPU for my VM, To configure the CPU.
- Click on System.
- Click on Processor tab.
- Change the Processor from 1 to 4 – This again depends on your requirement, you could even run the virtual machine with a single CPU, however the performance will be slower.
5. Configure the Network.
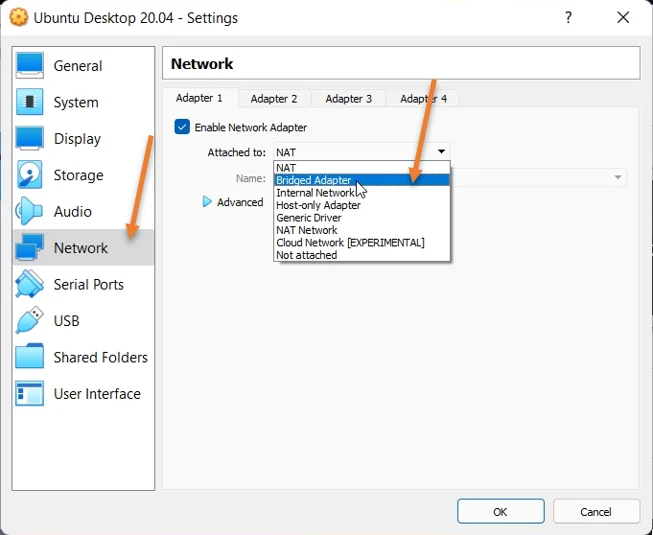
After the CPU configuration, click on the network option on the left side.
You could configure different network types here, by default VirtualBox would pickup a NAT network, but with that your LAN hosts wont be able to communicate with your virtual machine. so I am going to choose bridge network here.
Follow the article here to learn more about how you can configure the different network types in the virtual box hypervisor.
6. Attach the Ubuntu Desktop 20.04 ISO image as CDROM.
We need to attach the Ubuntu desktop 20.04 iso image to the VirtualBox in order to proceed with the installation.
- In the settings window, click on Storage.
- Under storage devices, choose Empty Disk.
- Choose the CD drive from the right and attach the Ubuntu desktop ISO image that we have downloaded in the begginging.

7. Install the Ubuntu VM.
We just configured the Ubuntu Desktop VM properties, which include its memory storage and other parameters. Now let’s go ahead and install the Ubuntu Desktop in Virtualbox by following the below steps.
The Ubuntu VM is powered off by default in VirtualBox. You can start the VM to proceed with the installation.
Virtualbox installation wizard takes you right to the Ubuntu installation screen after a few seconds.
8. Start the installation.
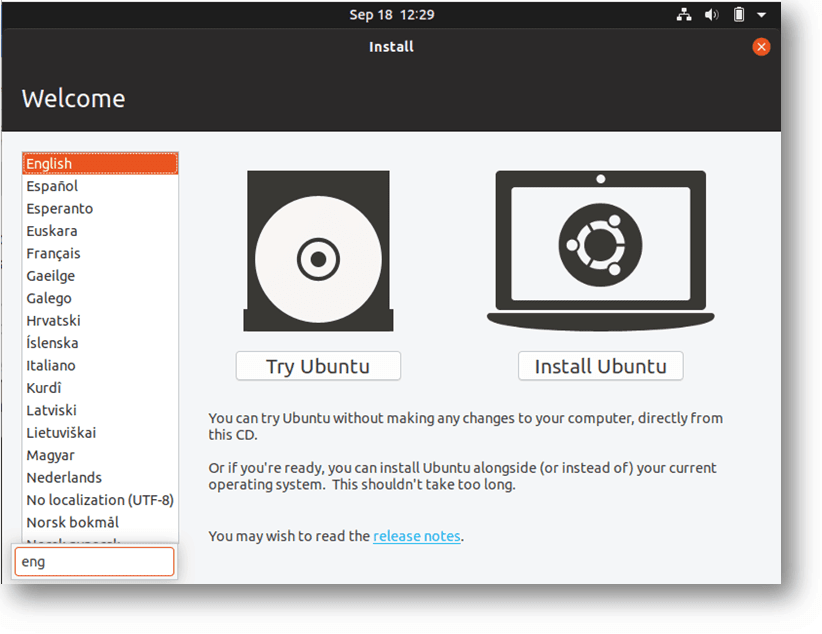
On the installation screen, you will get a prompt to Try or install Ubuntu.
When you click on Try Ubuntu, it would show you the live environment of Ubuntu. And you can experience the Ubuntu desktop, However, we are going to install the Ubuntu Desktop on the VirtualBox, hence click on the Install Ubuntu.
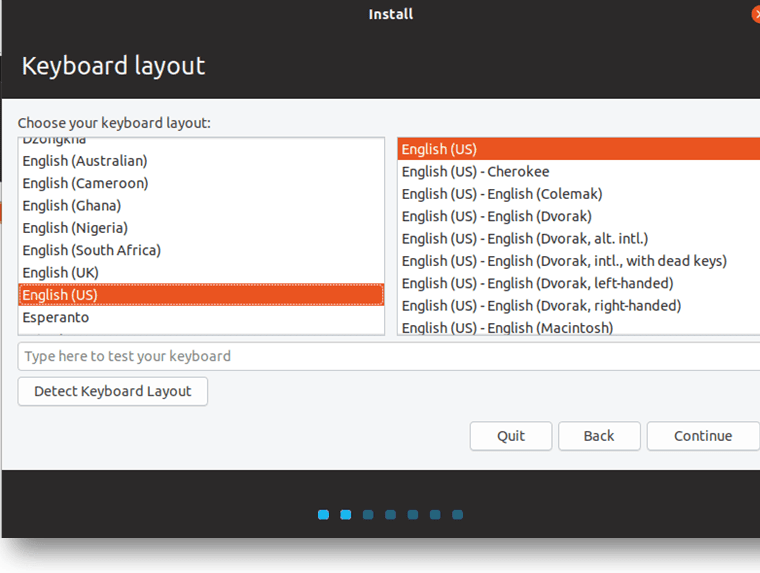
You will have to choose the keyboard layout for your machine.
I choose the default, you may choose the layout depending on your language and click on Continue.
9. Minimal or Normal installation.
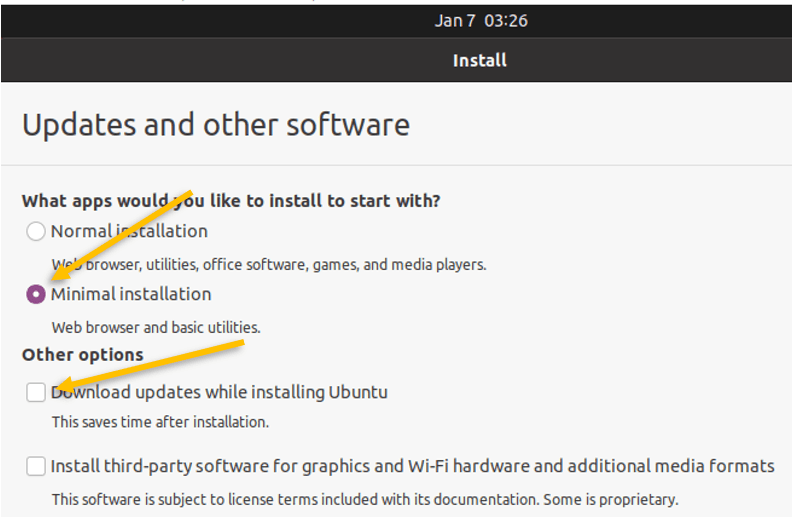
You need to decide here how you wanted to use the Ubuntu OS, if you are planning to use it as a full-blown desktop then you need to choose Normal installation, so it would install the required software that you needed.
I am choosing the minimal installation as I am going to use mainly the web browser and the Ubuntu terminal.
You also need to make sure that you unchecked the option that says Download updates while installing Ubuntu.
If you check this option the installation will take time as it requires downloading the software during the installation. If you are okay with that then you may check the option.
10. Format the virtual Hard disk.
On this screen, you would get multiple options.
For a normal user, it is better to stick with the Erase disk and install Ubuntu, click on Install now.
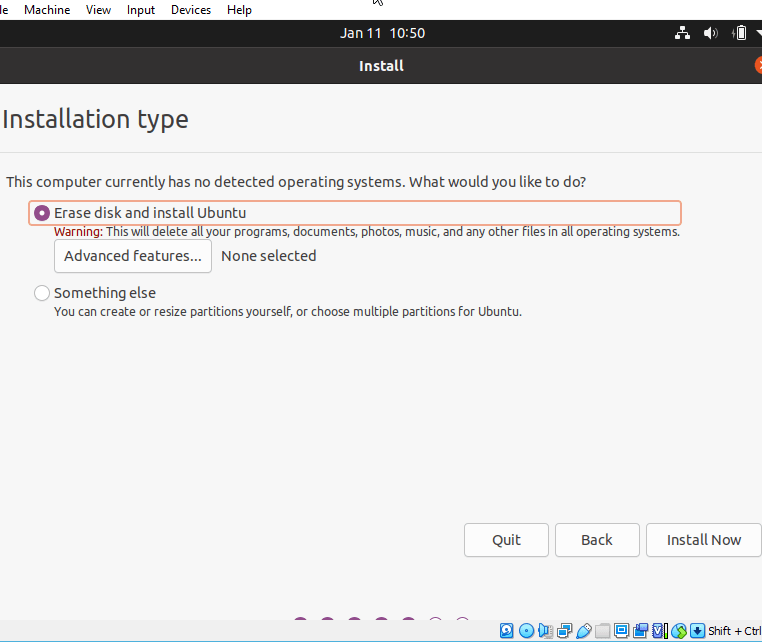
when you click on Next here you will get a warning that says you are going to format the drive, click continue.

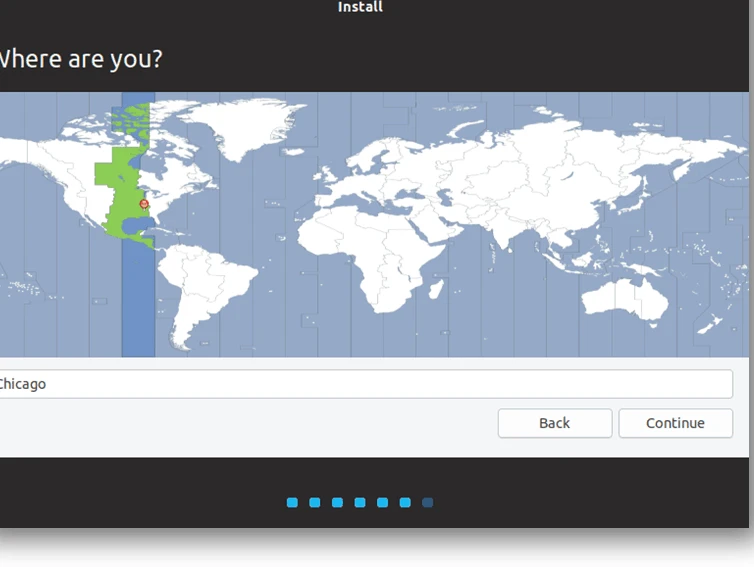
11. Setup the Time zone and create the account.
Choose your time zone based on your location and click on next.
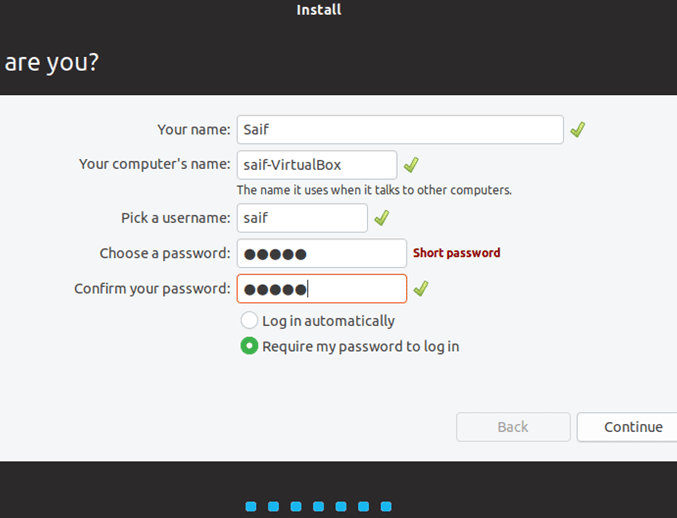
We are now going to configure the account that you are going to use with the Ubuntu desktop.
Specify your login credentials and click on continue, make sure you remember these credentials.
The installation has now started, just give some time for the installation to finish.
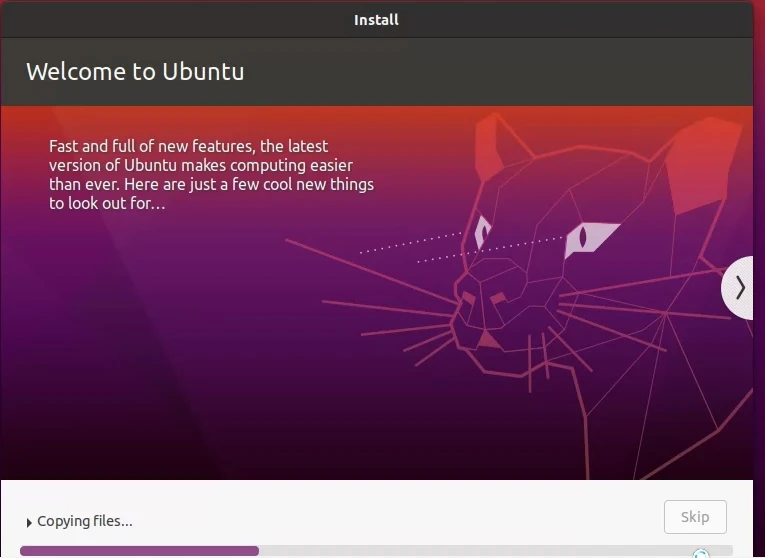
12. Restart the Ubuntu Virtual machine to finish the installation.
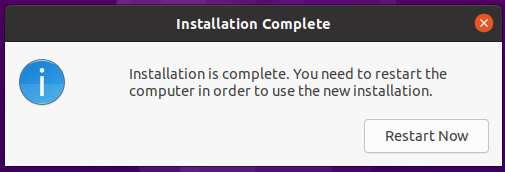
Once the Ubuntu installation is complete, you would get the below pop-up, which says installation complete. You may click on restart now.
During the restart, you would also get a prompt to remove the installation medium, by default it will be auto removed you can clock on Enter here.

Once the Ubuntu machine is back online, You can log in to the Desktop using the credentials that you had set up earlier.
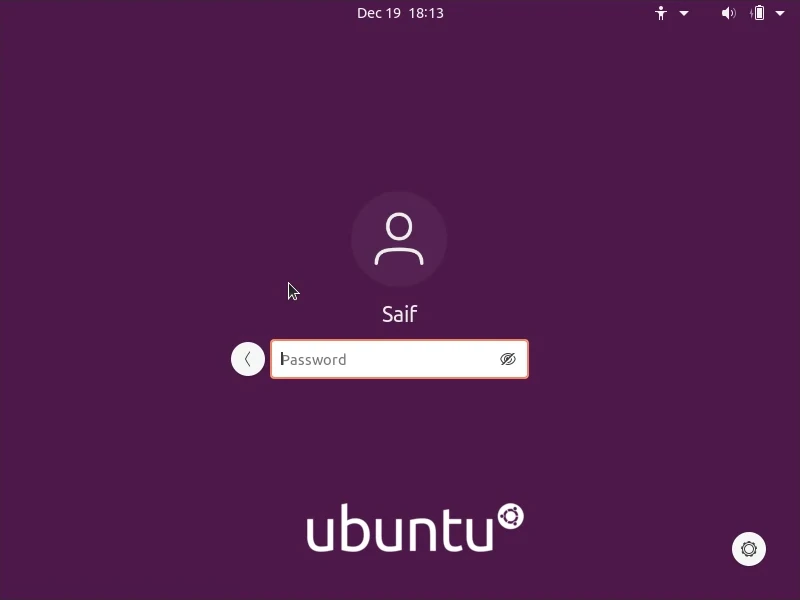
That’s it. Now you are ready to go. You now have Ubuntu VM installed on Virtualbox.
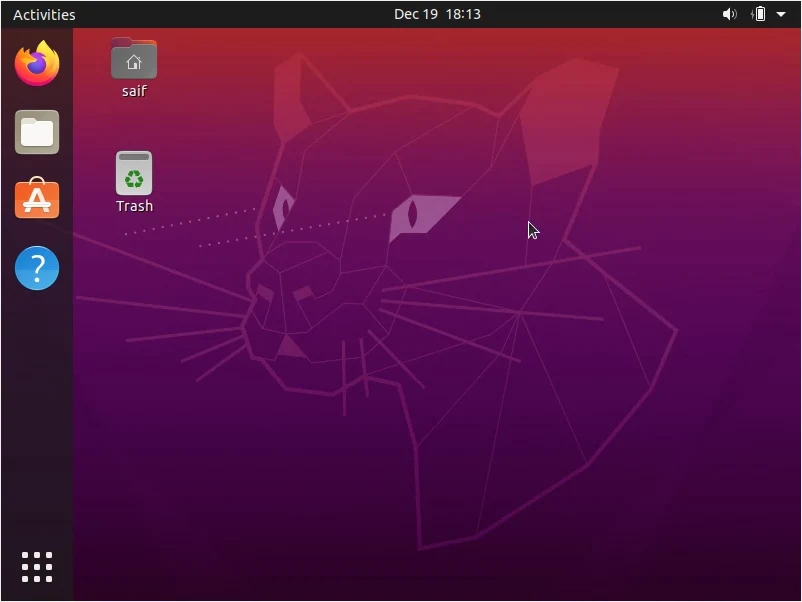
Here is what the new 20.04 Ubuntu desktop looks like. But we have to one more thing, which is the installation of VirtualBox guest additions.
13. Install VirtualBox guest additions for Ubuntu Desktop 20.04.
To get a good performance from Ubuntu using VirtualBox, you need to install the VirtualBox guest additions.
On the VirtualBox menu bar click on Devices, and click on Insert Guest Additions CD image.
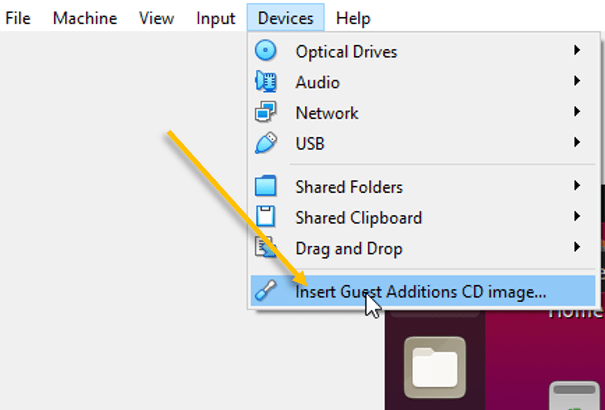
As soon as you click on that A CD drive will be attached to the Ubuntu and you would get a prompt to install the VirtualBox guest additions in Ubuntu, you may click on Run here.

You need to authenticate in order to install the software, enter your account password, and click on authenticate.
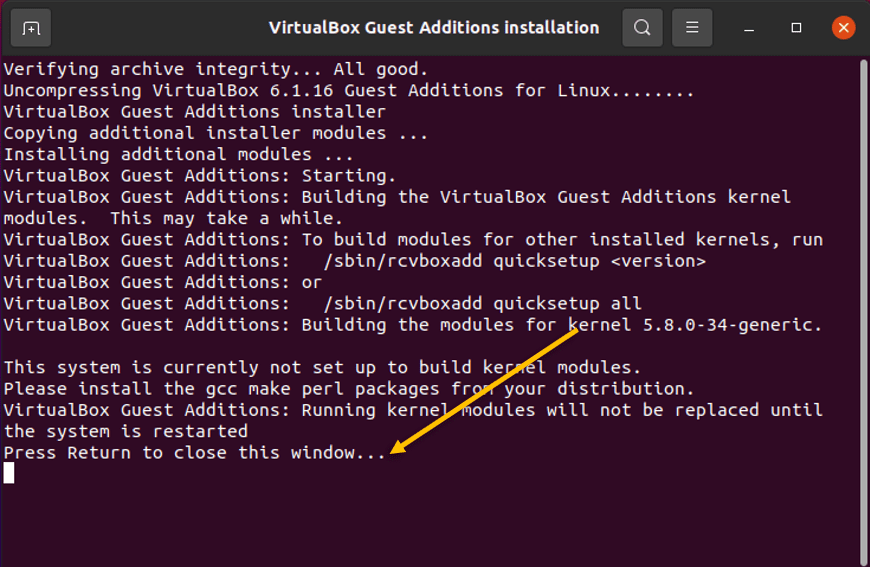
The installation will start on the terminal, after it is completed you will get an option that says Press return to close this window.
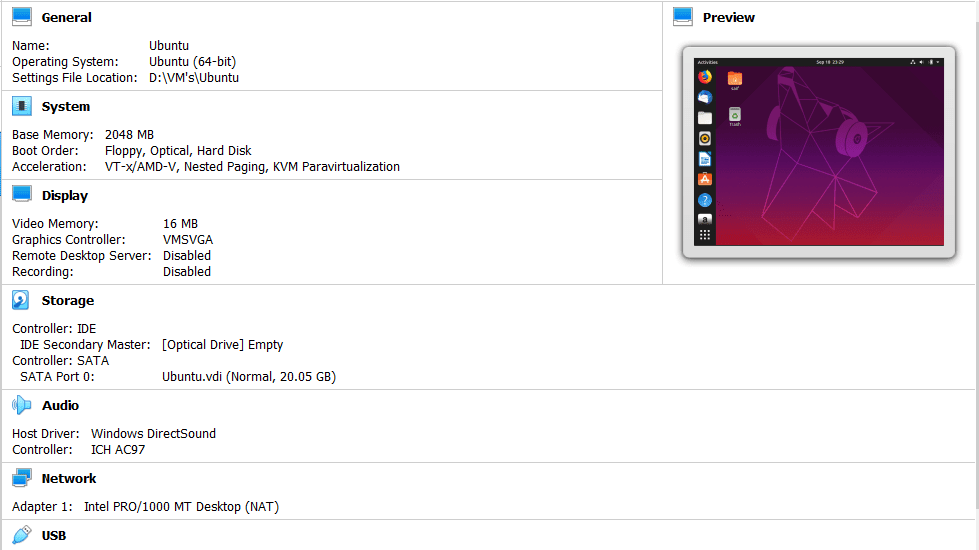
Note: Virtualbox is great to test your VM’s in your physical box, However, if you would like to go more advanced or integrate with GNS3 I would recommend you to use VMWare workstation pro, you can follow the steps here on how to install ubuntu on VMware workstation pro.
Dav
Thursday 30th of November 2023
Thank you! How to activate port 25 to be able to send smtp emails from ubuntu server using virtual box (virtual box installed on my personal computer)