

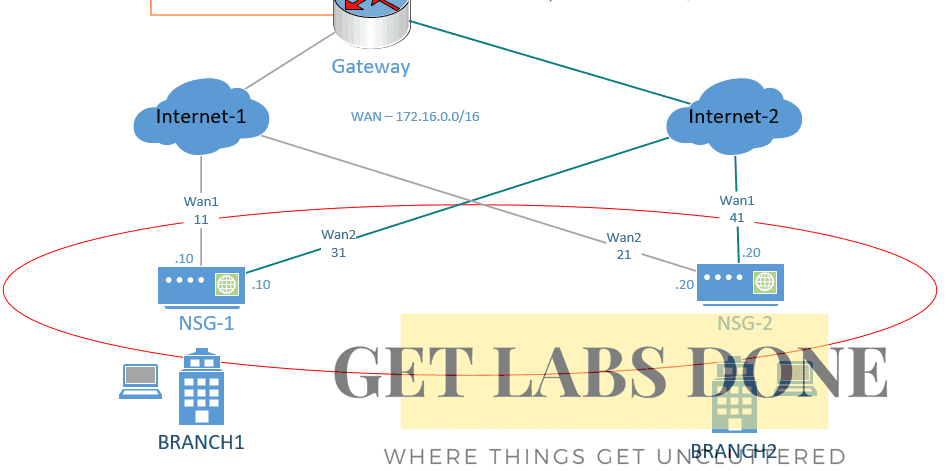
Even though we have virtual Nuage NSG, let’s think for a second that we have got a brand new NSG’s at our branch locations and we are going to deploy them as Branch 1 and two like below. 🙂

- Creation of NSG in an Enterprise.
- NSG bootstrapping using auto bootstrap.
- Nuage NSG installation and bootstrapping
- Second NSG bootstrapping
1.Creation of NSG in an Enterprise.
The first step for the NSG bootstrapping is to create an NSG in the enterprise.
Step1. You could go back to the enterprise that we had created earlier and click on infrastructure and click the plus icon to create the Nuage Network Services Gateway.
- Both the NSG profile and the access profile are imported via the template we have selected.
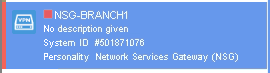
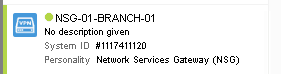
The NSG would look like below with red dot indicate not bootstrapped yet.

Step2. Configure the underlay network for wan.
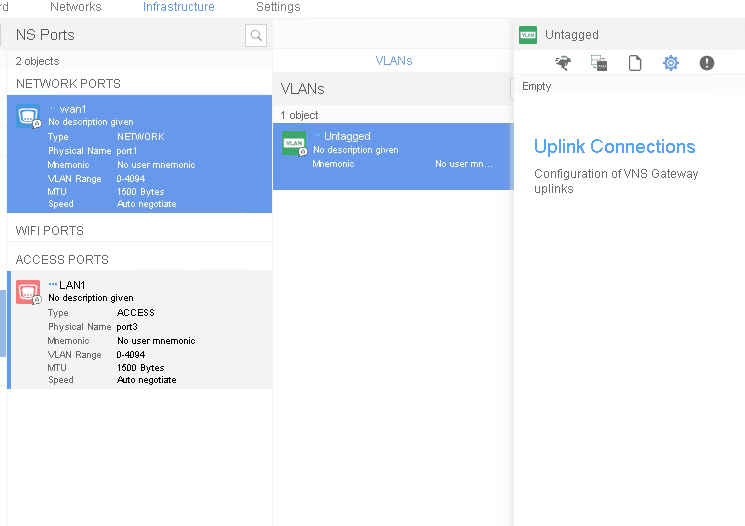
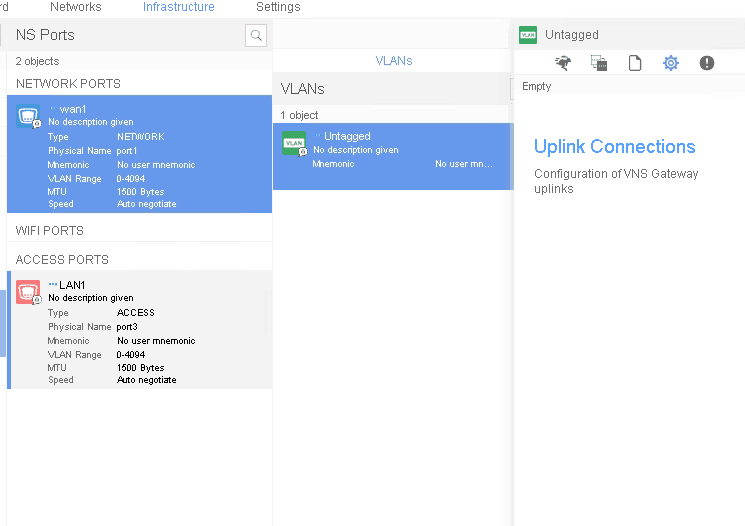
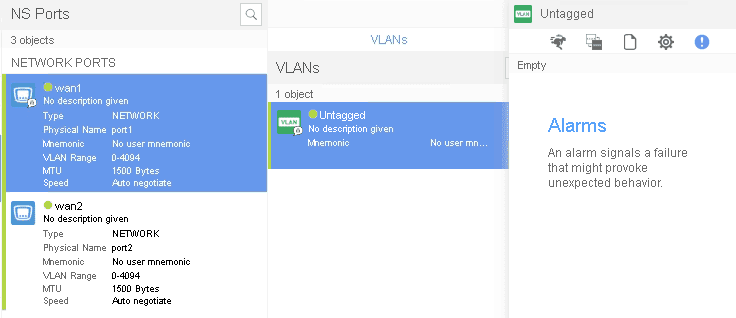
As you can see below there are two WAN interfaces for the NSG, but we have created only one for now, After the bootstrapping is done we can add the secondary wan link.

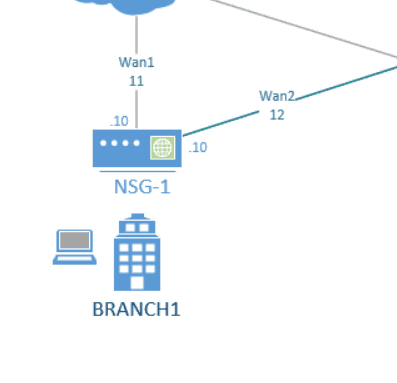
- Click on WAN1 and Vlan, and in then click on the uplink Connection.
Note: The VLAN shows untagged because I have created as VLAN 0
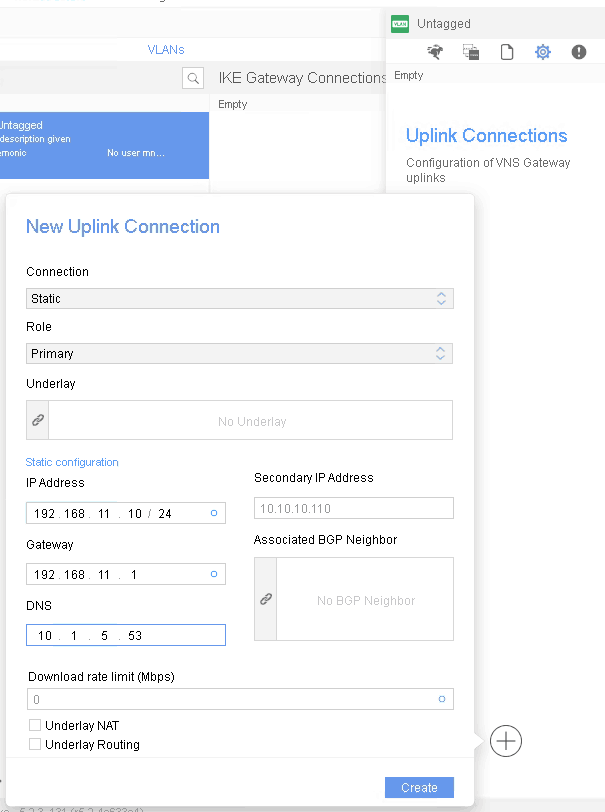
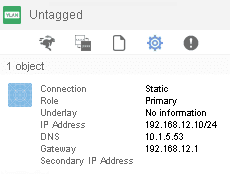
- click on the gear icon to manually or dynamically configure the IP address and DNS.
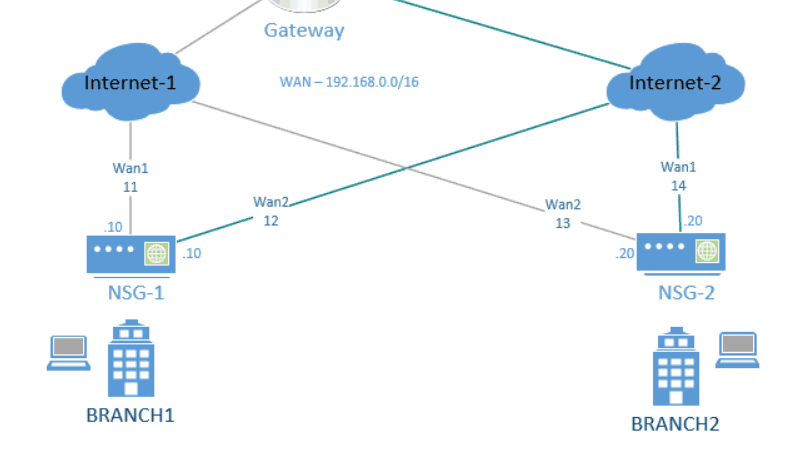
- For the wan link one I have to give the IP address 192.168.11.10/24 as per the diagram and the DNS server IP and click on Create

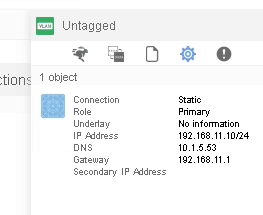
You will have interface configured like below.

a. Different methods of bootstrapping Nuage NSG.
There are multiple ways you could bootstrap the NSG, and NSG supports zero-touch provisioning.
- You could send an email to the installer and activate the NSG.
- You could use the two-factor option by sending SMS
- and the final one is auto bootstrapping.
Since this lab doesn’t have SMTP configured for email delivery I preferred the last option which is auto bootstrapping.
i. What is Auto-bootstrapping
In the real world scenario, Auto-bootstrapping is the method where you download the bootstrap file and save it in a USB drive and ship to the installer, meaning the person on the site.
The installer then plugs in the USB drive and start the NSG, and NSG would contact the nuage proxy server and bootstrap automatically without installer not having to connect the laptop or desktop on the LAN port of the NSG.
2. NSG bootstrapping using auto bootstrap.
There are multiple nuage NSG (Network Service Gateway) models.
There are physical ones, for Eg: NSG 7850, NSG 200, etc.
And there is also a virtualized flavor known as NSG-v.
We will be using NSG-v in this lab.
Step1. To Auto-bootstrap the NSG’s right clicks on the NSG profile and download the bootstrap file.

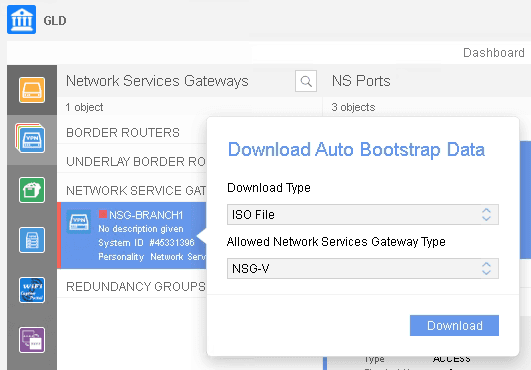
Step2. Once you downloaded the bootstrap file, then extract the ISO file to the server, where you have NSG installed.
Since the NSG that we are going to use is not a physical one and we cannot directly plug the USB to the device, we would have to attach it as a disk file virtually.
Note : If the NSG is physical then you would have to transfer the bootstrap file to the USB drive and plug in the USB drive to the NSG to initiate the gateway activation.
Now you need to boot NSG with the auto bootstrap file.
This auto bootstrap file contains static IP details, nuage proxy server URL and DNS details, that we had defined under the VSD Architect.
As soon as the bootstrap initiated, the first Nuage NSG would change the attributes of the NSG-v, such as IP address on the port and DNS addresses. Etc.
After that’s done NSG will resolve the proxy URL by contacting the DNS and will start the NSG bootstrap process.
3. Nuage NSG installation and bootstrapping.
Step1. Open Virtualisation manager by typing the below command in terminal.
virt-manager
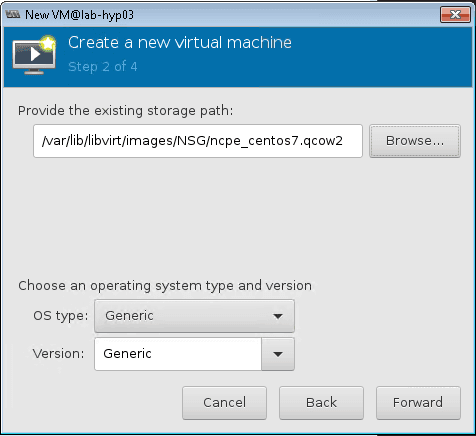
Step2. Click on new and add the nuage NSG qcow2 image, that we had moved before and click forward.

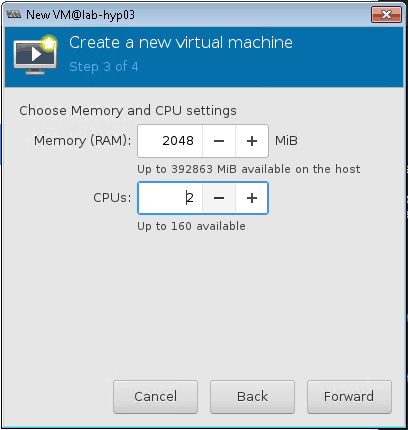
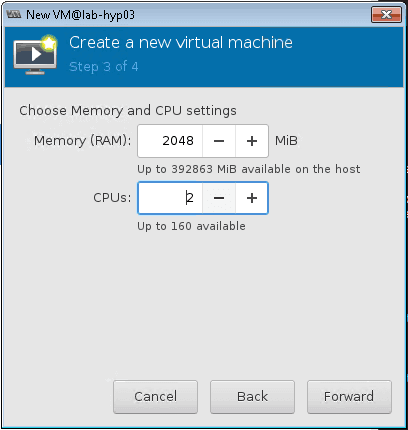
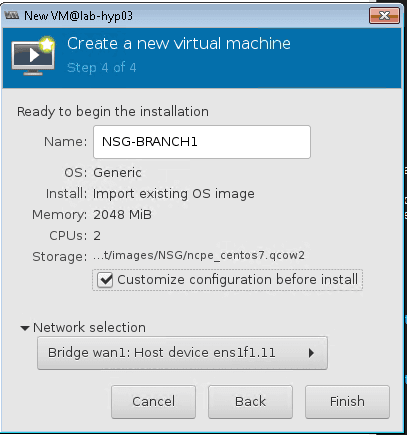
Step3. Provide 2GB of memory and 2 Cpu’s and click forward.
Step4. Name the NSG select the interface wan1 that we had created earlier and check the option which says ‘Customize configuration before install’ click finish.

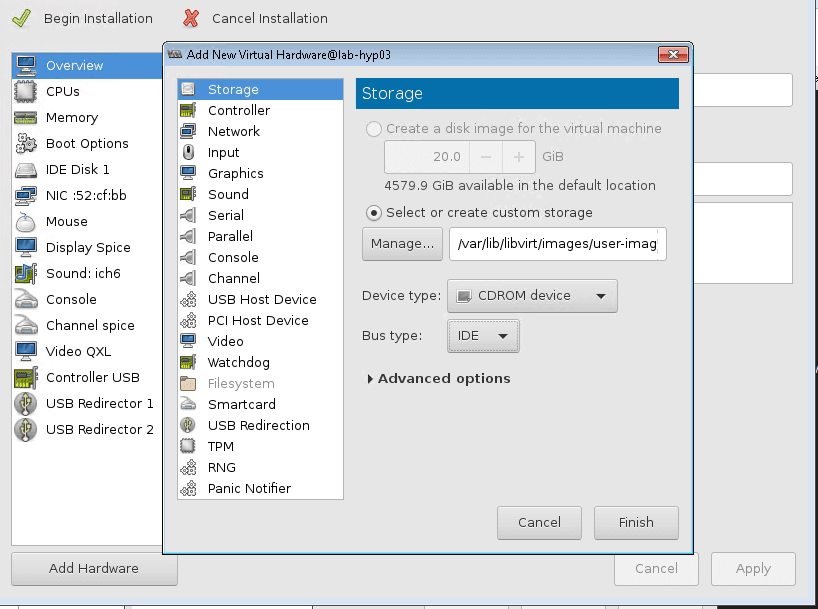
Step5. Click on Add hardware, and select storage.
Here we are going to attach the bootstrap file as virtual CD Drive.
Step6. Select custom storage and browse for the autobootstrap file that we had downloaded.
Step7. Change the device type to CDROM and click Finish.

Step 8. Now you may begin the installation.
Once the VM started, it would take about 5 to 10 mins to get NSG bootstrapped. Once bootstrapped it would look like below with green dot this time.

You could see the status of the VSD architect Dashboard as events while the NSG bootstrap process is going on.
Step 9. Let’s go ahead and add the secondary WAN link.
- Click on the plus icon on the network ports.
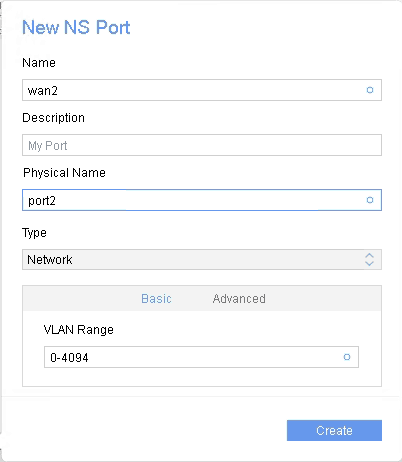

- As you can see both the Wan link 2 and the LAN are not active at the moment we are going to fix the WAN2 now.
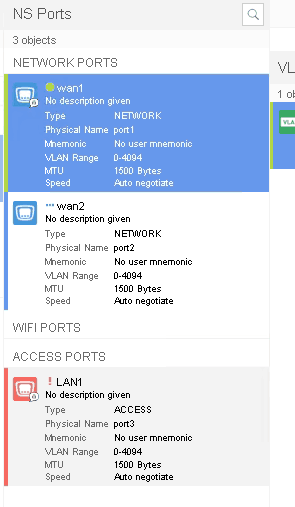

- Click on WAN2 and Add VLAN 0 to the WAN link, and click on it.
- Configure the second uplink which is on the network 192.168.12.0/24

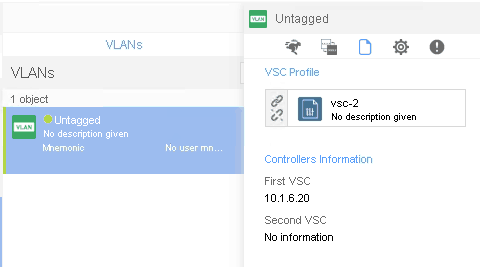
- On the same interface, you would have to attach the second VSC to it.
Click on the VSC configuration tab and attach the secondary VSC, we had added in part4.

- Go back to the NSG that you had just bootstrapped in your KVM host and go to its properties and click on add hardware, click on network source and select the wan 2 interface we had created earlier, and click Finish.

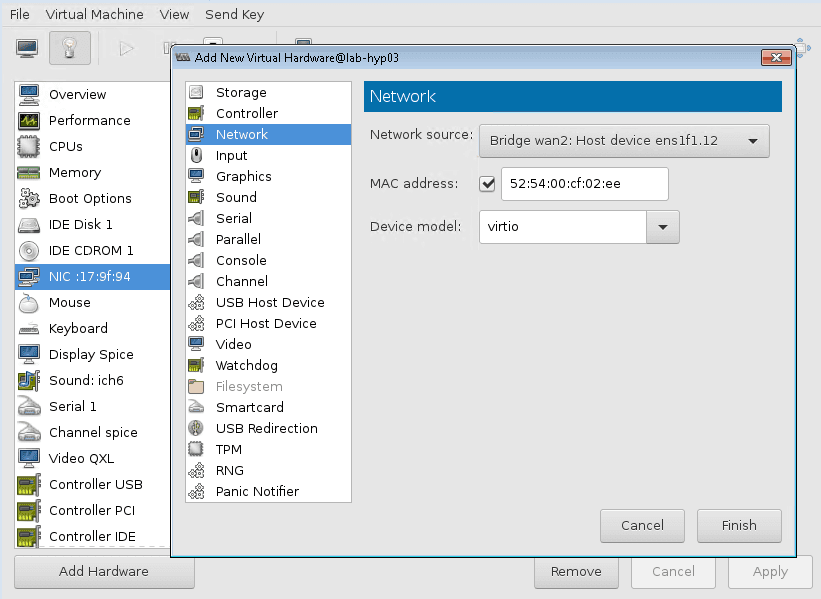
- Reboot the NSG to take this effect.
- Once the NSG back online on the KVM host, Go back to the VSD and click on Reload configuration on the NSG.
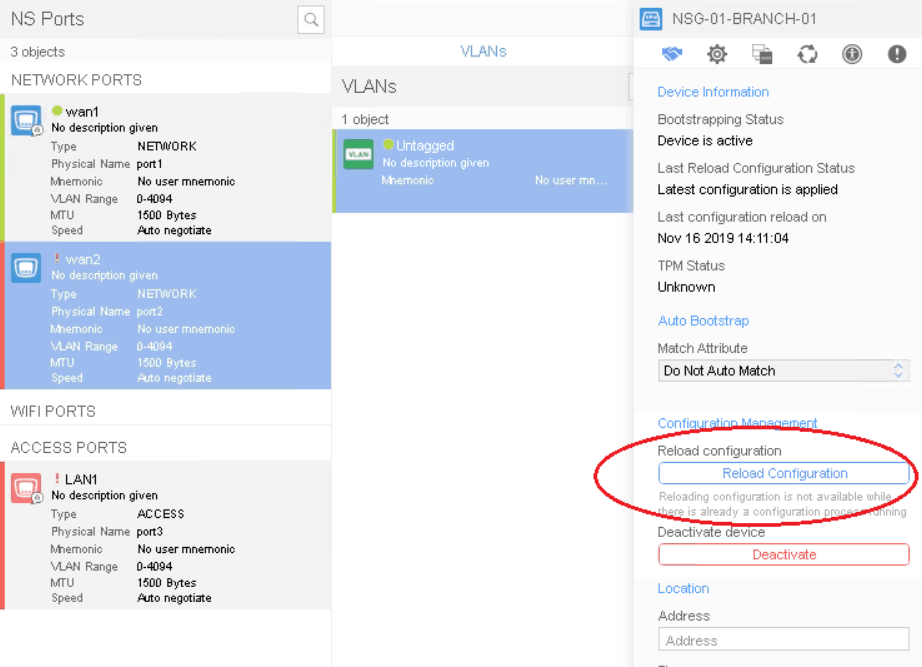

- You can see the second wan link as been added now.

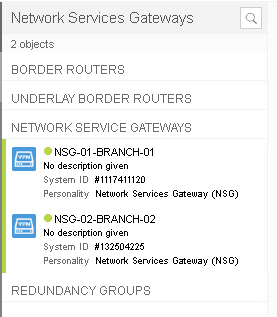
4.Second NSG bootstrapping.
The way how you have configured first NSG, you may follow the same steps for the second NSG as well. Once the activation is complete you should have two NSG’s in VSD like below.

Next is connecting the branches together