

When I got my mac machine, the first thing I did want to try was to install windows 11 on mac. Being a windows user for quite a long time, I would want to switch from time to time, when I want to try something out on the windows playground.
But the problem was mac machines are now using arm based architecture with m series chips and there is no longer mac coming out with intel x86 chips.
So if you try to virtualise windows 11 with its regular x86 iso image it wouldn’t work.
However, vmware fusion made it alot easier, and we no longer have to goto the microsoft site to download the iso image, it all can be done within the VMware fusion itself. The VMware fusion would go to the microsoft site automatically and download the windows 11 arm based iso image.
And recently, VMware announced that they made the vmware fusion pro free for anyone who wants to use it for personal purposes. So I decided to give it a try.
I followed this article and installed the vmware fusion in my machine and got myself free VMware fusion software.
You can check out the video here to learn more as well.
So once you have the VMware fusion installed on your mac machine, this is what we are going to do.
We will proceed with the installation of windows 11 on the mac machine in VMware fusion. W will also install VMware tools so that the virtual machine performance would improve, we will adjust its default memory and cpu configuration, so I can get maximum performance out from the vm.
So lets begin.
If you prefer to watch step by step guide video, check out the video below.
1. Create virtual machine.
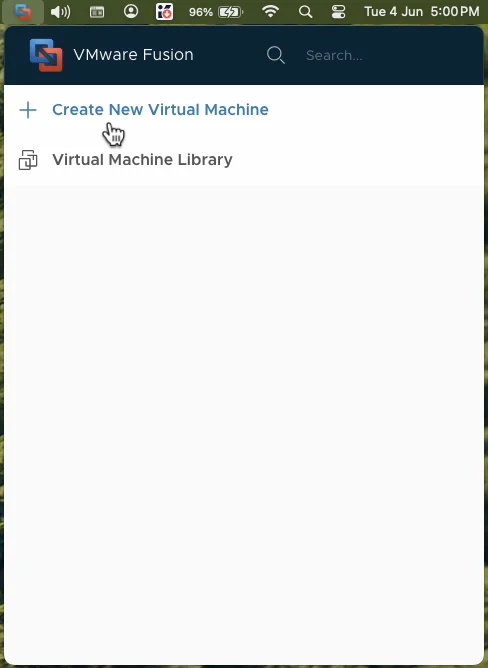
In mac machine, on the top right corner, click on the fusion icon.
In the fusion window, click on Create new virtual machine.

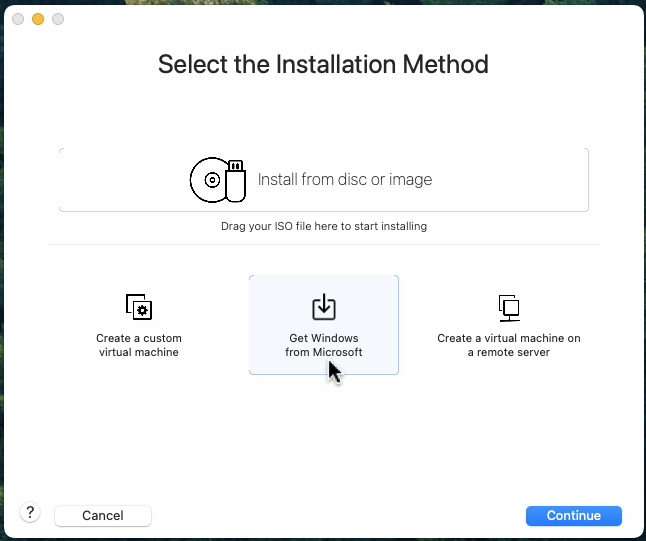
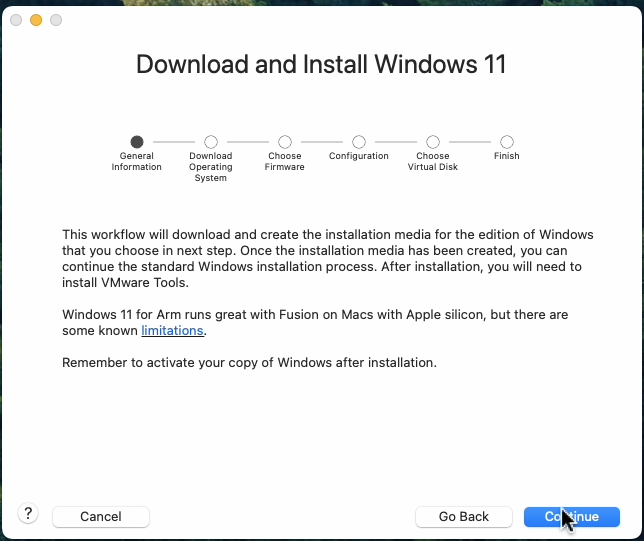
A new window now pops up with multiple options.
Click on Get windows from microsoft and click on continue.
And click on continue again.

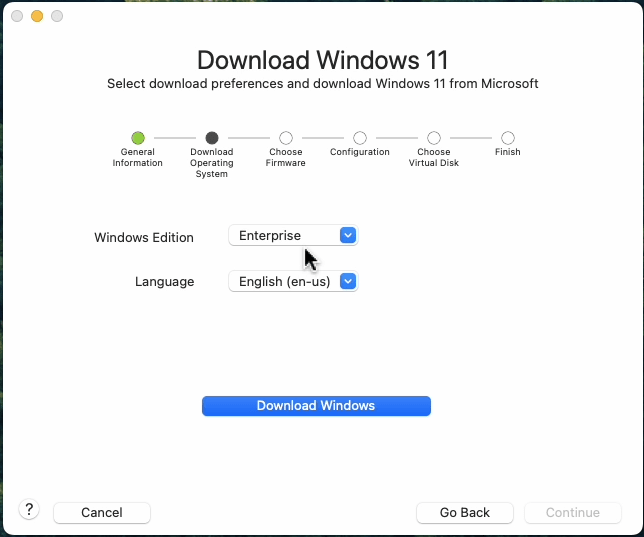
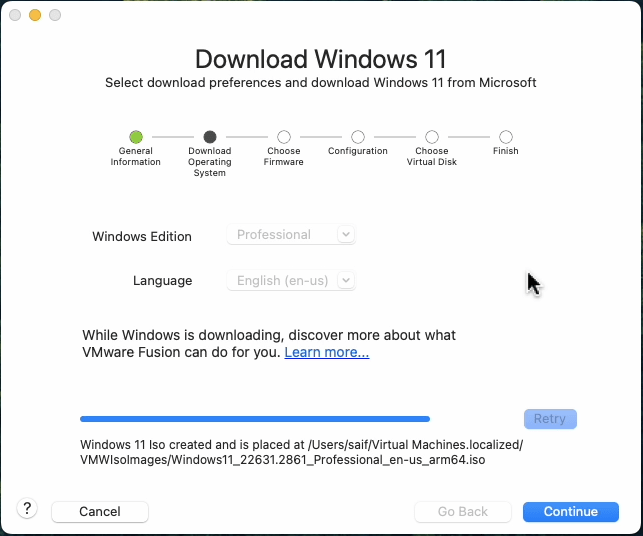
In the windows edition screen choose the edition of your choice, I am choosing prod.
And the language to english,
And click on Download windows

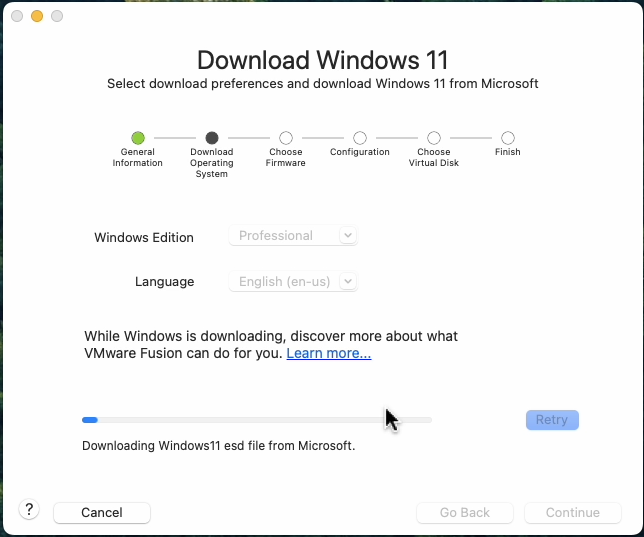
The windows first will start to download the windows arm iso image from microsoft, the file size is over 5GB, so this will take some time to finish.
Once done, you will get a message that says, windows 11 iso created and placed in your mac storage.
Click on continue here.

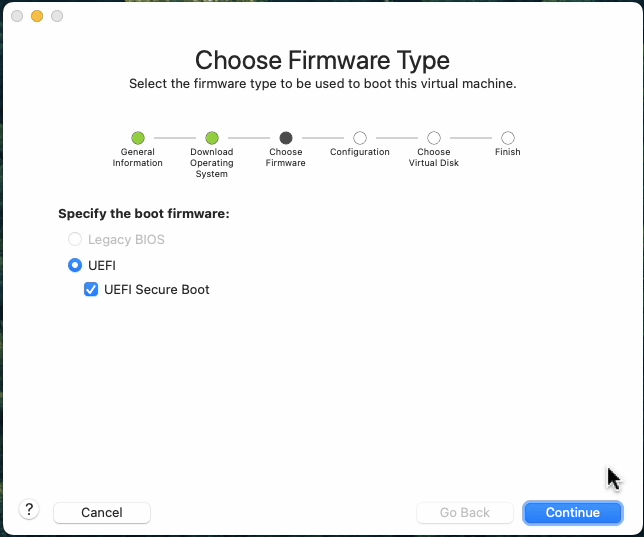
2. Enable the SecureBoot and TPM.
You will be presented with the boot selection, here choose UEFI and UEFI secure boot option, this is important step for windows 11 to boot and click on continue.

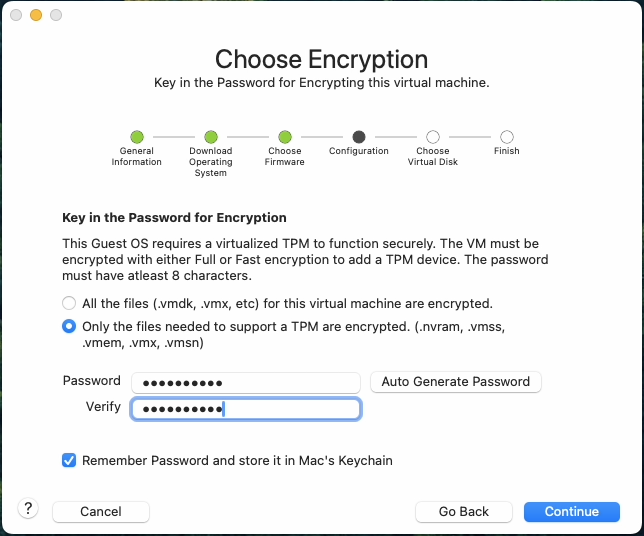
We are now going to configure TPM which is another requirement for the windows11 installation.
So enter the password for the encryption.
You may note that this password is not the same that you would use inside the windows machine, ever since I have installed the windows 11, it never asked for this password.
But it is important that you keep a note of this password, in case if you decide to move this vm disk to another mac machine, you might be required to enter this password.
Once the password is entered, click on continue.

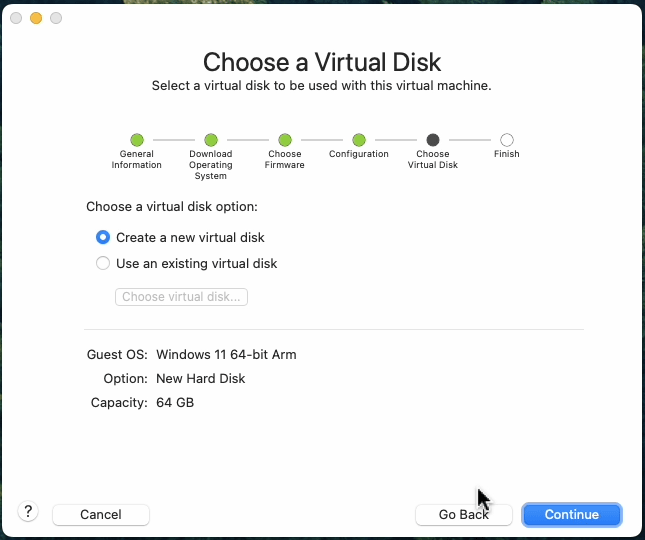
If you already have a Windows 11 disk image, you can select use an existing virtual disk.
As we are creating a new virtual machine from the iso image, I chose create a new virtual disk and click on continue.

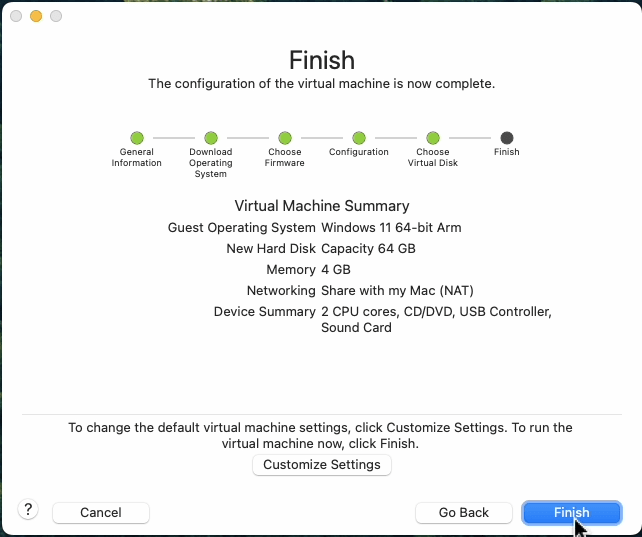
You are at the final step,
Make sure everything looks good here.
It is important that you give 4GB of RAM and 2 CPU which is the minimum requirement for the windows machine.
So if your Mac doesnt have much memory, like for example 8GB of memory you may note that half of it will be used by the virtual machine.
And if you reduce from 4 to 3 or 2, the windows 11 virtual machine will not work, you can still work around that by ignoring those memory and cpu recommendations by doing registry tweaking in windows11, maybe that’s for another article.
In my mac machine I have about 36GB of RAM, so I will extend that later on.
click on Finish here.

You will be asked where you would like to save the virtual machine, and the name of it as well.
If you would like to change the virtual machine name, you may change it, as well as the location.
But I am leaving the default and clicking save.


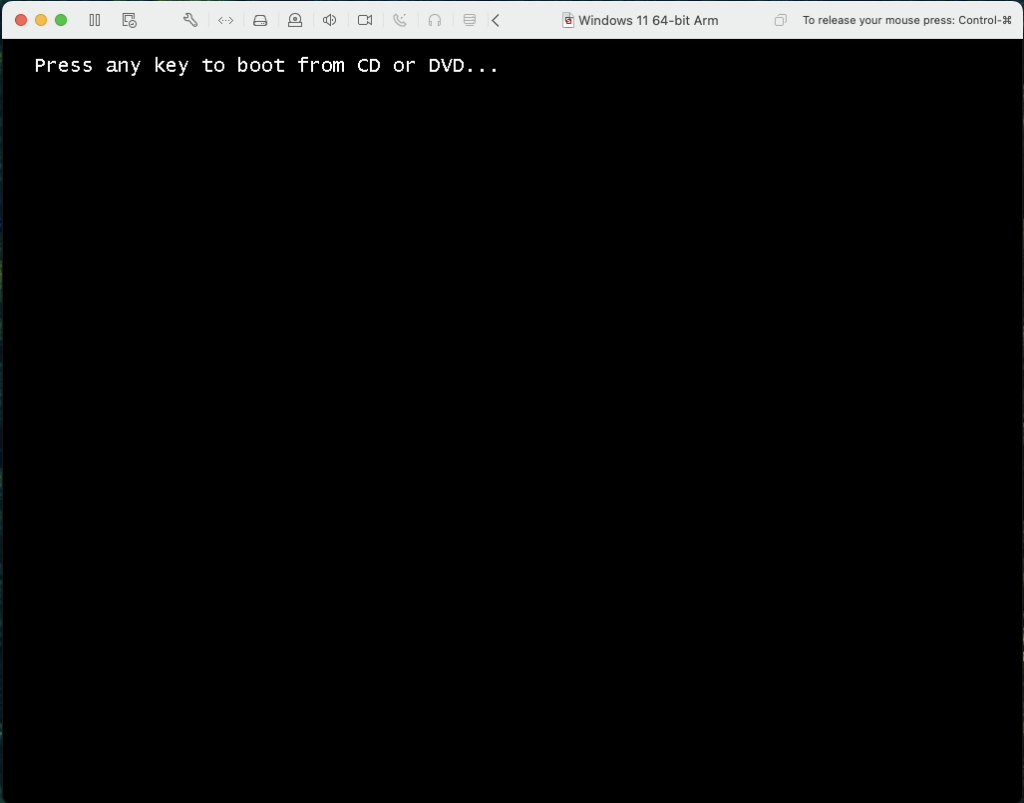
After a few seconds, the VM will be created and it will boot automatically.
When you see press any key to boot from cd/dvd press any key.

3. Proceed to install windows11 virtual machine.
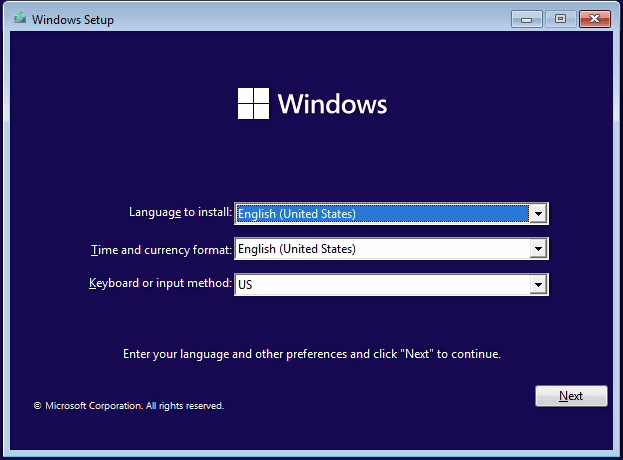
You will now be taken to the windows installation screen.
You may choose language of your choice Time and currency format, keyboard layout and click on next.

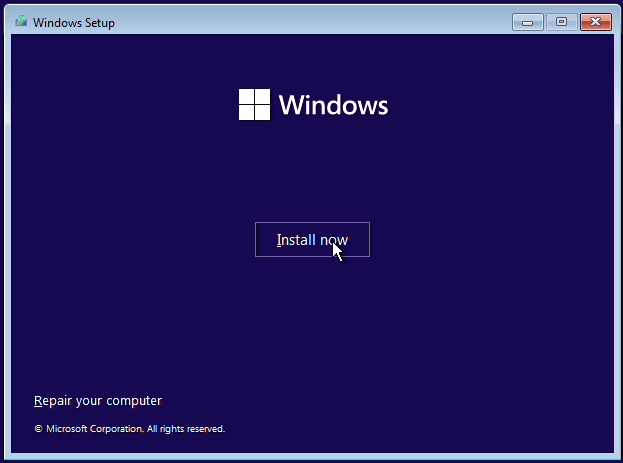
And install now.

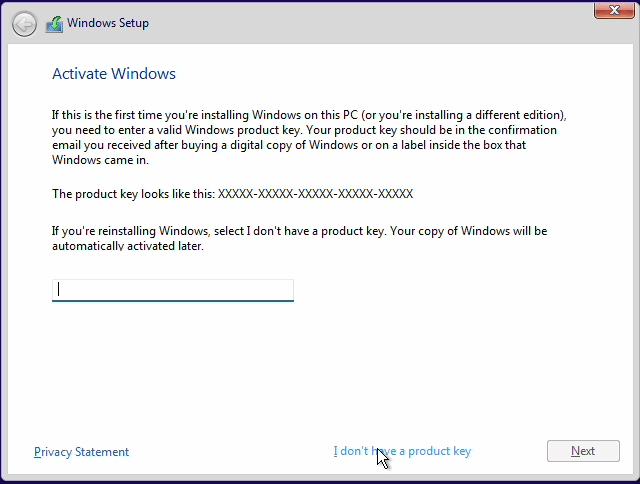
In the activate windows screen, choose I don’t have a product key.

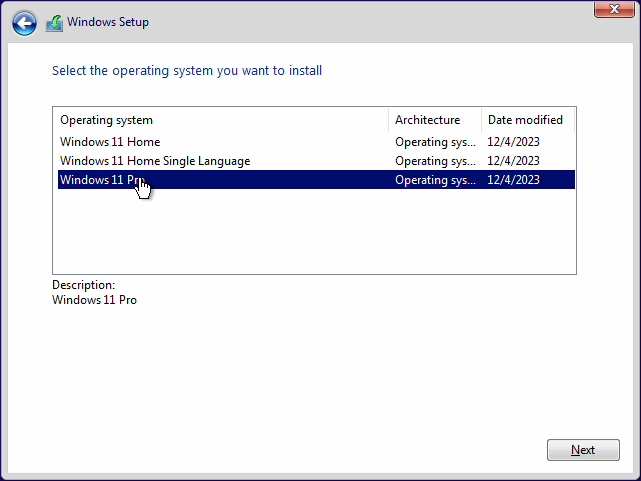
Choose the version of your choice.
I am choosing Windows 11 pro and clicking on next.

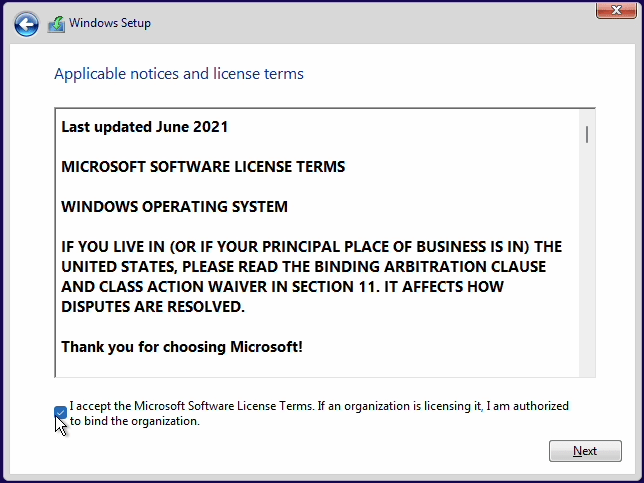
Accept the licence agreement and click on next.

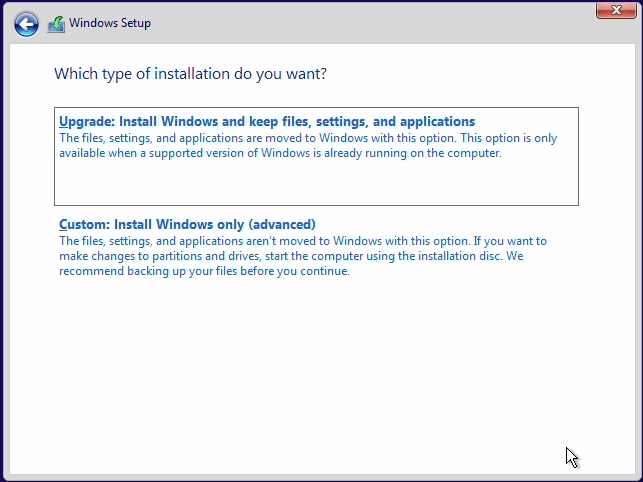
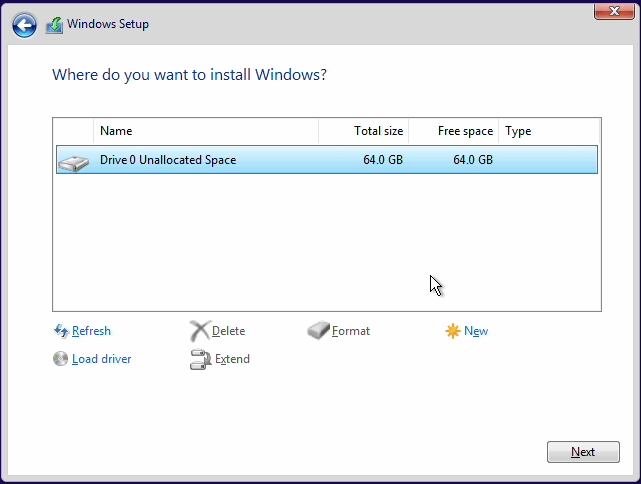
In the installation type, choose custom.

Select the virtual hard disk and click on next.

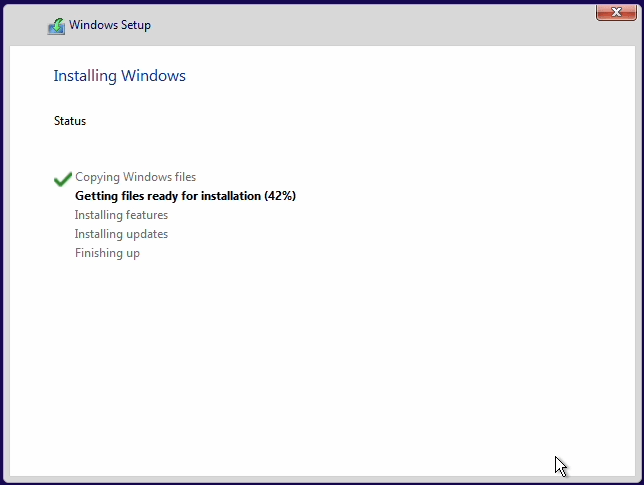
The windows 11 installation will now begin, and this process will take a few minutes.

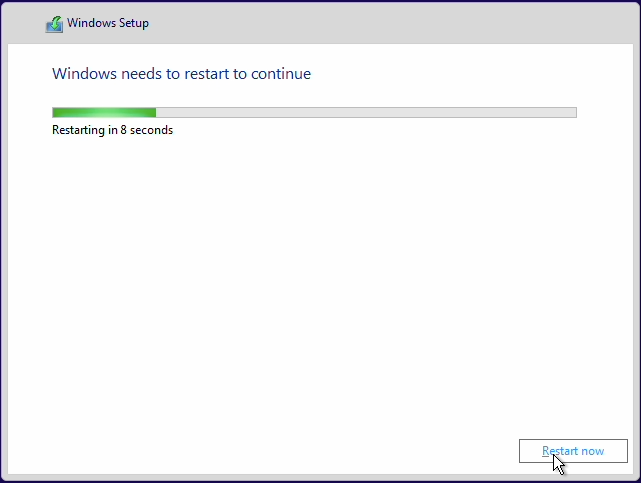
After the installation the windows would automatically now restarts.
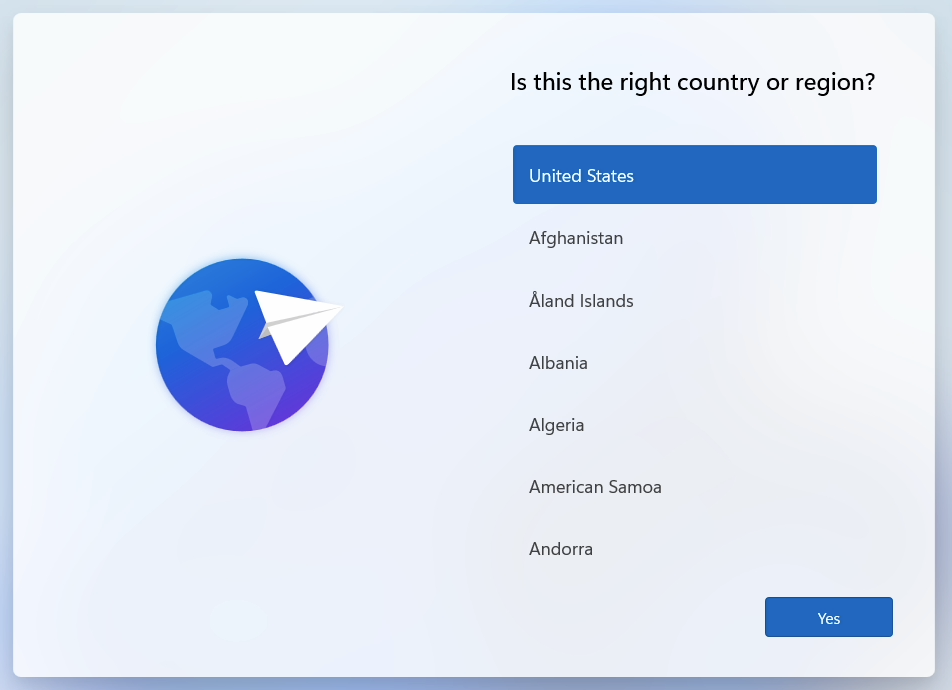
It will now take you to the windows 11 initial setup wizard, where it would ask you to choose the country of your choice.
4. Setup Local account in Windows 11.
But before we proceed with the selection, I would like to make some changes.
I like to use the local account with the windows machine and I don’t want to connect the microsoft account with it.
However with the default settings, Microsoft wouldn’t let me choose the local account setup.
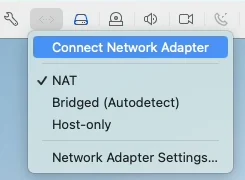
For that I need to disconnect from the internet.
So on the Vmware fusion, next to settings icon, click on the network settings icon, and click on Disconnect Network adapter.
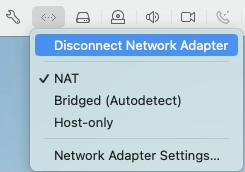
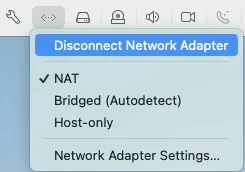
The network would now be disconnected, and you may proceed with the country and click on yes.

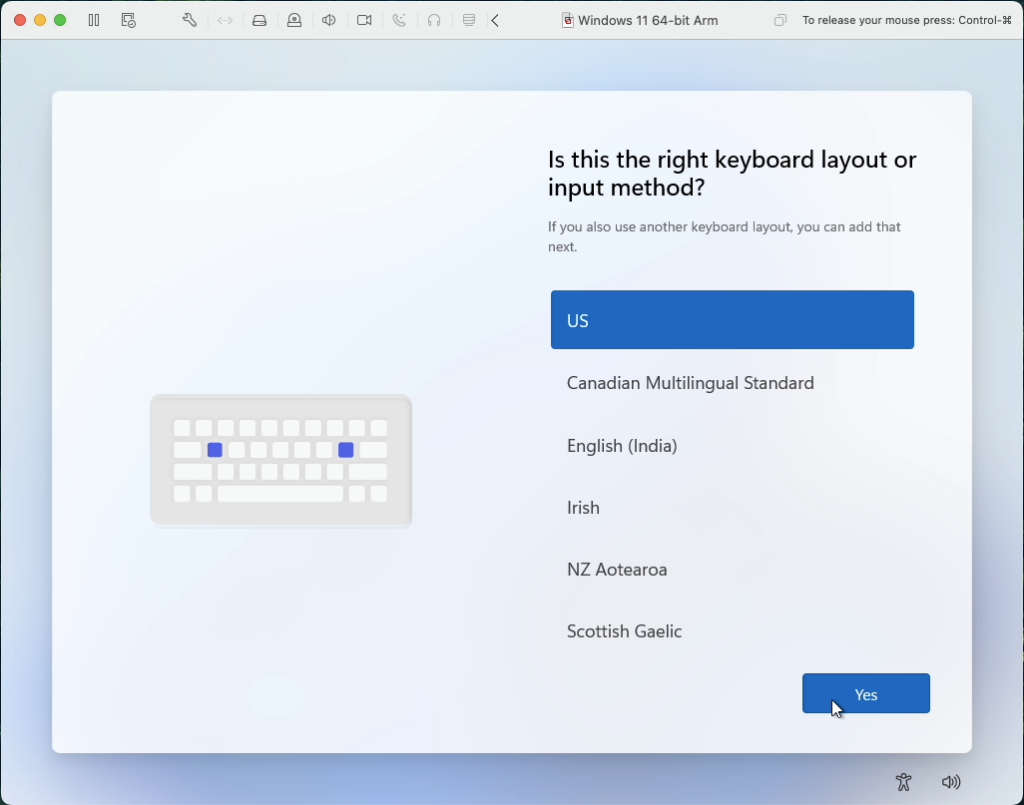
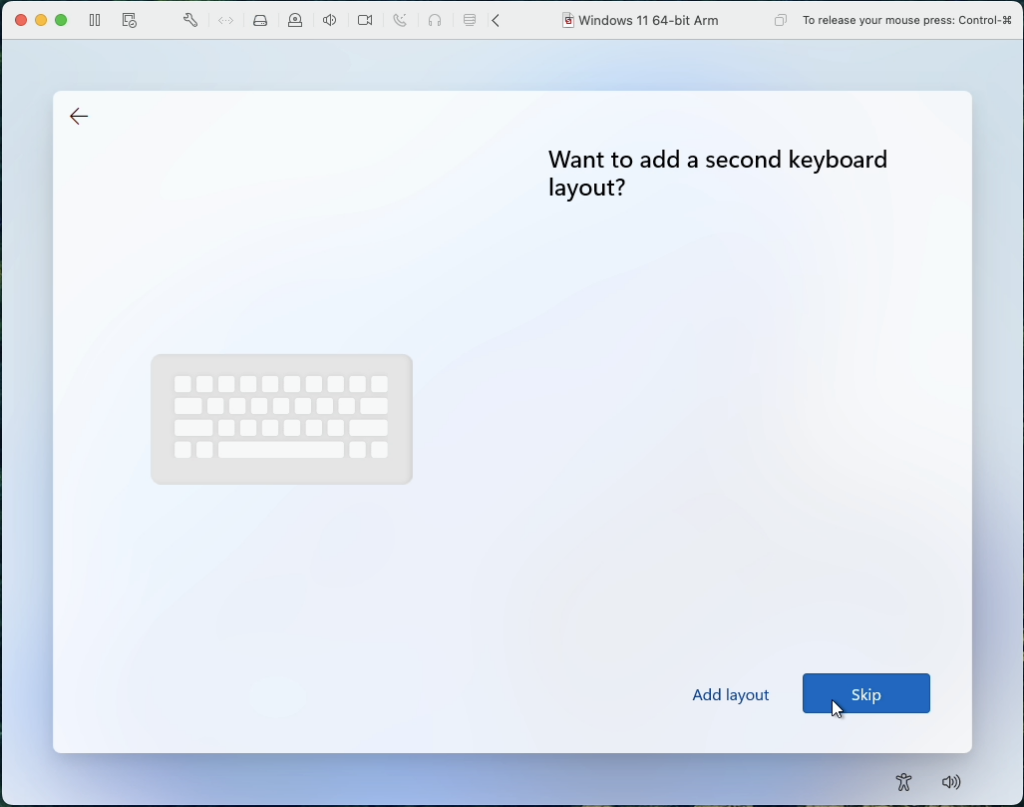
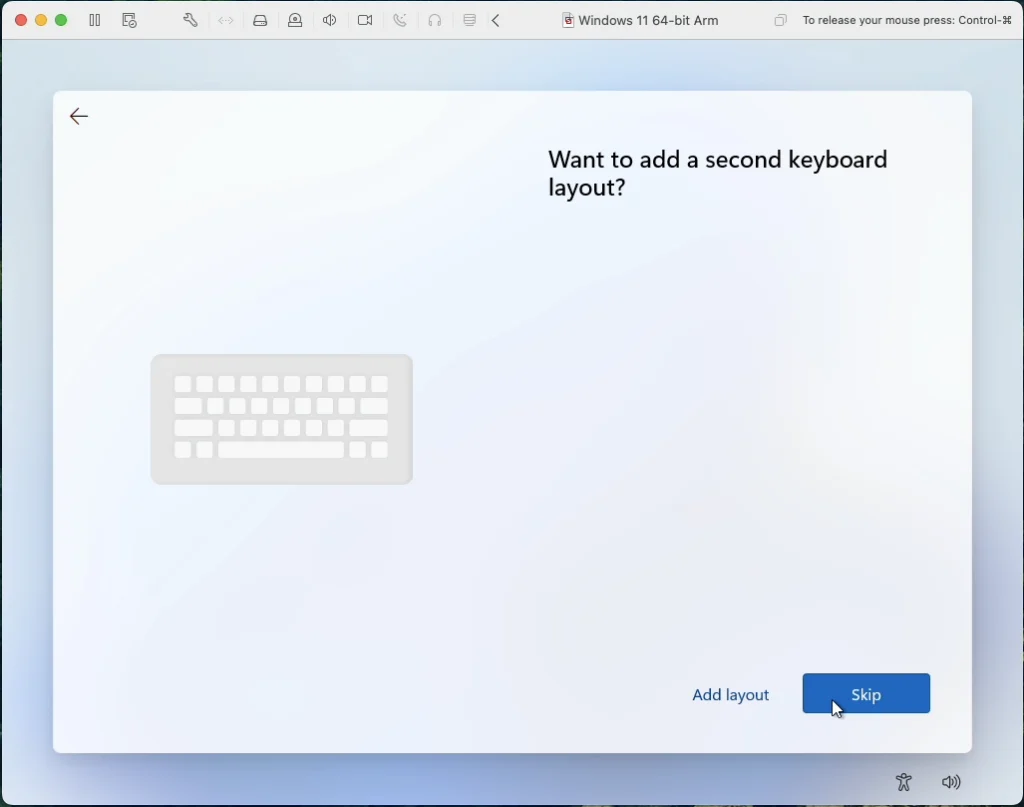
Choose the keyboard layout and click on yes.

If you would like to add another keyboard layout, you may do so, else click on skip
Because we disconnected the internet, we are unable to proceed further.
To continue, press shift +fn+f10 on your mac keyboard.
The command prompt would pop up, enter oobe\bypassnro and hit enter.

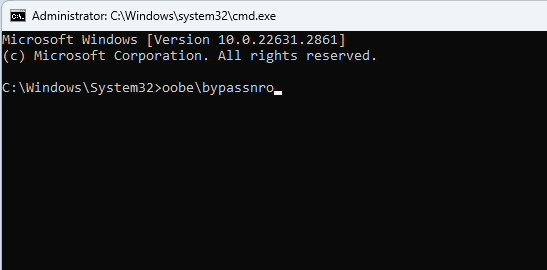
The system will now reboot, and will take you back to the same region selection screen.
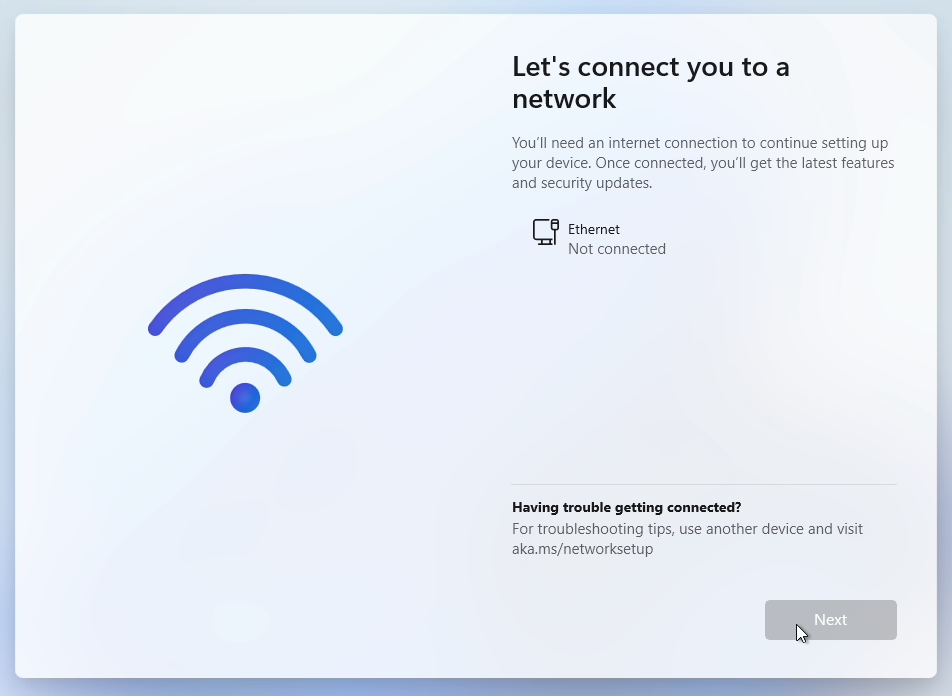
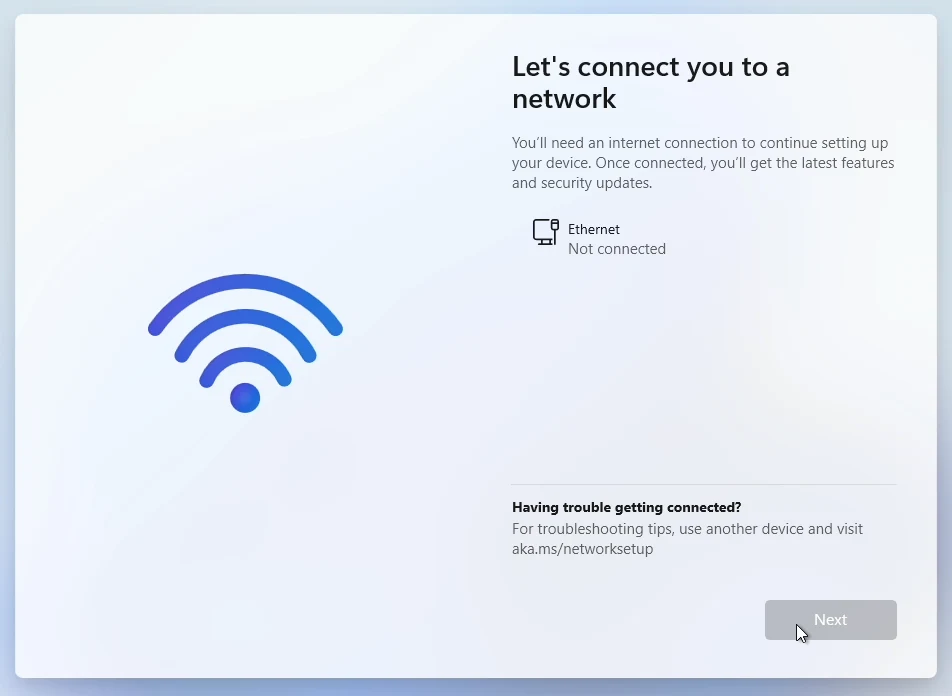
You may continue to the next few steps until your reach to the network selection.


In the network selection, you now have an option that says ‘I don’t have internet’ click on that.

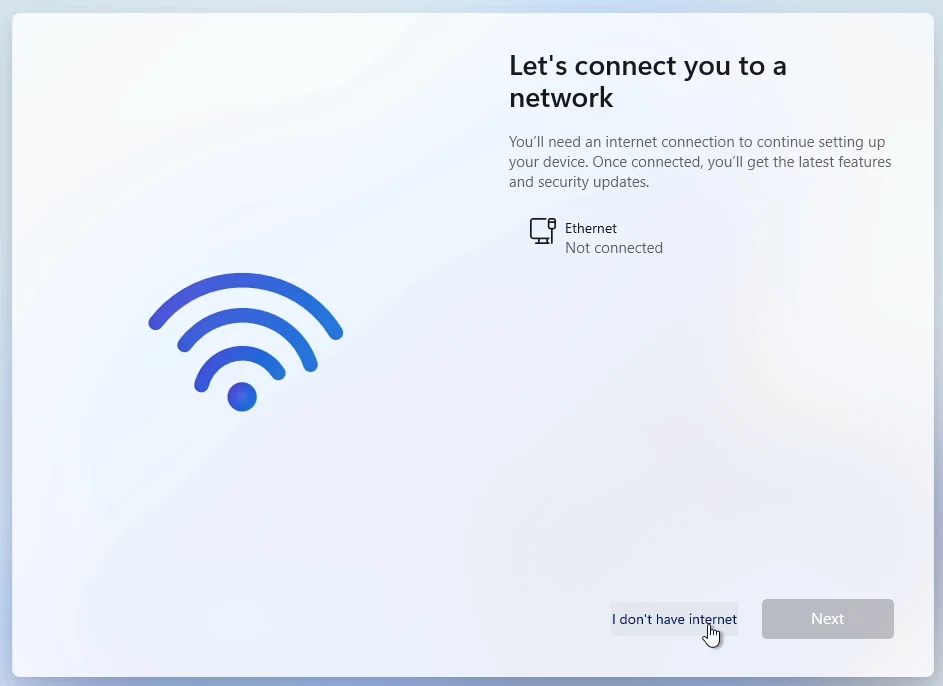
And continue with limited setup, this will let you proceed with the creation of a local account in windows 11.


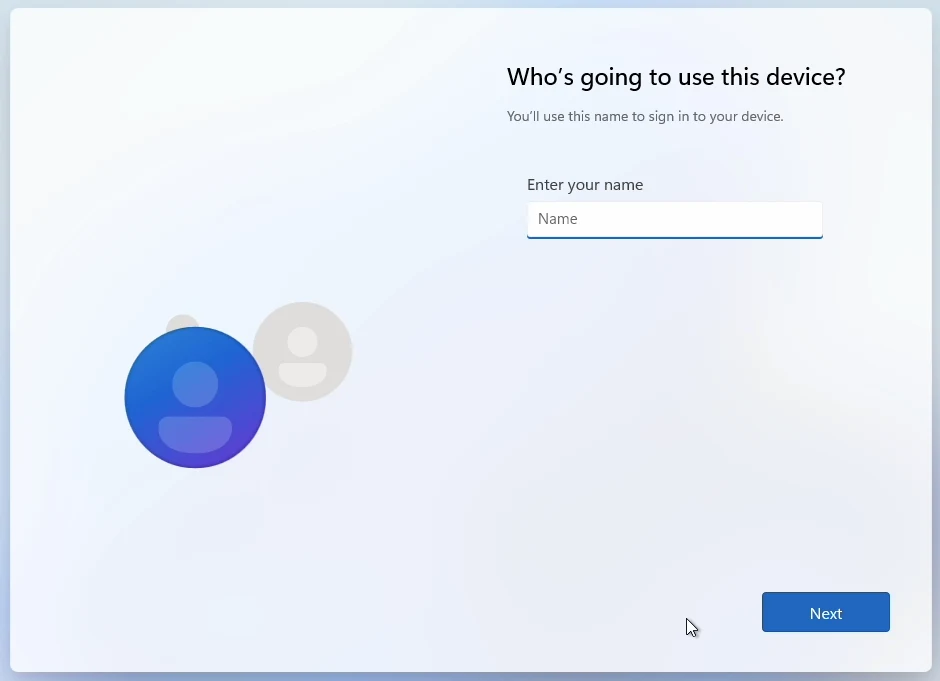
Enter the name of your local account and click on next.

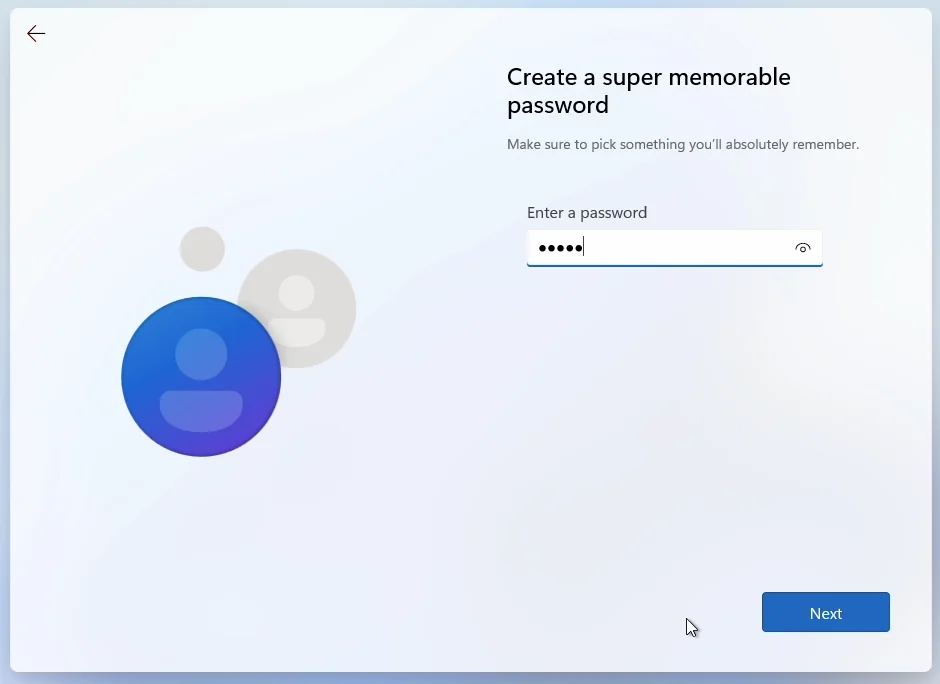
And the password for the account and click on next.
You will be using this account to login to the virtual machine going forward.

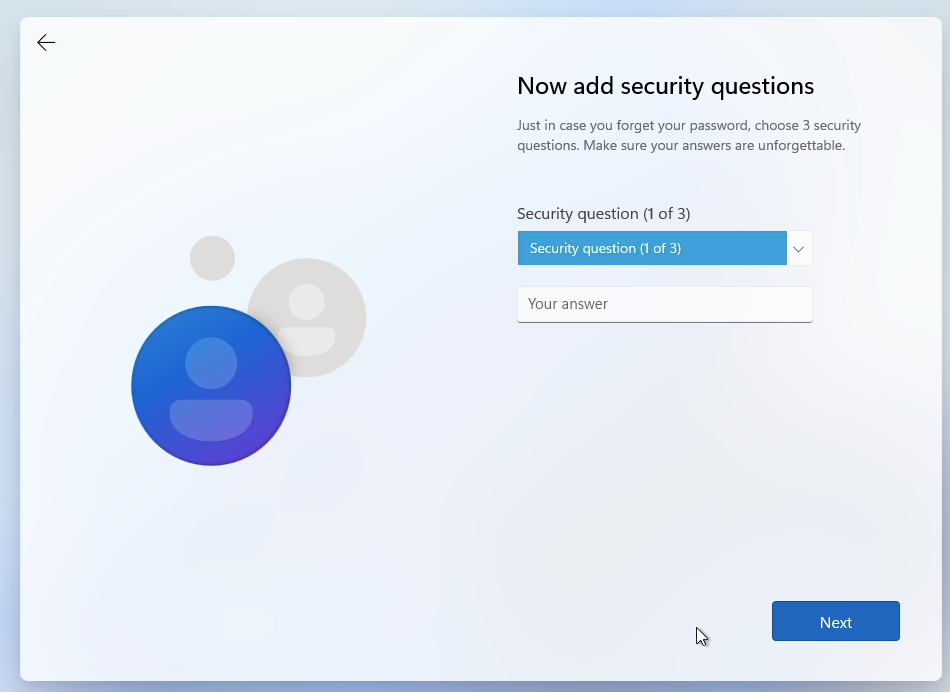
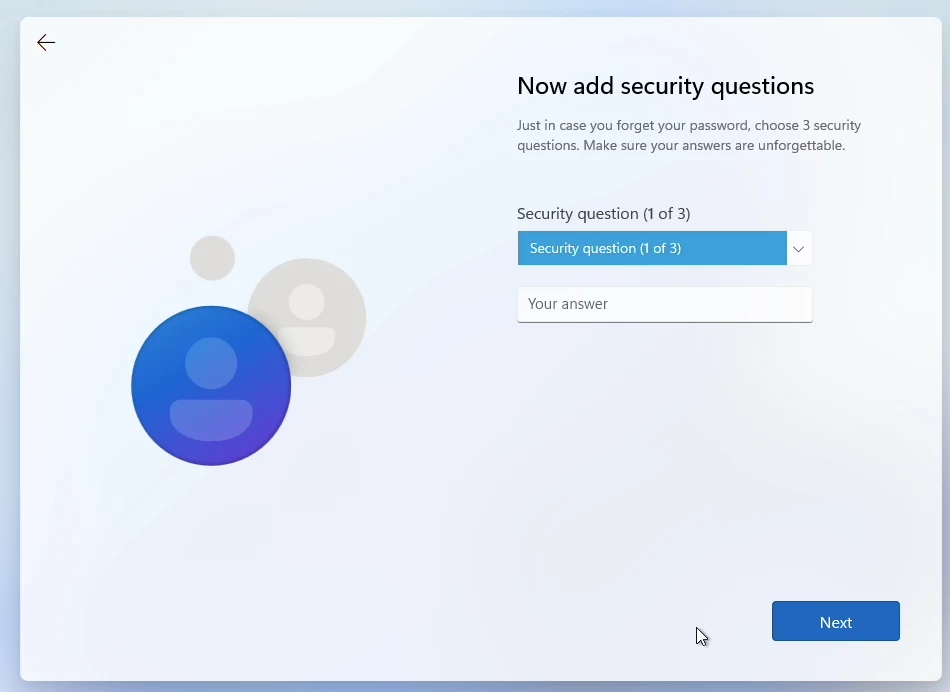
You will be asked to set up a few security questions, answer them here.
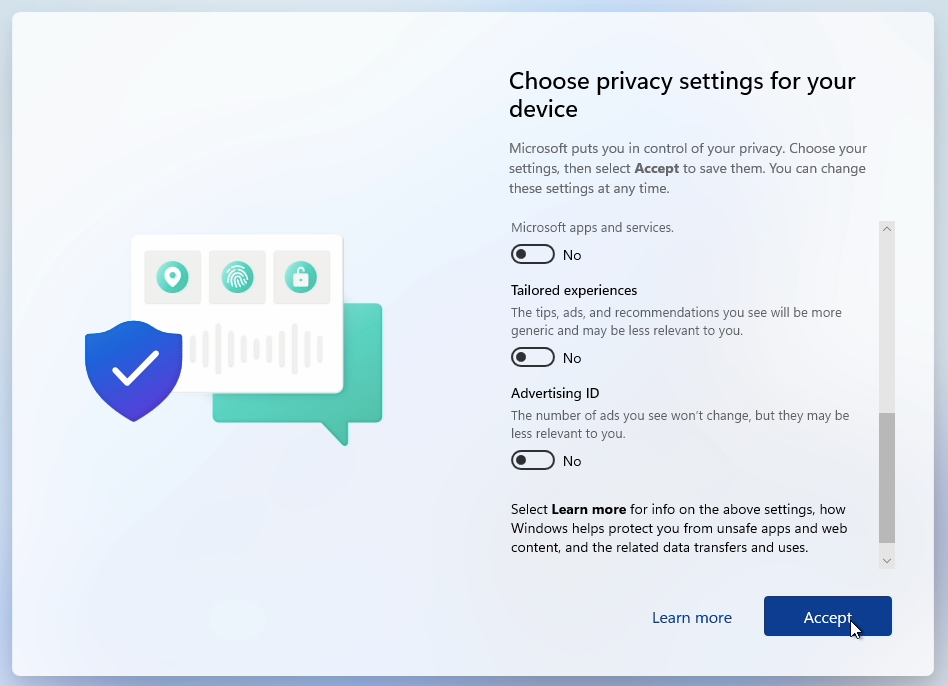
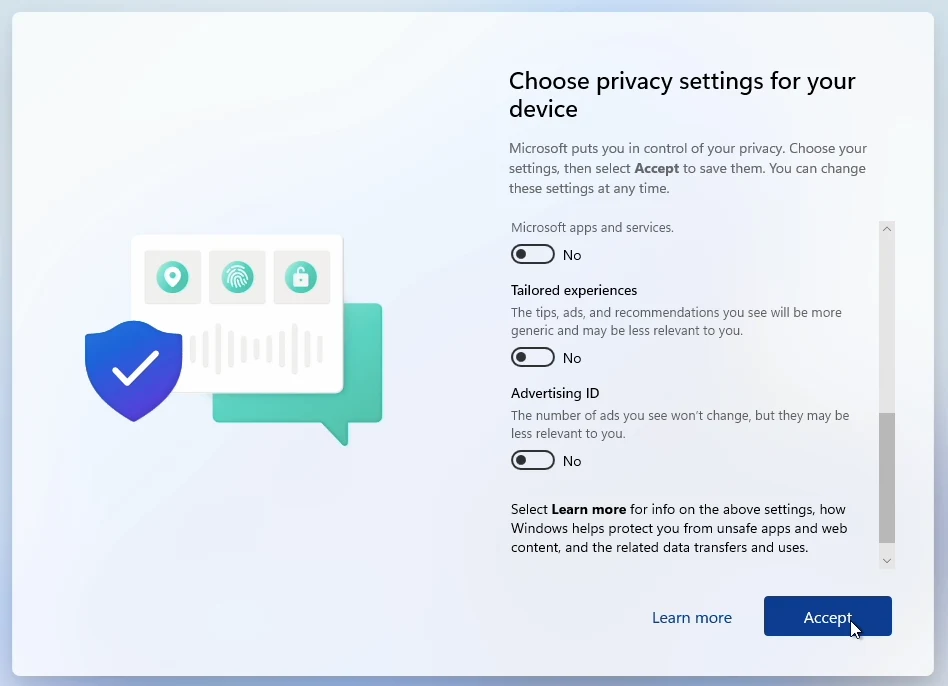
Make the appropriate selection in the privacy section and click on accept.
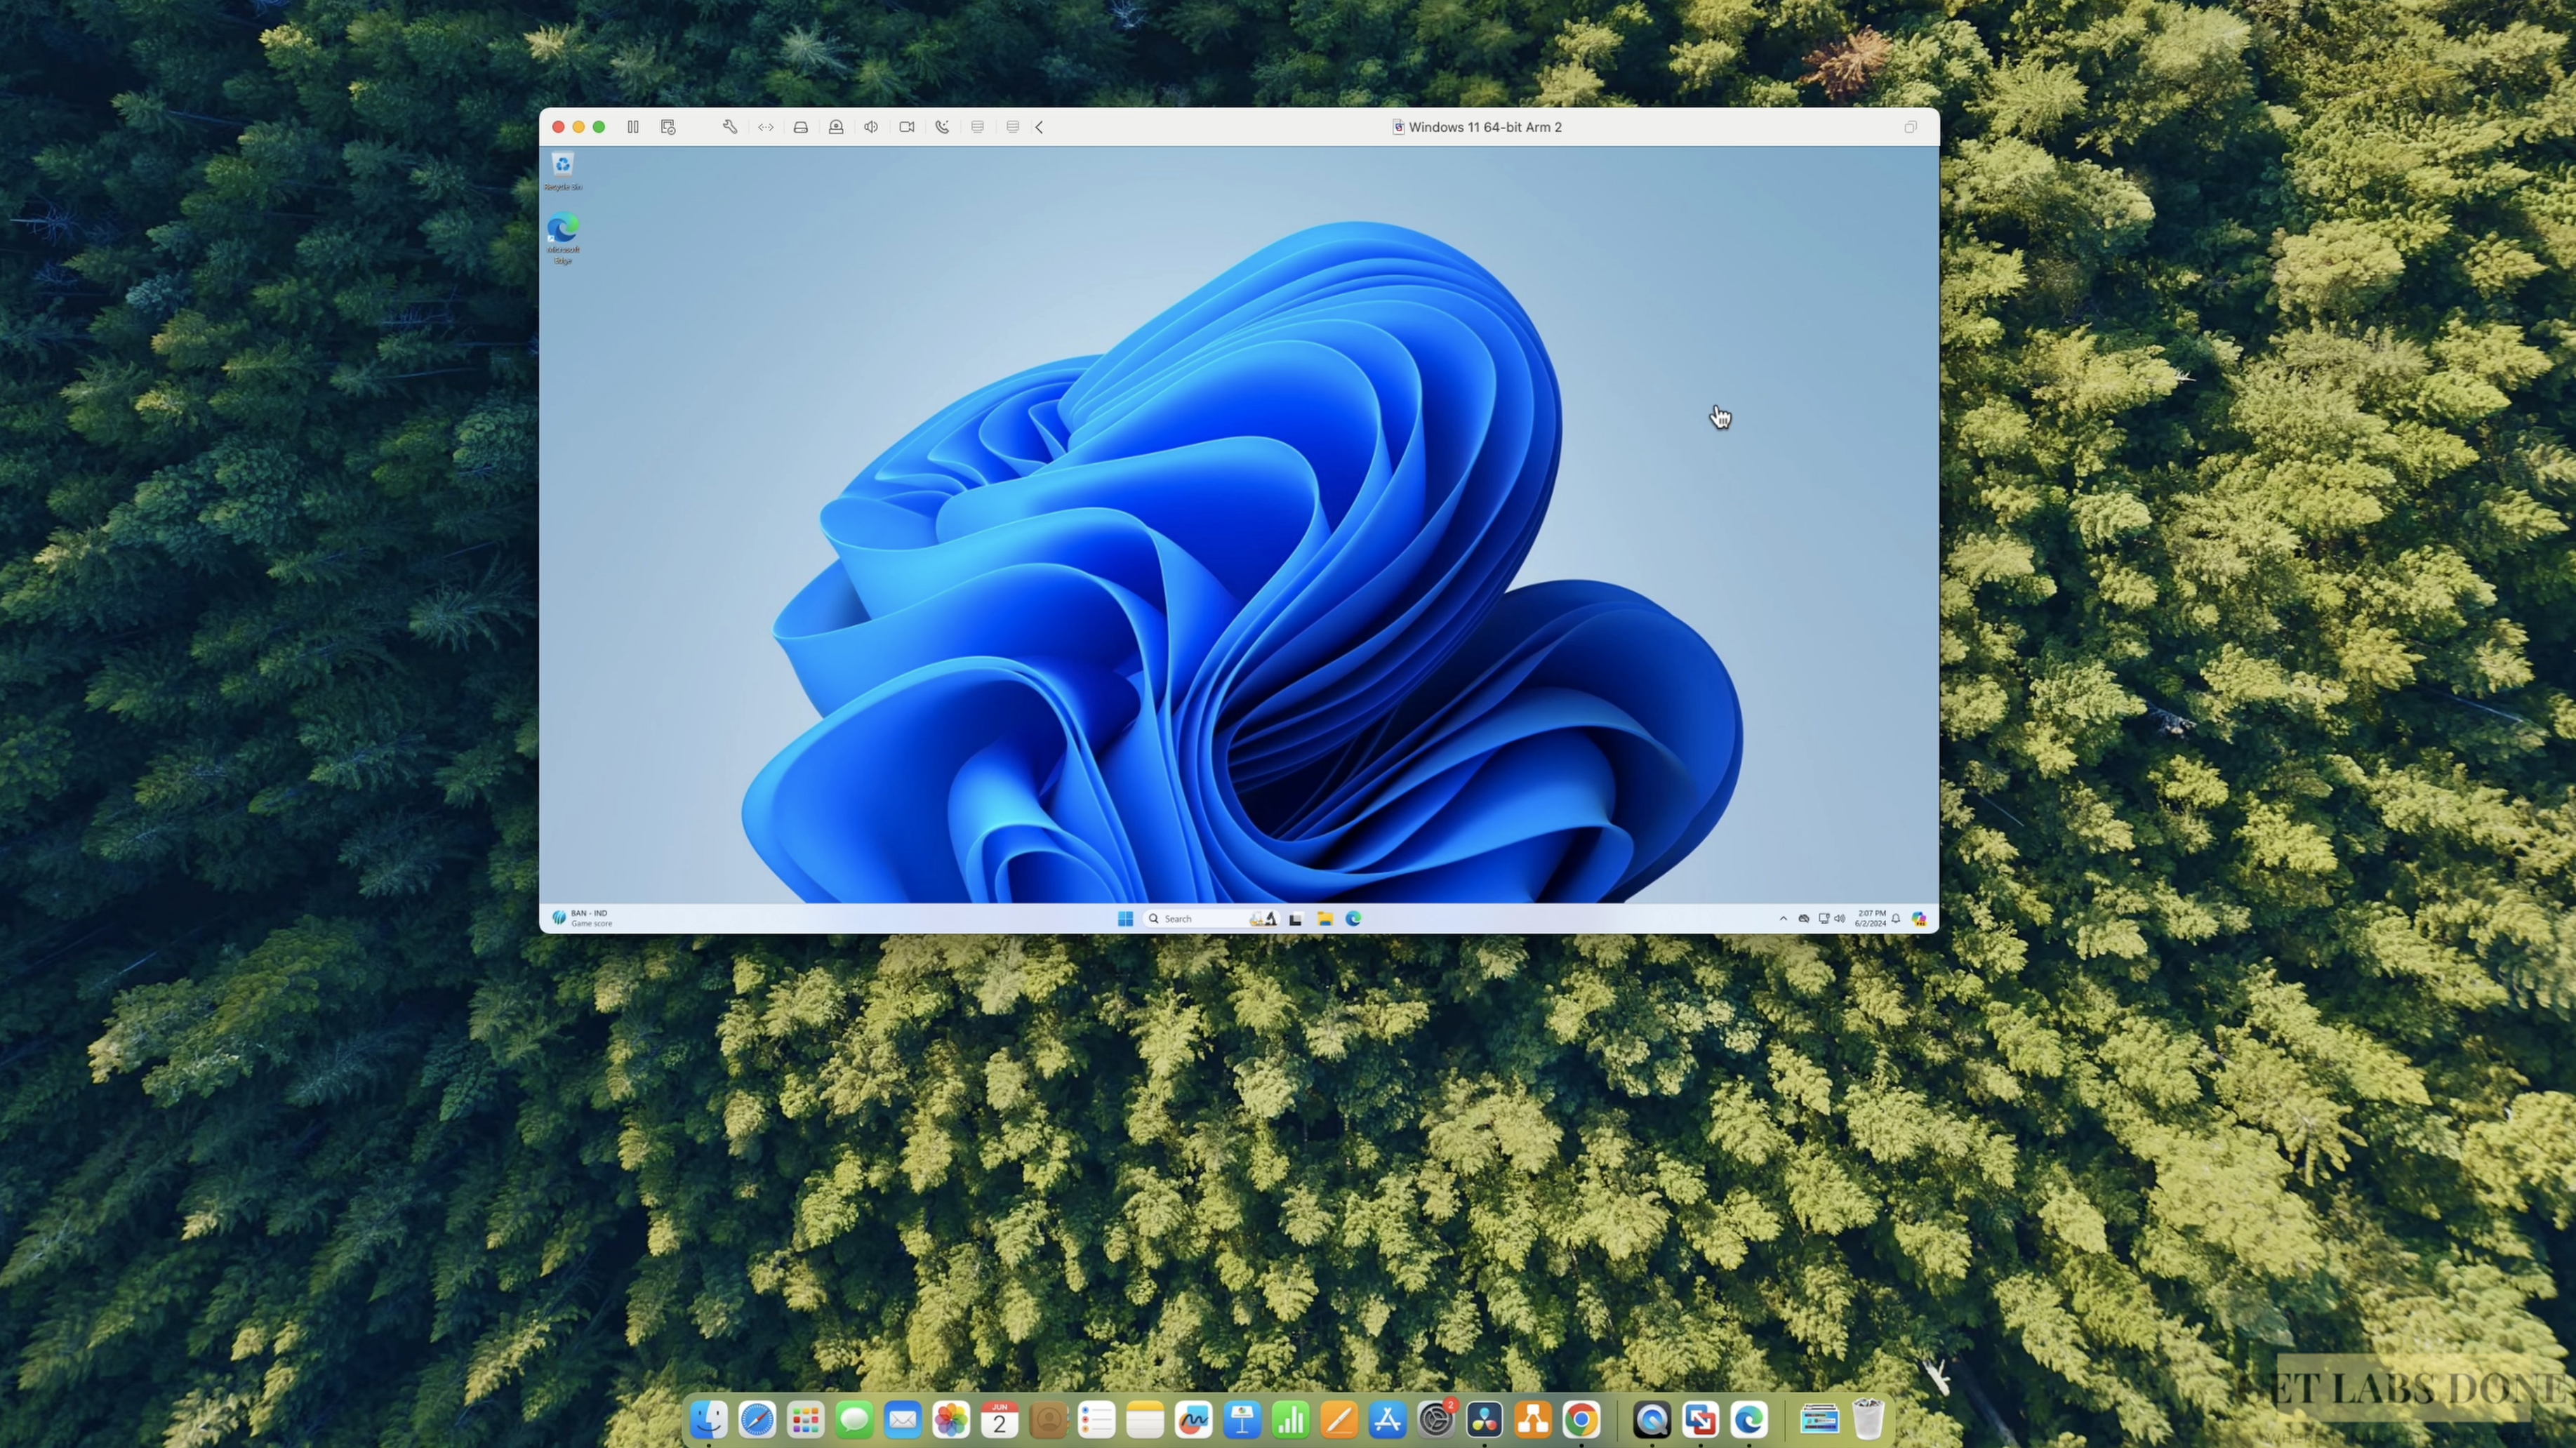
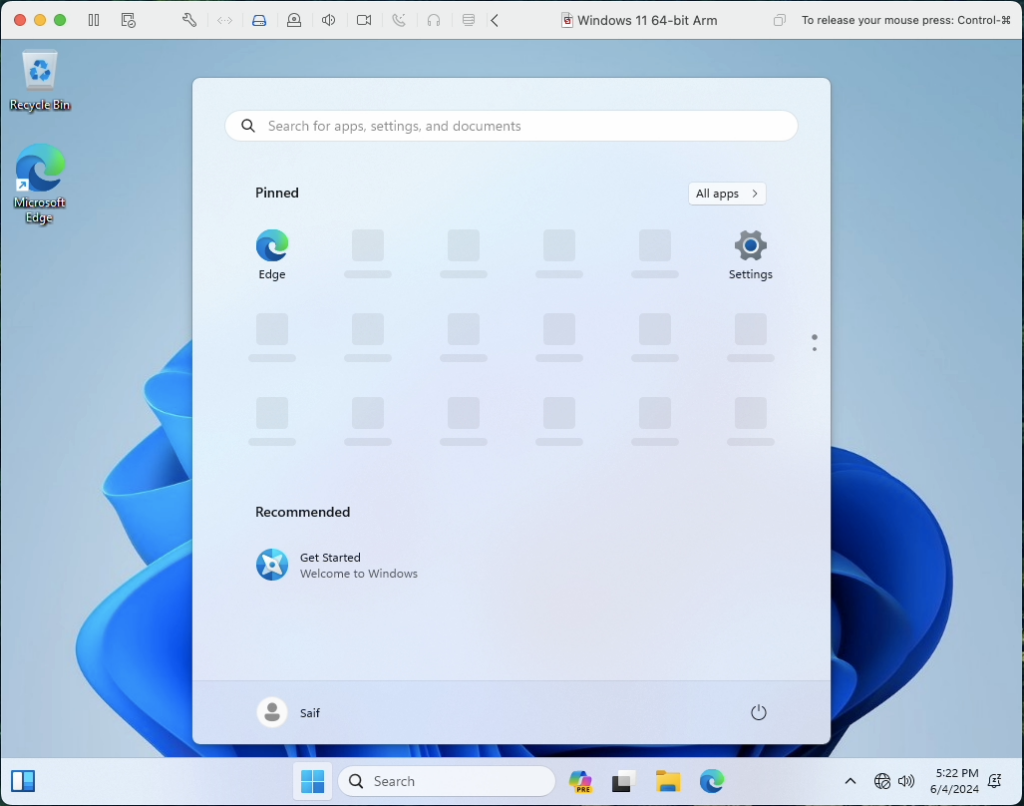
That’s it, after a few seconds, the windows will let you into the virtual machine, where it is showing you the main desktop with the start menu.
But our network is disconnected, you may connect them back now by clicking on the network icon and click on connect network adapter.

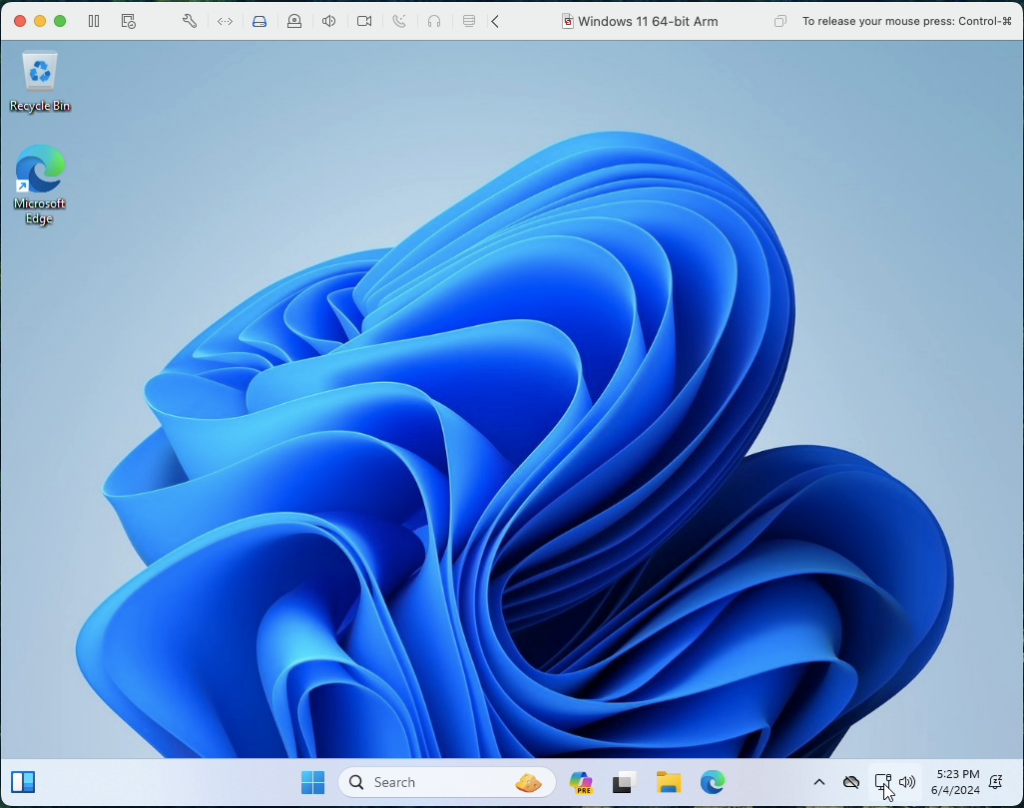
You can see at the bottom the network connection is now established.

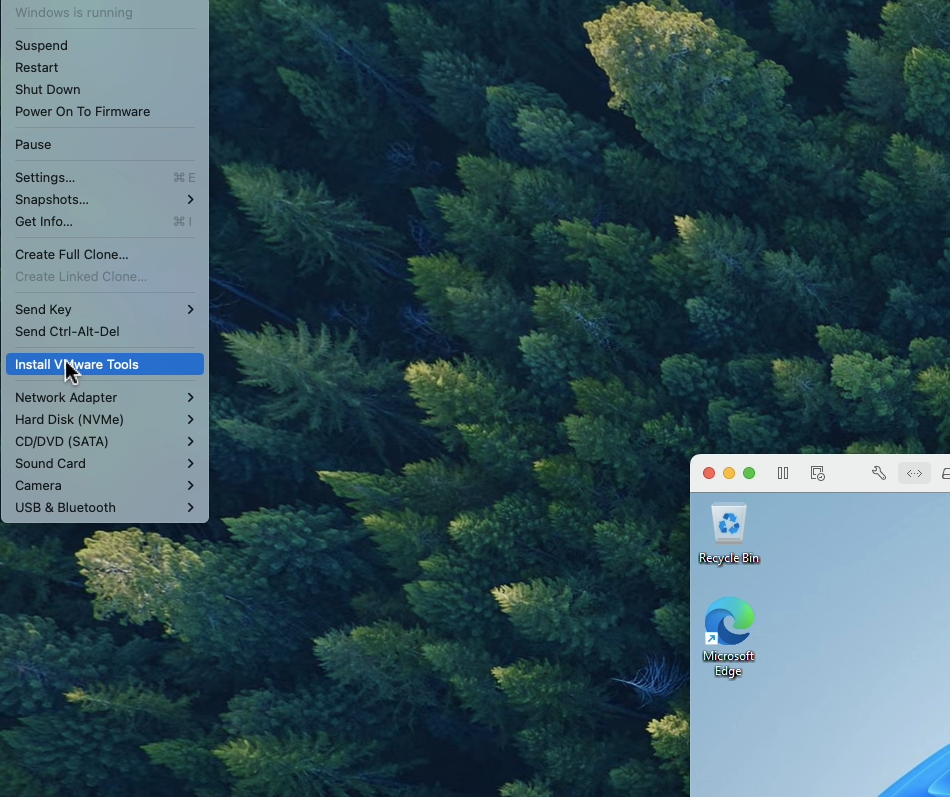
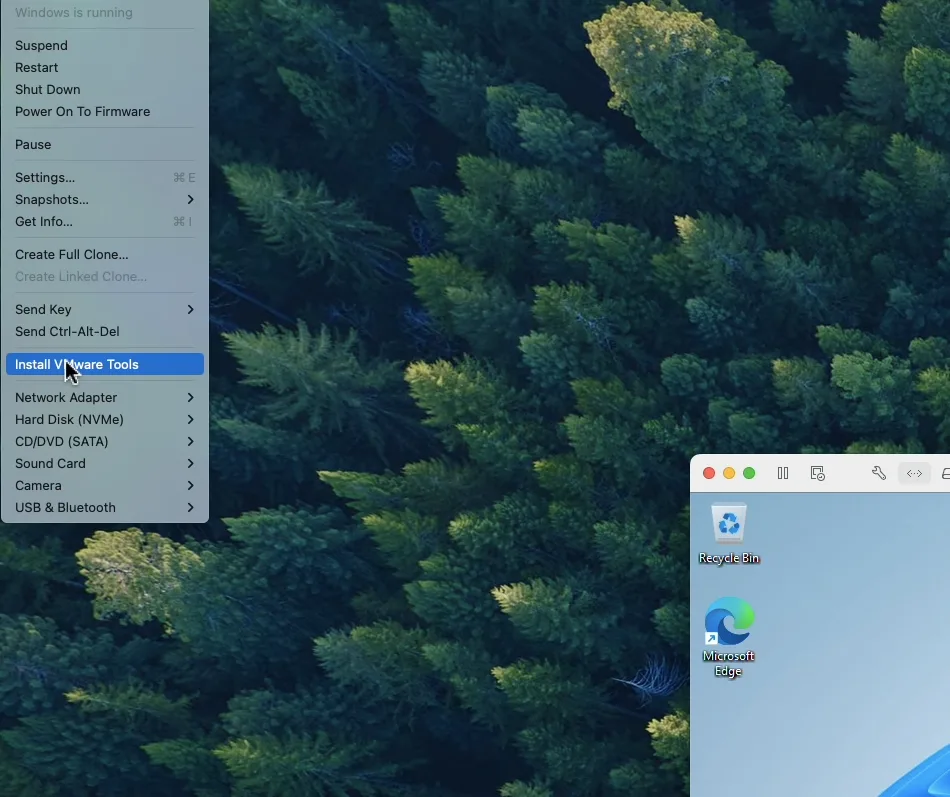
5. Install Vmware tools.
Next let’s proceed to install the vmware tools on windows 11 machine.
While on the screen click on the virtual machine.
And click on Install vmware tools.
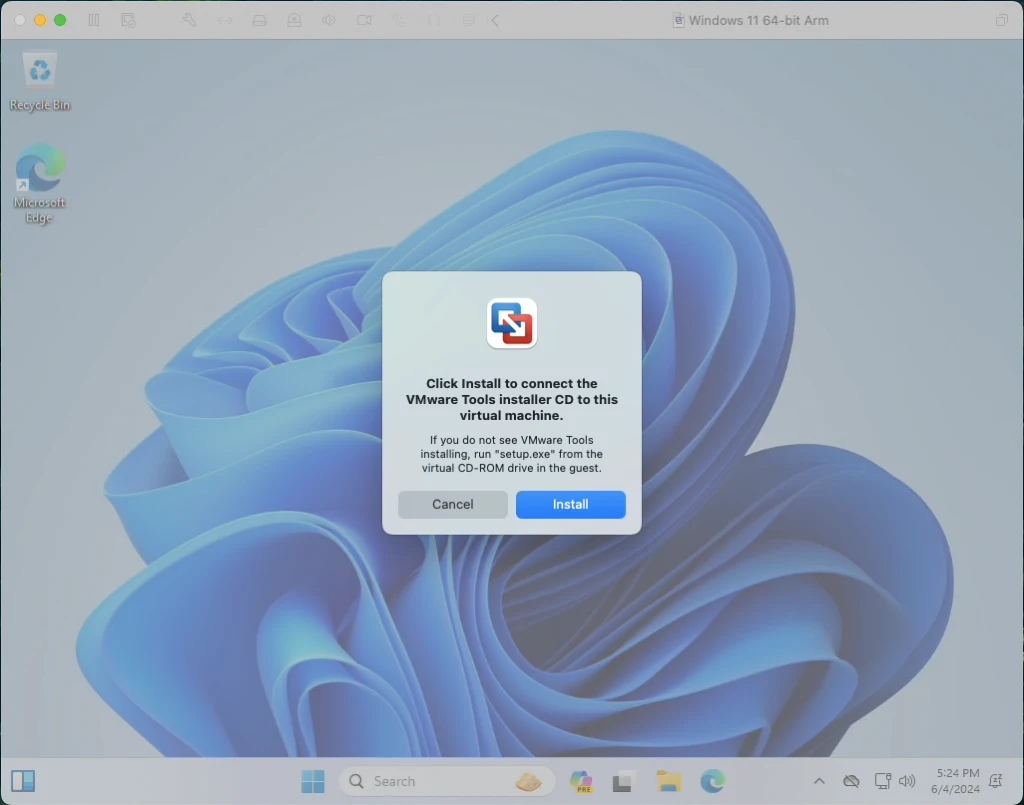
The VMware tools ISO is now attached to your windows 11 virtual machine, click on install.
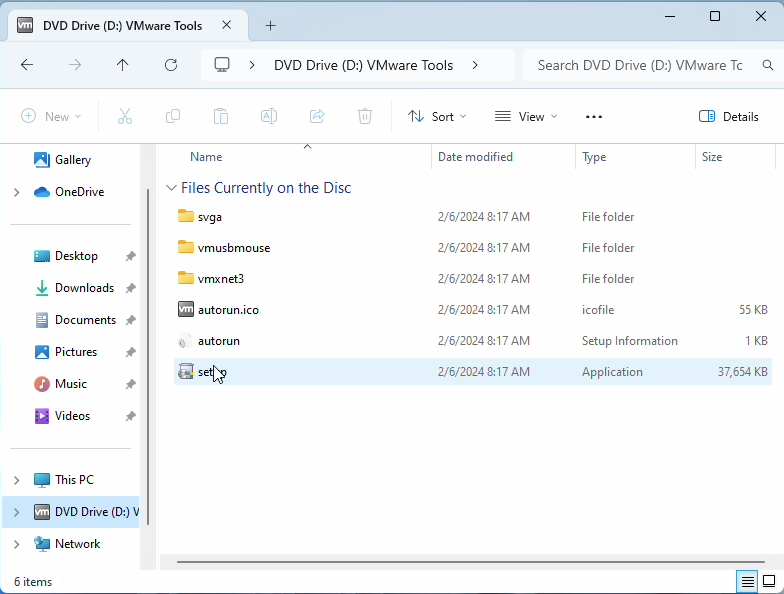
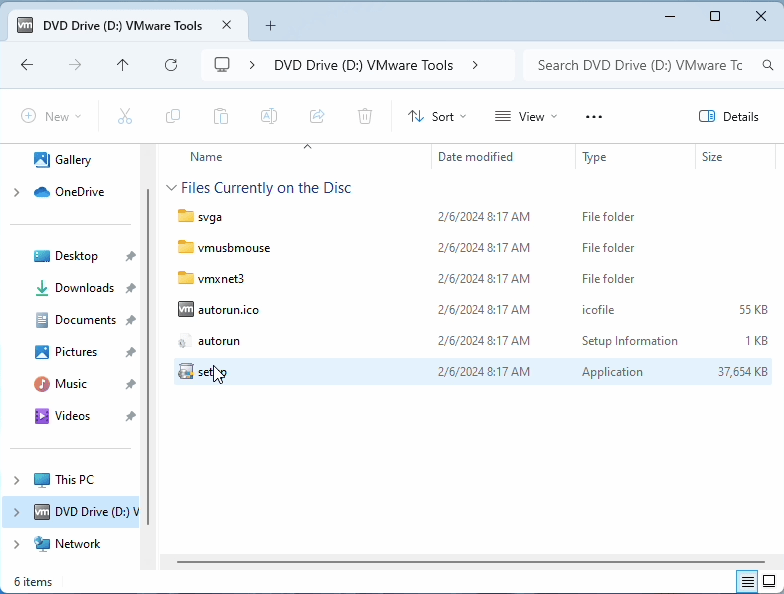
In my case it did not install automatically, so I had to goto file explorer.

And chose VMware tools cd drive.
Double click on the setup file to proceed with the installation.
Once installed you will get the finish screen, click on finish.
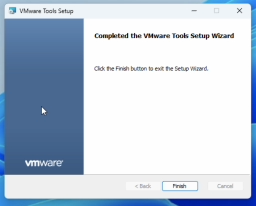
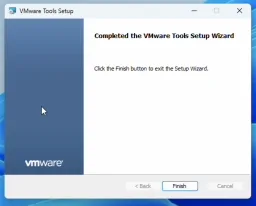
And you will be asked to reboot the machine, go ahead and reboot.
6. Adjust the CPU and memory(Optional).
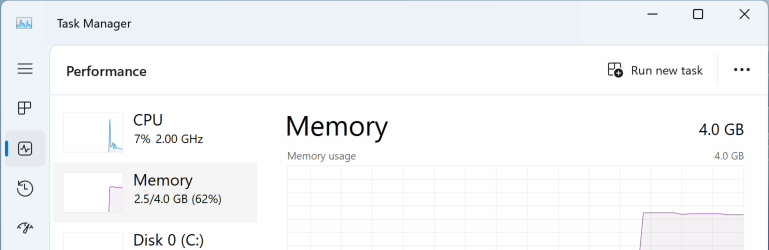
For some the default CPU and Memory configuration will be sufficient, however for thos who wanted to have more performance, you could increase the RAM and memory on the windows 11 virtual machine.
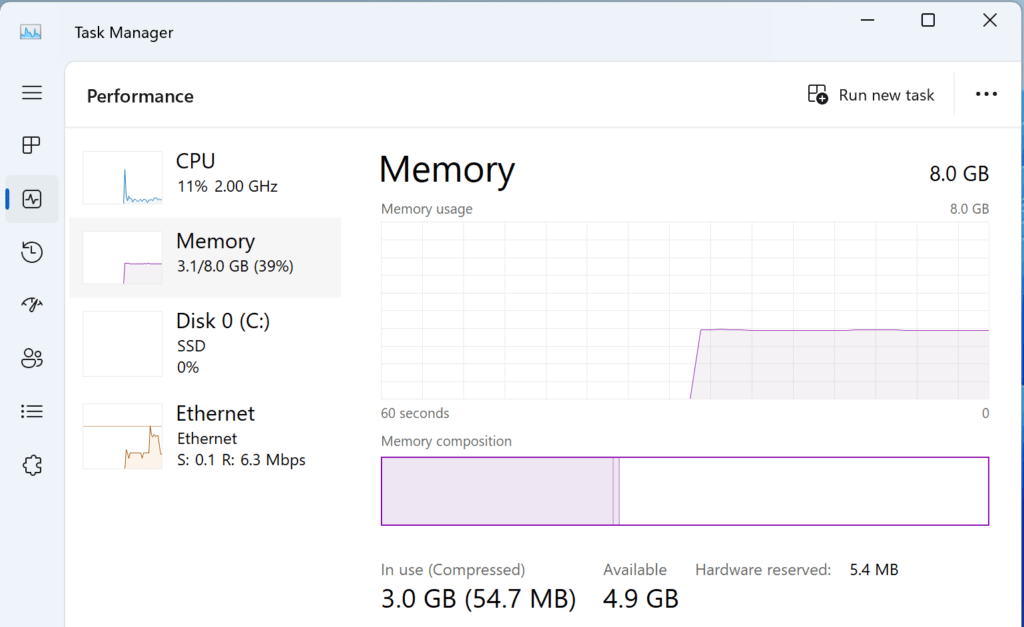
As you can see, more than half of the memory is already being used by the virtual machine, so I need to change it.
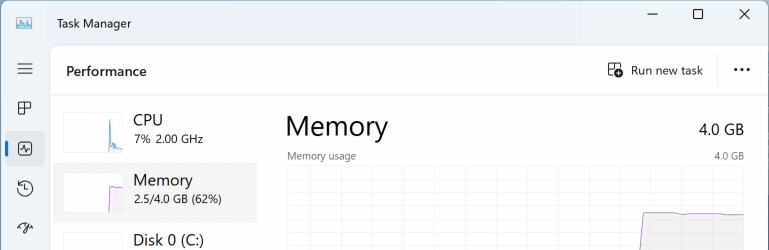
Shutdown the virtual machine.
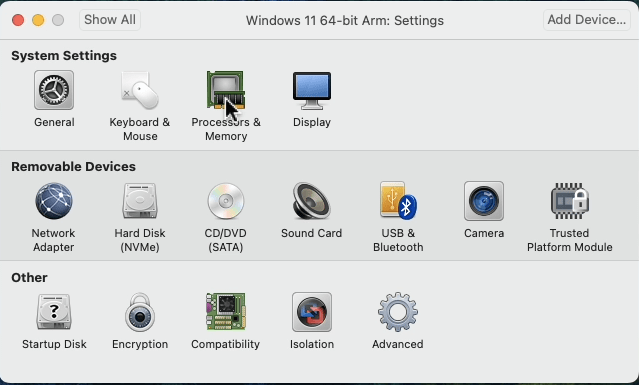
And click on the settings icon at the top.


Here chose Processors & memory.

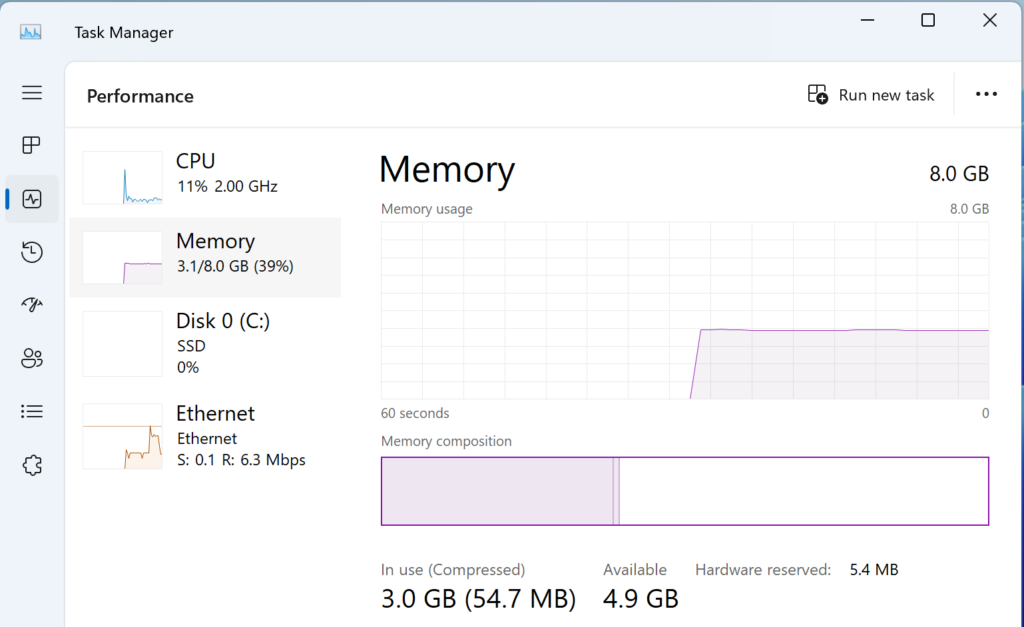
I am increasing the CPU to 4, and the memory to 8 Gigs.

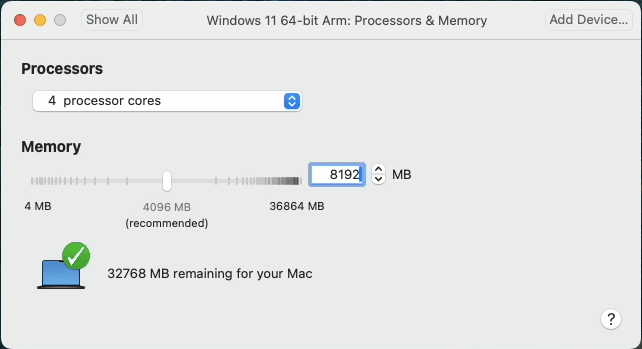
You may now power on the virtual machine, and you will see the memory and CPU are now increased to the one which we configured.
You can now enjoy Windows 11 on a Mac machine for free.
Janet
Thursday 8th of May 2025
This was extremely helpful for someone like me who is not technologically adept! Thankyou so much for the step-by-step breakdown. I've finally managed to run windows on my MacBook, and it was a painless process thanks to you!