
Quick Answer / CLI Summary: If you need the configuration immediately, use these commands in your MikroTik terminal:
/ip cloud set ddns-enabled=yes
/ip cloud print
(Read below for the full step-by-step guide and firewall security setup)
One of the main issues with consumer internet connections is that they rarely provide static IPs by default. If your ISP assigns dynamic IPs via DHCP (like mine does), your IP address changes every time you reboot the router. This breaks any remote access or port forwarding configurations you have set up.
While you could pay your ISP extra for a static IP or subscribe to a third-party DynDNS service (and pay a monthly fee), there is a much better, free solution built right into your hardware.
The Solution: MikroTik Cloud MikroTik routers offer a built-in DynDNS functionality called “Cloud.” This allows you to bypass third-party subscriptions entirely. Whenever your Public IP changes, the MikroTik automatically updates the record, allowing you to access your router using a permanent domain name.
What You Can Do with MikroTik DynDNS?
The DynDNS feature in MikroTik identifies the public IP configured on your internet-facing port and maps it to a custom FQDN (Fully Qualified Domain Name).
Note: If your MikroTik is behind a NAT (e.g., connected to an ISP modem), this feature may not work unless:
- You bridge the ISP modem to move the Public IP to the MikroTik, OR
- You enable DMZ/Port Forwarding on the ISP router pointing to the MikroTik.
I’ve created an extensive guide on troubleshooting router access over the public internet—check out that article here.
With MikroTik DynDNS enabled, you can do almost everything you would with a paid Static IP:
- Enable port forwarding to access LAN services.
- Configure WireGuard or IPsec VPNs.
- Access the MikroTik router remotely (WinBox/Web) over the internet.
⚠️ Important: By enabling these features, you are exposing your router to the internet. You must configure Firewall rules to restrict access (covered in Step 2 below).
Step 1: How to Enable DynDNS on MikroTik Router
Configuring the Dyndns service in MikroTik is pretty simple, you may login to the web GUI, or WinBox.
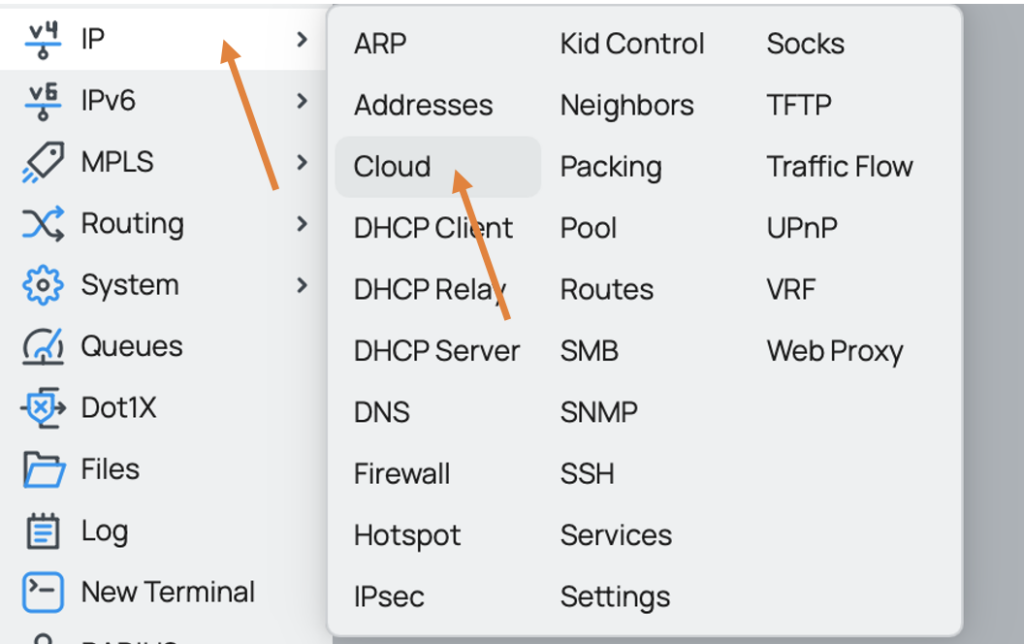
1. Login to your router and go to IP -> Cloud.
2. You will see the DynDNS configuration is disabled by default.
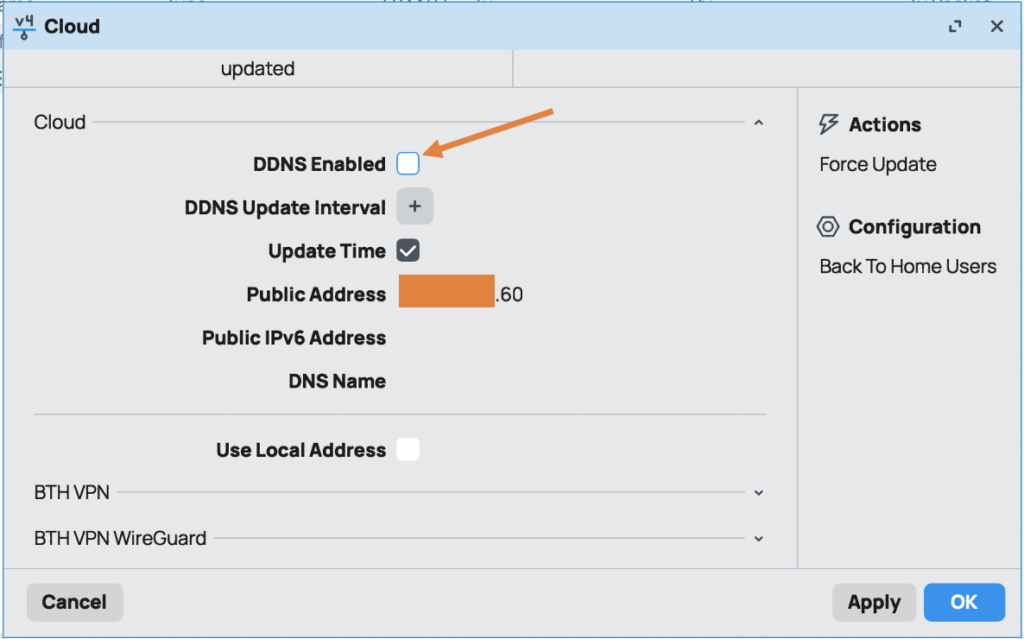
3. Check the DDNS Enabled option.
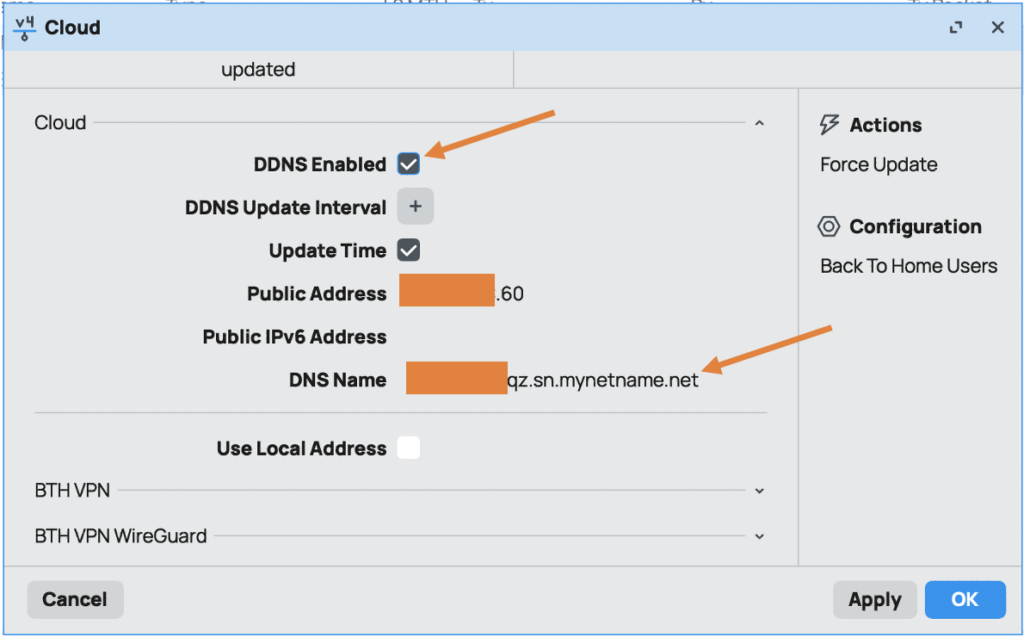
Click Apply. After a few seconds, the status will show “Updated” and your router will be assigned a custom DNS name (e.g., serialnumber.sn.mynetname.net).
Step 2: Accessing Your MikroTik Router Over the Internet (Securely)
Now that DynDNS is active, you need to ensure proper Firewall policies are in place.
1. Enable the Required Services
To access the router using WinBox (default port 8291) or Web (port 80):
- Navigate to IP -> Services.
- Verify that WinBox (port 8291) is enabled.
- If you plan to access the MikroTik using a web GUI, check that the www service is enabled, and note its port number (default: 80).
Note: By default, the following services are enabled:
- WinBox: Port 8291
- HTTP: Port 80
If you’ve customized these ports, ensure they match your configuration.


2. Configure Firewall Policies to Allow WAN Access.
You must create a firewall rule to allow traffic on the WAN interface. However, do not allow access from 0.0.0.0/0 (Any). This allows the entire internet to hack your router.
As the traffic will be ‘To’ traffic, not ‘through’ traffic you need to create ‘input’ chain rule instead.
create an input chain rule that only allows access from a Trusted IP (e.g., your office IP or a specific location).
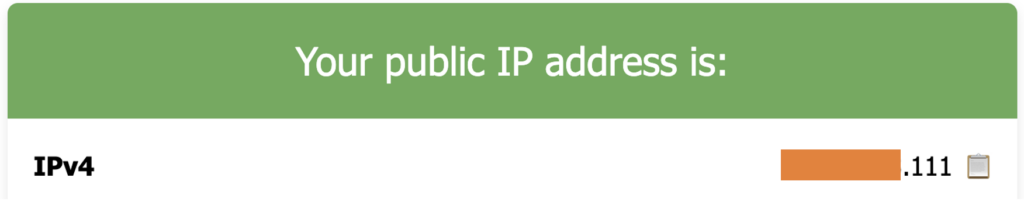
I have temporarily connected to another internet, and when I check the public IP here, as you can see, I got the IP x.x.x.111 , I will be allowing the WinBox access to only to this IP.
To Create the Firewall Policy.
• Navigate to IP -> Firewall.
• Create a new rule under the Filter Rules tab.
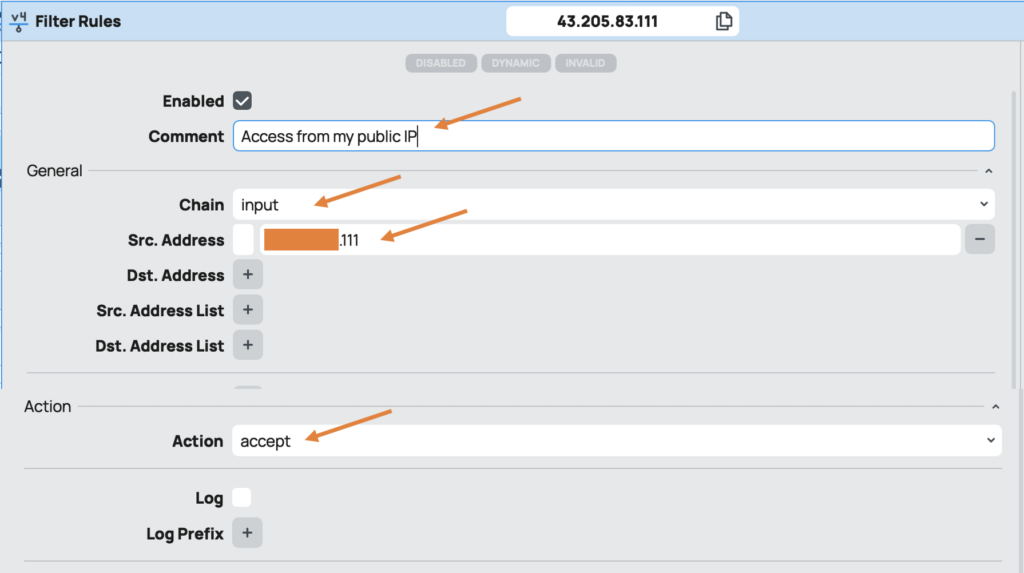
Firewall Rule Configuration:
• General:
• Comment: Add a comment to describe the rule (e.g., “Allow WinBox from x.x.x.111”).
• Chain: Select input.
• Src.Address: Enter the trusted public IP (x.x.x.111).
• Action:
• Choose accept.
• Click OK to save the rule.
Once the rule is added, it will appear in the list of firewall rules.
As you can see the rule is now added.

3. Test Access
Now, test the router’s accessibility using both WinBox and the web GUI:
1. Open WinBox and enter the DynDNS FQDN as the router’s address.
2. Provide the username and password.
3. You should be able to access the MikroTik router successfully.
Once you access the router, you can monitor active connections:
• Go to IP -> Firewall -> Connections.
• You will see an entry showing the source IP (x.x.x.111) and the destination IP (x.x.x.60), which is the MikroTik’s WAN-side IP.
As you can see, there is a traffic from my public IP to the mikrotik wan side IP on port 80 and 8291.
