I have seen some of my friends and colleagues who are struggling to get their GNS3 up and running with no issues at all. Sometime they call me and say, Saif can you please take a look, it is not working!
The problem with GNS3 is that after you get everything working and the next day when you come back some error pops up.
It’s so annoying and you are again back to square one trying to figure everything out from the scratch.
Best way to setup Gns3
In this article, I am going to provide the best methods that I follow to get my gns3 up and running.
Trust me the method I am showing here works so great for me for a couple of years now. so if you are like me don’t want to mess around much of the gns3 configuration and focus on your lab then this guide is for you.
also let me know in the comments section below how it turned out for you.
Read also,
How to Install Palo Alto in GNS3?
Gns3 Common Errors And How To Fix Them.?
How to Integrate VMware, VirtualBox, Qemu Vm’s in GNS3 ?
How To Install Pfsense Firewall On GNS3?
How To Install Checkpoint Firewall In Gns3?
How To Connect GNS3 Devices To The Local Machine?
Easy way to connect GNS3 to the internet on Windows host.
How to configure gns3 step by step?
There are two ways I use GNS3 for my lab purpose. The first common way is to use the GNS3 with VMware workstation. But if you would like to get a good performance then you should use the GNS3 on a remote server.
1. Setup a Gns3 with VMware
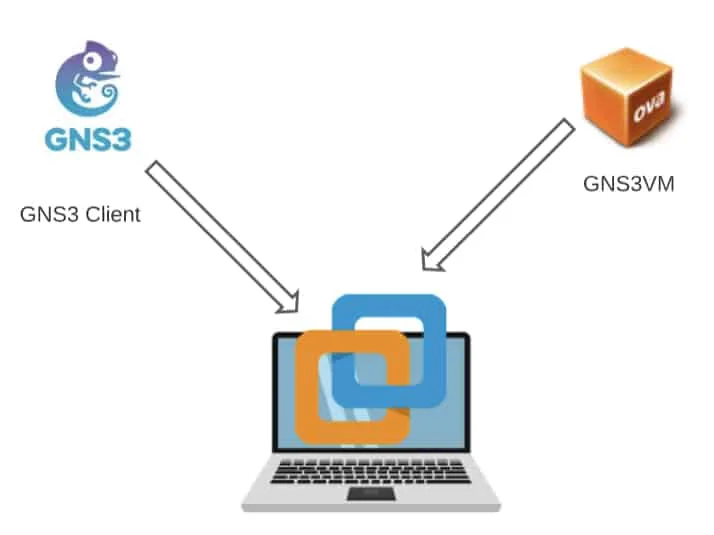
This is the very common method of installing the GNS3 software. First you install and configure the GNS3 client on the machine. And then you configure the GNS3VM in the VMware workstation.
In this method both the GNS3 client and the VM runs on the same machine.
Prerequisite
- You need laptop with good configuration.
- VMware workstation pro.
After you have the prerequisite ready, now you can go ahead and install the GNS3 services using VMware workstation
Table of contents
- Install the Gns3 software
- Install the VMware workstation pro
- Download and import the GNS3VM to the workstation
- Create an interface called vmnet2 from GNS3
- Allow internet sharing to the vmnet2
- Change the host binding to the VMnet2 IP address
- Connect the GNS3VM to the VMnet2 interface
- Connect GNS3VM to the GNS3 client.
- Configure the IP address for the GNS3VM
- GNS3 Verification.
Step 1. Install the Gns3 software
The first step of the method is of course to install the gns3 software, you may download it from here and install the gns3 software on your windows machine.
Step 2. Install the VMware workstation pro
You would have to also install VMware workstation pro to emulate the gns3vm in your machine. I know there are multiple hyper-visors are supported but I have been using Vmware workstation pro and it works great.
You can download the VMware workstation pro here.
Step 3. Download and import the GNS3VM to the the workstation.
In the same location that you have downloaded the gns3 from, you will have to also download the gns3 vm as well.
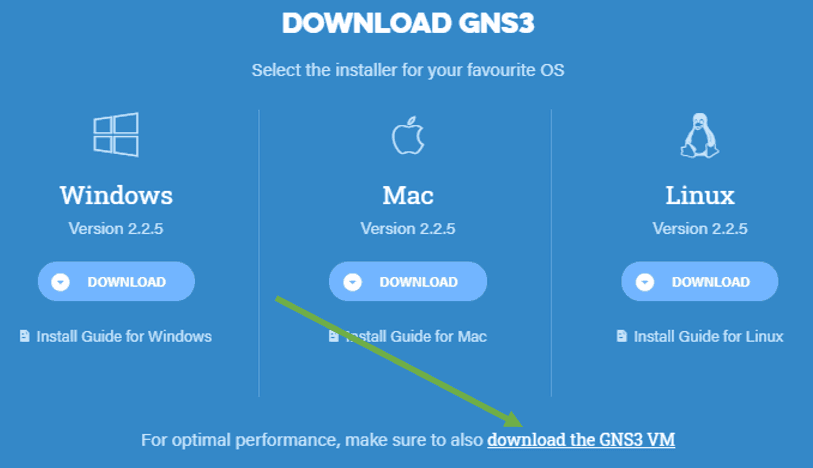
Once the VM is downloaded you may extract the file and you would get an OVA file out of it.
To import the VM to the Vmware workstation double click on the OVA file and click on import on the pop-up window. It may take a couple of minutes to completely import the VM.
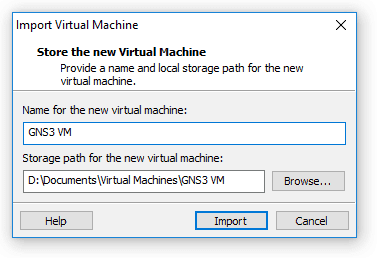
Step 4. Create an interface called vmnet2 from GNS3.
Note: You may skip this section if you already have VMnet2 installed in your system.
Open gns3 client. Since this you just installed the gns3 client you may get some setup wizard popup, just close it.
Click on Edit and preferences. In the gns3 preferences windows click on VMware and Advance local settings.
Under managed Vmnet interfaces select vmnet2 on both the field and click on configure
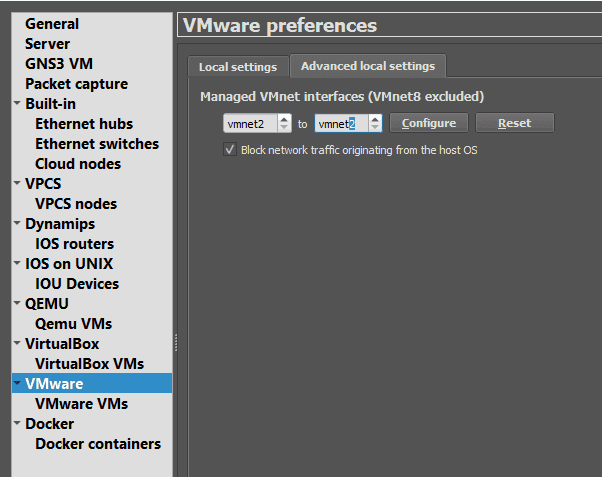
This would create a VMnet2 interface on your windows host.
Step 5. Allow internet sharing to the vmnet2.
Goto network adapter setting by typing ncpa.cpl under Run prompt in windows
Right-click on the network adapter that you are currently using and click on properties, I am using a wired connection.

Note: If you are using wireless you may righ click on the adapter which says Wi-Fi
In the properties, windows click on the Sharing tab and check the first option to share the network and select the VMnet2 interface which you have just created using gns3 client. Click on OK.

Step 6. Change the host binding to the VMnet2 IP address.
By default when the network sharing is enabled the VMnet2 interface would get an IP address from the private network range 192168.137.0/24.
Open the command prompt and verify the VMnet2 IP address by typing ipconfig

As you can see the IP address of Vmnet2 is 192.168.137.1
In the GNS3 preferences click on the server and on the Main server tab click on Host binding address, and change it from 127.0.0.1 to 192.168.137.1

Click on Apply and close it.
Step 7. Connect the GNS3VM to the VMnet2 interface.
Open the VMWare workstation and right-click on the GNS3 VM that you imported and click on settings.
You can see two adapters in the gns3, you really don’t need to use two all the time, so let’s remove the second one.
In the Network, adapter choose Custom and VMnet2 as the virtual adapter.

- And click on Ok.
Step 8. Connect-GNS3VM-to-the-GNS3-client
In the gns3 client preferences window click on GNS3VM and check the option enable the GNS3 VM.
Select the hypervisor as VMware workstation/Player

- Click on Apply
Step 9. Configure the IP address for the GNS3VM.
Though VMnet 2 would provide the IP address automatically via DHCP to the gns3, I prefer to use static configuration.
Open VMware workstation again and power on the gns3vm, by default you may have a DHCP IP address. Hit enter to click on OK.
Come to the network field and hit enter to configure the IP address as below.
IP=192.168.137.10
Gateway= 192.168.137.1
Note: You can configure any IP address you want from the range as long as it is from the range 192.168.137.0/24.
Since the GNS3vm is based out of Ubuntu it uses netplan to configure the IP address. Change the Value as below.

Save the configuration and it would restart the GNS3vm and once its back it would have the IP address that you have defined.
Step 10. GNS3 Verification.
That’s it you are all set now. Close the VMware workstation and the GNS3 client.
Reopen the Gns3 client again.
After a Couple of seconds, Gns3 would automatically start the Gns3VM if you have done the all the above steps correctly.
Note: This may not work well if there is a firewall or Antivirus program which is blocking the connection between the Gns3 client and the Gns3VM. You may check this article if you ever face such issues.
Once everything is ready you can see the local PC and the Gns3 VM resources in green shows on the right screen under the servers summary.

Now you have successfully configured GNS3 on your machine with VMware workstation pro.
next let’s take a look at the next step
2. Gns3 on a remote server or bare metal server
I have been using gns3 with Vmware for long time, and I still do use it at times, but the best performance that I got when I installed the Gns3 service on a remote server kinda like gns3 bare-metal installation.
This is the second and best method as it provide good performance while working on the lab.
Prerequisite;
- You need to have Machine with a good configuration to install the GNS3 server.
- Another machine to install the GNS3 client.
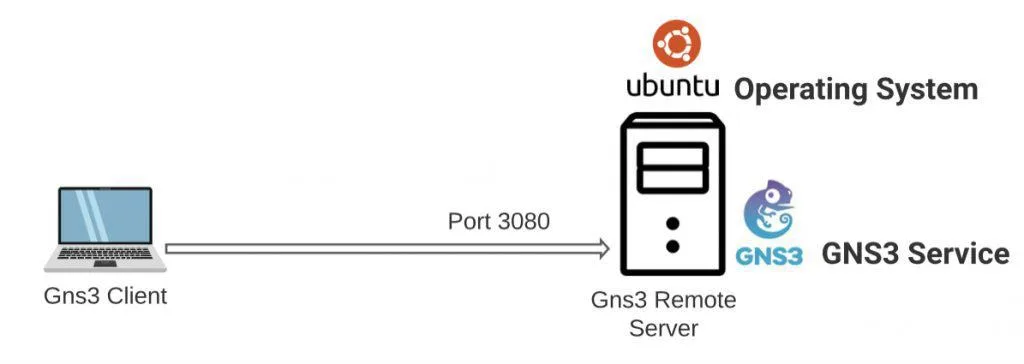
How to setup gns3 remote server?
To install gns3 in a remote server or a bare-metal host there are few things to keep in mind.
First you need to decide how long should you be using the lab.
If it’s for a temporary purpose you could use some bare-metal service provider cloud and install gns3 service in it. Which will become more expensive.
In my case, I wanted something for the long term, then I started to think about investing for a server or PC build. But the question came to my mind again, I want something portable too and not so expensive either, that way I can carry around whenever I want to and practice my lab.
Fortunately, my wife was looking to buy a laptop too 🙂
I already had a laptop which is an ultrabook, I then decided to buy a laptop with good configuration, not an ultrabook, but something that is beefier in terms of CPU and Memory.
Since I already know about gns3 hardware requirements.
Finally, I bought this Asus rog gaming laptop, and the investment decision was good.
When I bought it, it had 16GB of ram and an i7 CPU with 12 cores (6 cores and 6 threads), but later I bought an extra 16GB RAM to double the Memory, so after the upgrade, I got 32Gig of RAM total.
So in this second installation, I am going to show you how I have set up a gns3 bare-metal set up on my Linux bare metal machine step by step.
Though I am using an Asus rog laptop, the steps performed here would work with servers or any other PC’s.
I personally did test this steps with a Hpe DL360 servers as well.
This should work, As long as you can install the Ubuntu machine and the GNS3 services in it.
How to install gns3 on remote server step by step?
- Dual boot windows machine to Ubuntu.
- Install Gns3 services on Ubuntu.
- Configure the GNS3 client to talk to the remote server.
Step1. Dual boot windows machine to Ubuntu.
Note : You may skip this step, if you are planning to use only the Ubuntu operating system in the server.
The Asus laptop came with a built-in windows 10 home operating system, so I didn’t want to wipe that off and install an Ubuntu in it.
So I decided to install Ubuntu along with windows 10. Which I covered here.
The only issue with the dual boot is that you can only use one operating system at a time. Either Windows or Ubuntu, I also made sure to install Ubuntu desktop with 250GB of storage.
Step2. Install Gns3 services on Ubuntu.
The next step was to configure a static IP on the Ubuntu box, so it will never change. You can follow the steps here to set the static IP on Ubuntu.
I configured 192.168.0.100 as the static IP on Ubuntu.
Then installed GNS3 services on Ubuntu.
All you got to do is run the below commands.
cd /tmp
curl https://raw.githubusercontent.com/GNS3/gns3-server/master/scripts/remote-install.sh > gns3-remote-install.sh
bash gns3-remote-install.sh --with-iou --with-i386-repository
After the installation is done, you can check the gns3 services by typing service gns3 status, you should be able to see that the gns3 service is working fine.
Step3. Configure the GNS3 client to talk to the remote server.
next, you have to point your GNS3 client on your laptop to the gns3 server which is on the Asus Rog laptop.
1. Open GNS3
2. Click on Edit and then preferences.
3. Click on Server, where you check the option which says Enable local server.
This would allow the GNS3 client to talk to the Local Server.
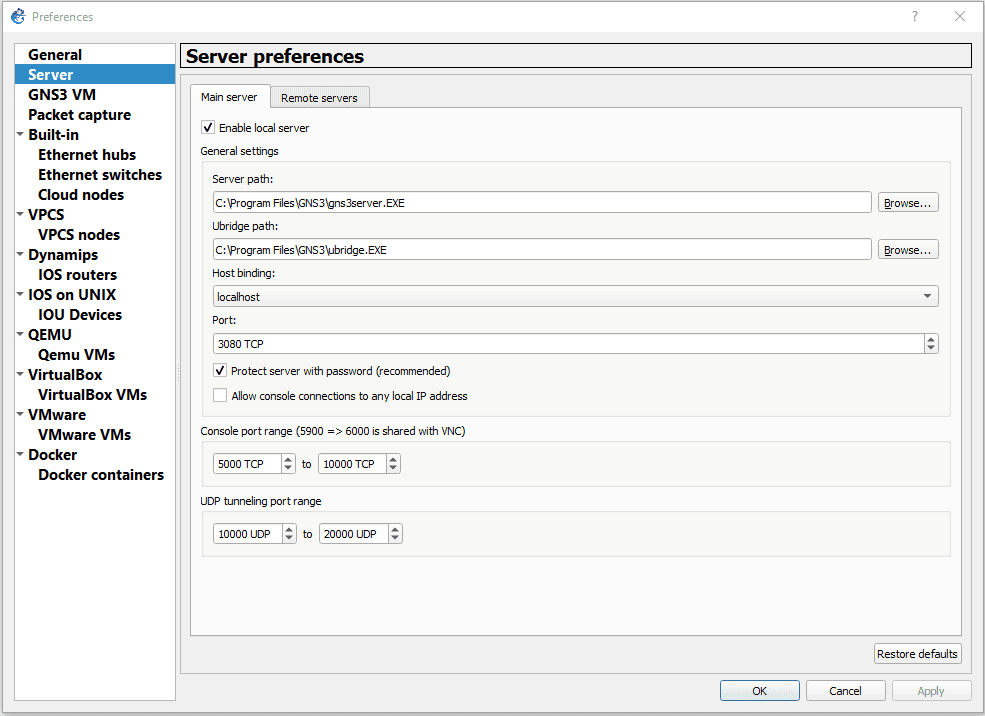
4. You can click on the Remote servers tab now.
here you may click on Add, a new window would pop up you can add the gns3 server here, click on Ok.
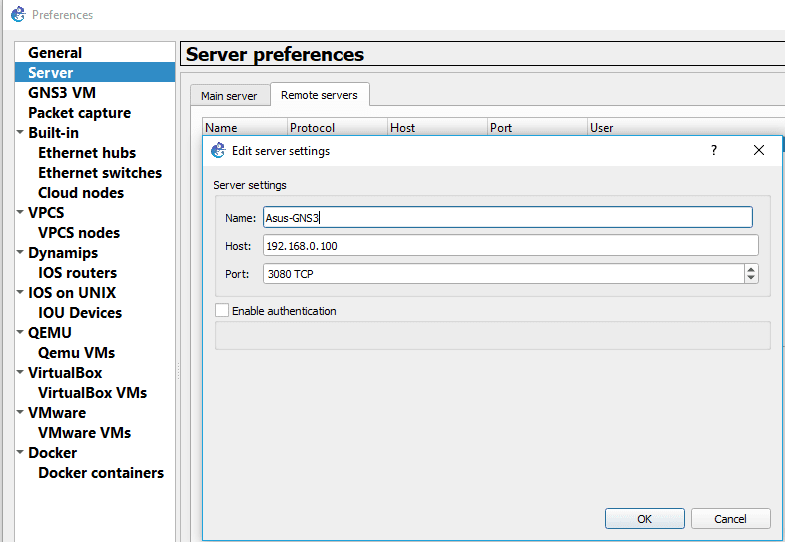
As you can see I am now added my Asus laptop which is acting as gns3 baremetal host to the remote servers.
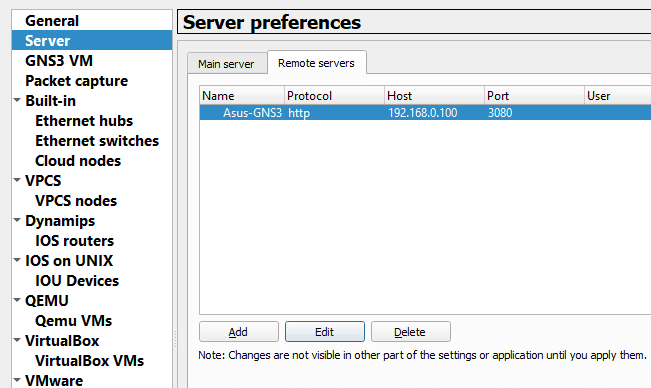
The best part of enabling the local server and the remote server is that you can use the resources from both machines at the same time. Again depends on where you run the devices.
One of the use case being, use the gns3 remote server for running the devices, and for the internet access you could use your local machine.

