You wanted to work with firewall, mainly the checkpoint firewalls, but you don’t know where to begin with and no prior experience with firewalls either, then you are in the right place.
Even if you have experience with the firewall but just wanted to spin up the lab in GNS3, that’s fine too.
In this blog, I will cover how you can install and configure the checkpoint firewall step by step from the beginning.
Don’t forget to leave the comments below if you find something isn’t working or any further questions about this particular lab. So let’s get to it.
Read also,
How to Install Palo Alto in GNS3?
Gns3 Common Errors And How To Fix Them.?
How to Integrate VMware, VirtualBox, Qemu Vm’s in GNS3 ?
How I have setup my GNS3 | 10 Easy steps.
How To Install Pfsense Firewall On GNS3?
How To Connect GNS3 Devices To The Local Machine?
Easy way to connect GNS3 to the internet on Windows host.
What is the Checkpoint firewall architecture?
In the Paloalto firewall, you may know that you can manage all the firewalls using the Panorama device. Even in Checkpoint, we use the same method but here it is called Checkpoint management server.
So let’s begin by discussing the overview of the checkpoint firewalls.
Below are the components that you will be working with when you deploy and configure the Checkpoint firewall.
Smart console.
You can think of it as a management plane to modify the firewall configurations and policies. This Smart console again connects to the management server.
Management server.
All the actual policies and configurations would be stored in the management server. When you open the smart console, you access the checkpoint management appliance with it.
Security Gateway.
The security gateway is the checkpoint firewall, and all the firewalls are again connected to the management server. And when you open the management server via smart console, you should be able to see all the security gateways and the management servers inside it.

The protocol used between Checkpoint security gateway and the management server communication is called Secure Internal Communication (SIC) protocol.
We will be configuring them when we deploy the firewall.
You can have both the management server and the security gateway in the same device as well. And if you are deploying it separately, then that’s called distributed deployment.
The requirement for this lab.
- You should have basic network knowledge.
- A GNS3 software configured with either a remote server or VMware workstation. I am using GNS3 with a remote server and I recommend the same method for everyone as well. And it works great.
- Checkpoint Gaia software download here – The best part about the checkpoint image is that it provides a trial license for 15 days, and you can practice most of its features with it.
- Smart console – We will install this during the lab.
- Download empty100GB.qcow2 file by clicking here, you need this additional disk along with the checkpoint image.
How to configure a Checkpoint Firewall in Gns3?
1. Install Checkpoint image in GNS3.
2. Install Checkpoint management server.
3. Configure the management server network.
4. Access the Checkpoint management server web GUI.
5. Configuration of checkpoint manager.
6. Installation of Checkpoint Security Gateway (Firewall)
7. Security gateway configuration.
8. Installation of Checkpoint Smart Console.
9. Add the security gateway to the smart console.
10. Connect checkpoint firewall to the internet.
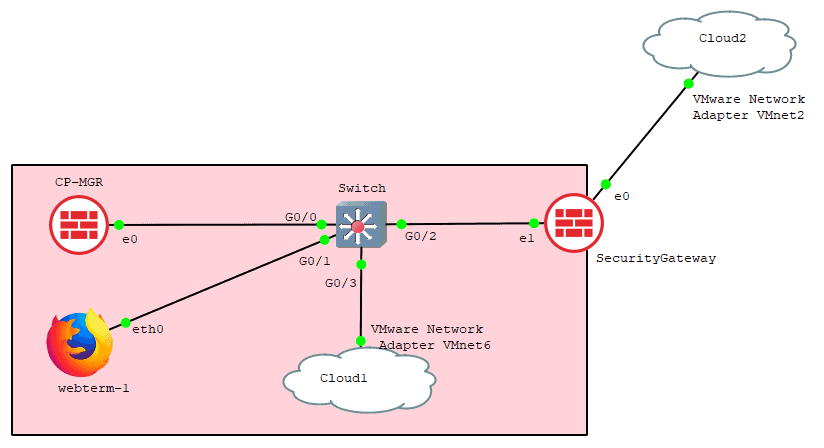
We will be installing a checkpoint management server, a security gateway, and a smart console as well. Also, connect the security gateway to the internet. And we are doing all of them in GNS3.
Step 1. Install Checkpoint image in GNS3.
The first step of the lab is to install the Checkpoint Gaia image in GNS3. You have to do this installation only one time. After this, if you plan to build a lab with the checkpoint firewall, you don’t have to re-install it again.
On the security devices in gns3, click on New template.
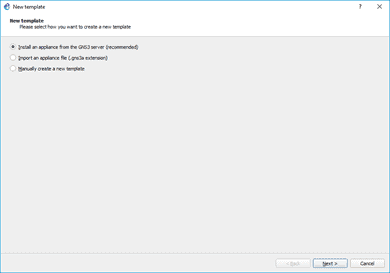
In the new template window, select Install an appliance from the GNS3 server and click on next.
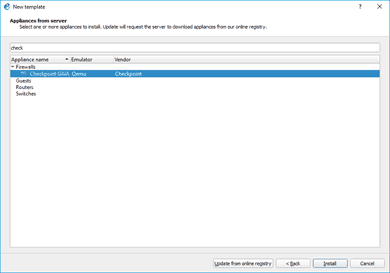
You may type Checkpoint and select the Checkpoint Gaia firewall from the list and then click on install.
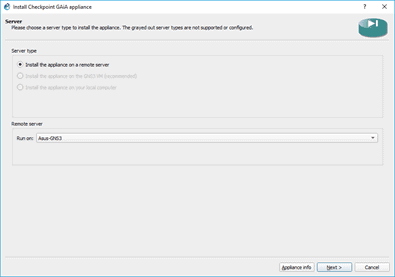
You may be using the gns3 either with GNS3vm or remote server, so based on your setup, choose the option.
As you know, I choose the first option as I have a remote gns3 server setup, so select install the appliance on a remote server and click on Next.
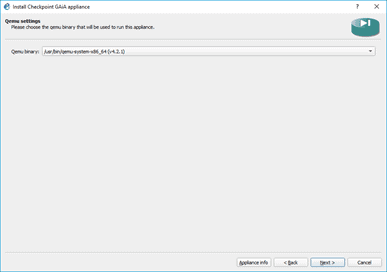
You don’t have to change anything on the qemu binaray, leave the default, and click Next.
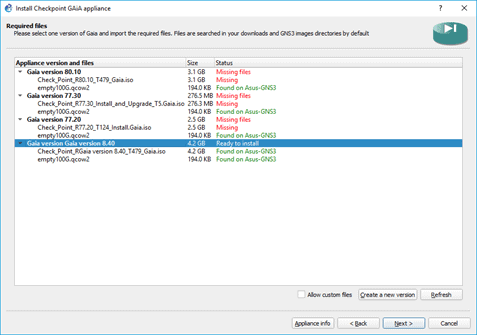
You would get a prompt that shows available checkpoint versions.
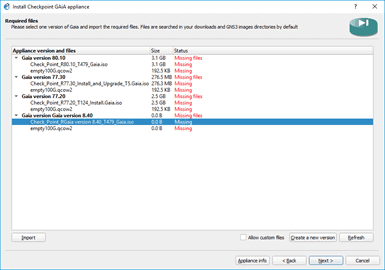
I am going to install Checkpoint version r80.40. However, I don’t see that option; hence I clicked on Allow custom version and Create a new version.
In the new version I put, 80.40.
After that, click on Import and browse for the Checkpoint image.
It will take some time to upload as the size of the file is about 4.2GB.
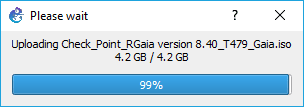
After the upload finished, you may click on next.
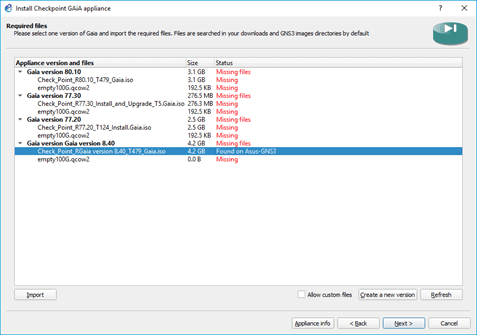
You already downloaded another file called empty100G.qcow2 file. Import that as well.
And you are ready to install the appliance, select the Checkpoint gaia version 8.40 and then click on next to install the checkpoint firewall to the gns3.
You should now see the confirmation screen, which says the firewall has been installed successfully.
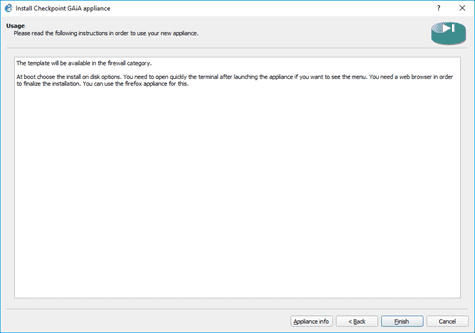
And you should be able to see it under security devices.
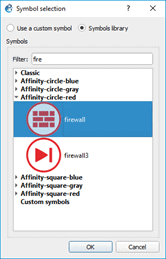
I like to change the symbol, so I did that by the right-clicking and configured the template. It’s not necessary, though.
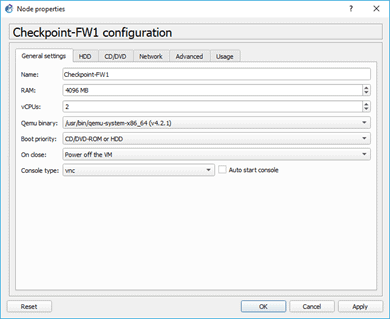
By default, the Checkpoint Gaia image would add the console as Telnet. You should change that to VNC, so right-click on the firewall, and choose the console type as VNC from the list. Then click on OK.
Note: Using Telnet as a console, you may get into some issues, so it is advisable to use VNC instead.
Alright, we have now installed the checkpoint firewall image in GNS3. Let’s go ahead and start the rest of the configurations.
Step 2. Install Checkpoint management server.
You manage the checkpoint firewall, known as a security gateway, through the checkpoint management server. The best part about that is you don’t need to use different software images for that.
The same checkpoint firewall image can be configured to use as a security gateway and the management server.
So let’s go ahead and install the Checkpoint firewall management server now.
Drag and drop the Checkpoint software image to the topology and right click and start it. The firewall will now be starting.
Double click on it to open the console.
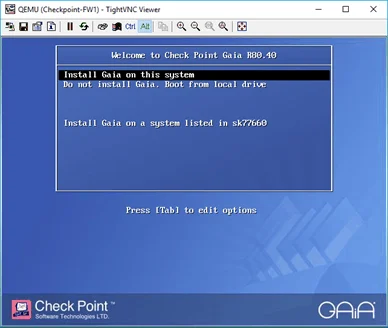
You will get a prompt with the Checkpoint Gaia installation wizard, choose Install Gaia on this system, and hit enter.
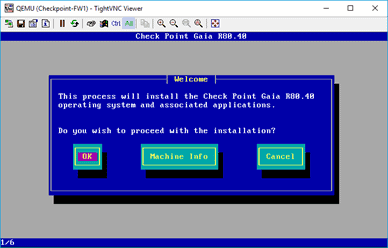
Click on OK on the next screen as well.
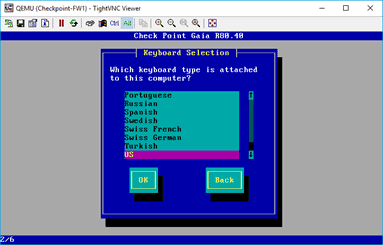
Just like any other operating system, you may now choose the language that you wanted to use. And click on, OK.
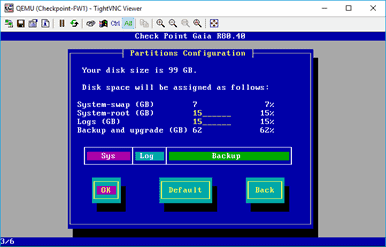
Next, you will have to configure the hard disk partition for the firewall. I am leaving the defaults and click on OK.
Next, you have to set up a password for your device, enter the password, confirm the same password, and click OK.
Note: The default username is admin, and you need to remember the password to log in to the system again later using the web GUI.
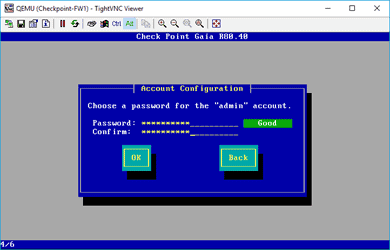
Step 3. Configure management server network.
If you look into the topology, I connect my Gaia management server into the switch on the ethernet port 0, hence select that and click on OK. And that’s the only interface which is UP at the moment.
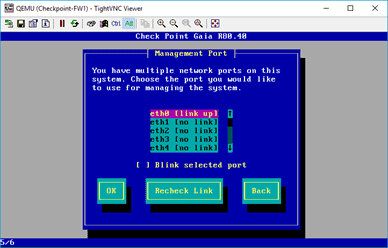
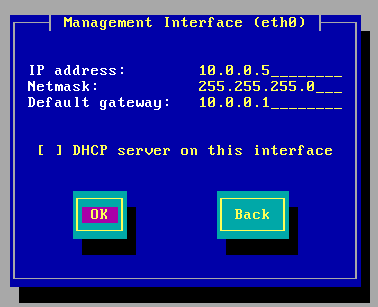
You must configure the network now. Here I am using the network 10.0.0.5/24; use the below values and then click on OK.
Configure the network as below.
IP address 10.0.0.5
Subnet mask is 255.255.255.0
Gateway 10.0.0.1
On the next scree, you can click on OK to continue installation.
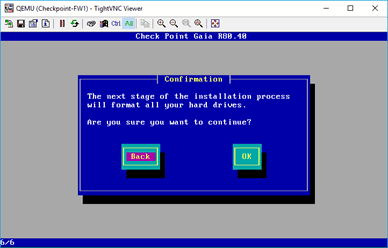
Note: If you are not able to click on OK, or at the point, the VNC screen is not responding, you may close the window and reopen it.
As you can see, the installation has been started for the manager.
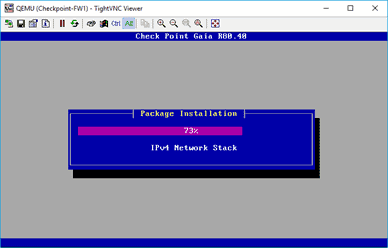
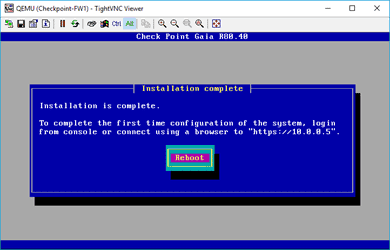
On completion of the installation, you have to reboot the device so hit on Reboot.
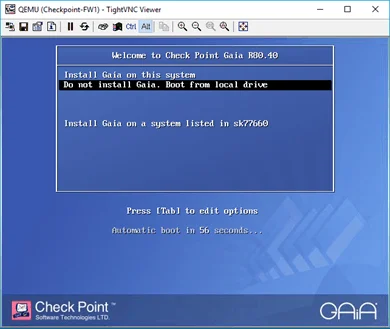
After the Reboot, you should be able to see the same screen you saw earlier, but you have to choose a different option this time. Do not install Gaia on this system, boot from local drive.
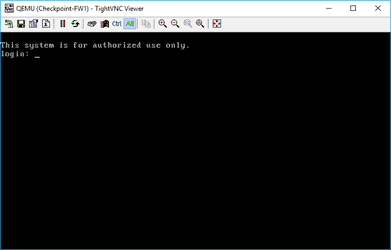
You should now get a login prompt.
Enter the username as admin and the password you have set up during the installation.
Step 4. Access the Checkpoint management server web GUI.
There are two ways you can access the web GUI of the checkpoint firewall in GNS3, either using GNS3 built-in end-user firefox based client ‘webterm’ or using the local machine itself by sharing the network.
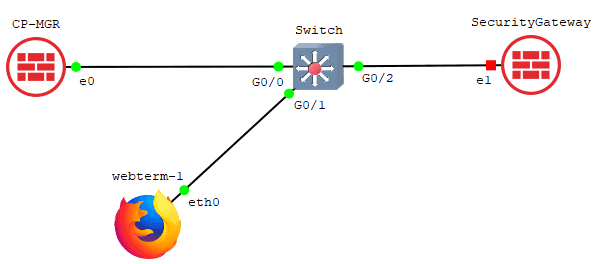
Add a switch to the topology and connect to the firewall interface eth0, I am using cisco virl switch for the purpose.
And connect Webterm client to the switch.
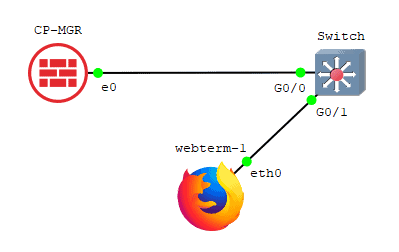
Below is the Configuration for the webterm client.
Connect the webterm client to the switch and configure the IP address as 10.1.1.15
#
# This is a sample network config uncomment lines to configure the network
#
# Static config for eth0
auto eth0
iface eth0 inet static
address 10.0.0.10
netmask 255.255.255.0
gateway 10.0.0.1
up echo nameserver 192.168.0.1 > /etc/resolv.conf
# DHCP config for eth0
# auto eth0
# iface eth0 inet dhcp
You can add the above Configuration by right clicking and click on webterm Configuration.
Under Configuration click on Edit on the network configuration.
And start the webterm client.
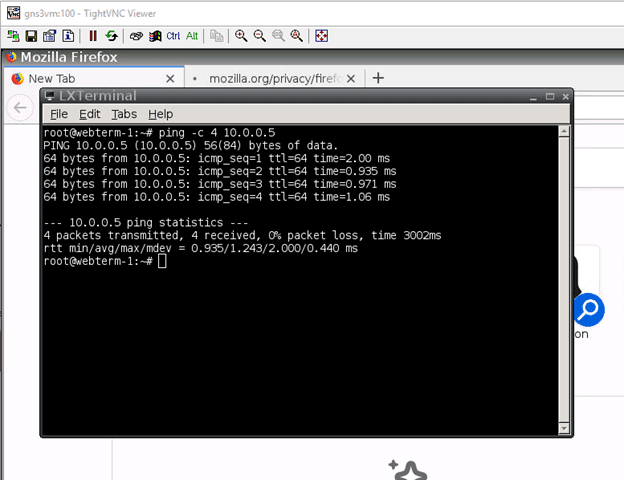
Once the webterm back online, and open terminal.
In the terminal, try to ping the checkpoint management server IP 10.2.2.5. If you can ping the IP address, then a good job
. You just configured everything correctly.
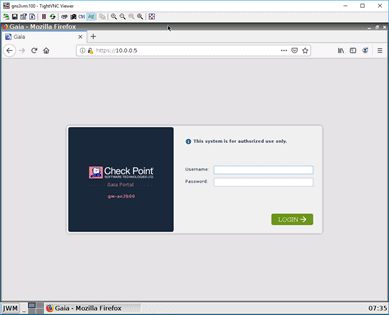
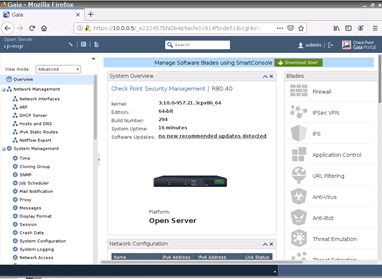
On the firefox browser, try to access the manager web GUI by typing https://10.0.0.5/ accept the security risk and click on Continue.
Accept the security waring, and on the login screen, enter the same credentials you have used to log in to the CLI and click on Login.
Step 5. Configuration of checkpoint manager.
You just installed the checkpoint manager on the GNS3, but you still have to configure it as the checkpoint manager via web GUI.
On the Checkpoint first time configuration wizard, click on Next.
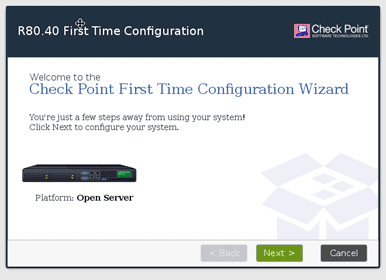
We need to choose to continue with R80.04 Configuration and click on Next.
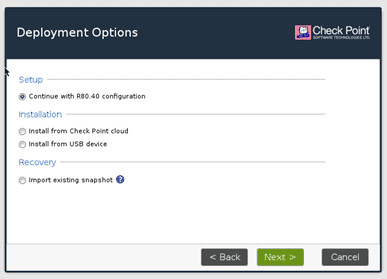
On the next screen, you should be able to see the network that you had set up initially. I am not making any changes here, hence click on next.
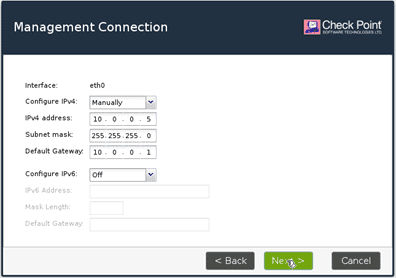
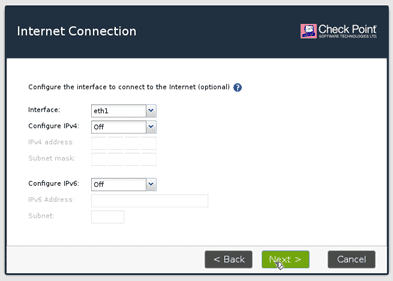
You will also get an option to chose the secondary interface since I don’t have anything configured. I will leave it as IPv4 off and then click on Next.
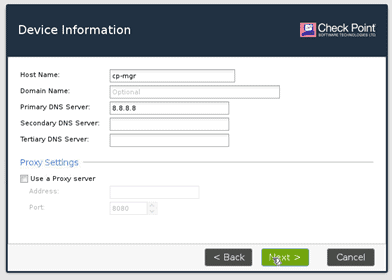
Configure the Hostname and the DNS server.
I am configuring the Hostname as cp-mgr and the DNS as google public DNS though it won’t be reachable at the moment. I am just going to use that and click on next.
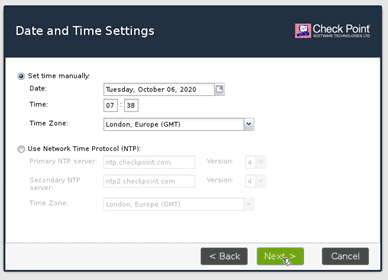
Set the date and time.
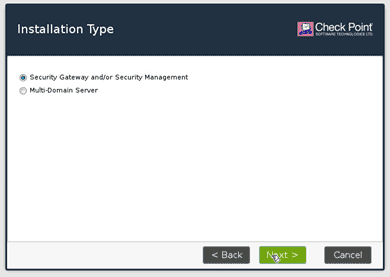
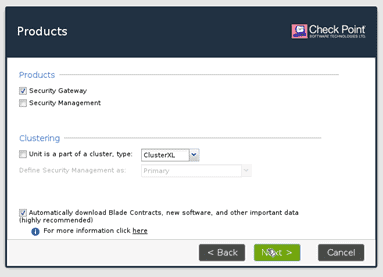
Now you have to decide whether you wanted to install it as Checkpoint gateway manager or as a firewall, so select security gateway or security management. And click on next.
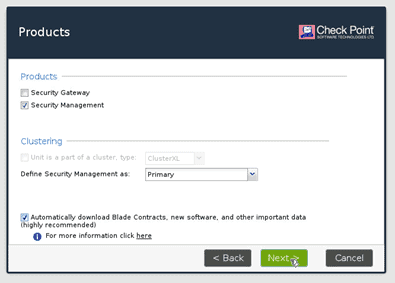
You now have to decide if you wanted to install Security gateway or Security management. Choose the security management and then click on next.
If you choose both, the device will act as both checkpoint security gateway as well as security management.
Usually, smaller enterprises would follow this method.
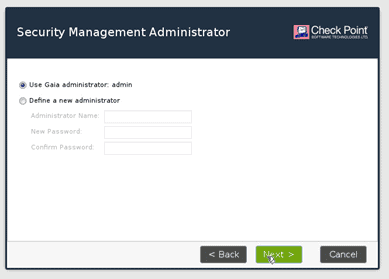
You will have to set up an admin credential here. You can either use the same credentials or a new one. I am just going to use the existing credentials. Then click on Next.
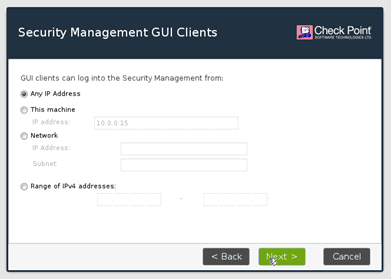
You can also allow ssh based on the source IP. Since this is the lab, I am just leaving the default one, that is Any address and click on Next.
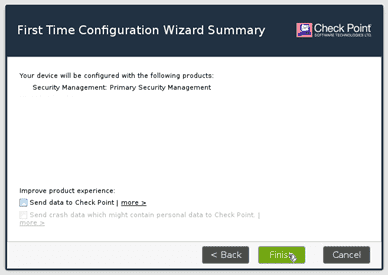
On the summary screen, click on Finish.
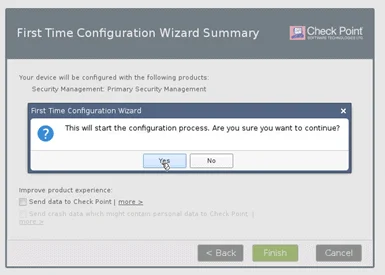
On the First time configuration wizard prompt, Click yes.
It should start the installation of the checkpoint Gaia software manager on the system.
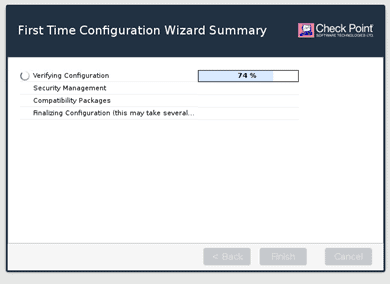
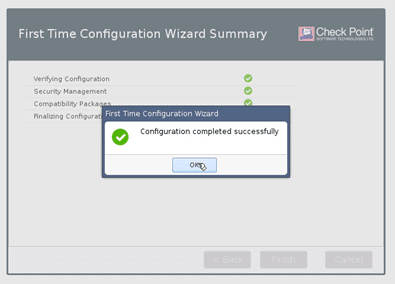
After the installation is complete, you will be presented with the Configuration completed successfully screen.
Next, let’s go ahead and install the security gateway.
Step 6. Installation of Checkpoint Security Gateway (Firewall)
Drag and drop another checkpoint r80.40 image to the topology, and connect to the switch as below.
Let’s start the Security gateway.
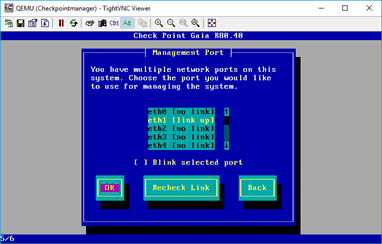
And just like how you have installed the firewall manager, you may follow the same steps for the security gateway as well, but while selecting the interface, you need to make sure to choose the interface as ethernet1 and click on OK.
Since the security gateway and the manager are on the same network, I will configure the security gateway IP address as 10.0.0.1 and click on OK.
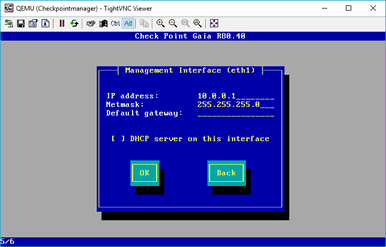
You should see the screen, which says the installation is complete, and you may click on Reboot now.
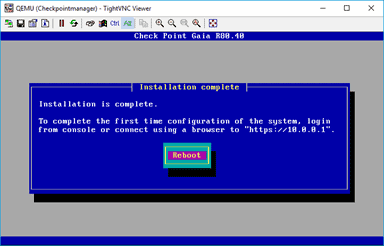
After the installation of services, you should get the same screen again, where you have to choose between install or boot from local drive, hence choose boot from local drive and click on OK.
Similar to how you have accessed the web GUI of the security management console, you can access the security gateway web GUI with the IP address https://10.0.0.1 as well.
Note: Though I call the current device as a security gateway, it is still not a security gateway as we have not installed the firewall services in it.
Step 7. Security gateway configuration.
After you get the checkpoint login screen, you may enter the credentials you have set up earlier and click on Login.
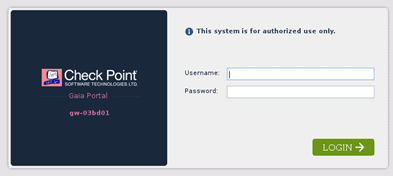
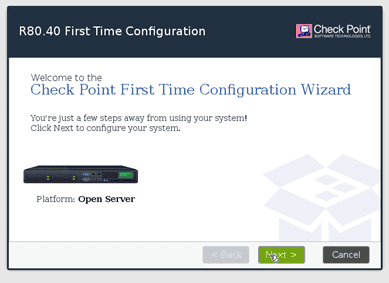
Similar to the management server, the the first time configuration wizard now appear.
Click on next here.
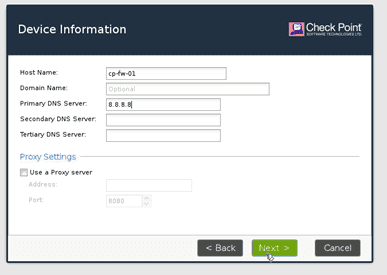
When you choose the Hostname, you may enter it as cp-fw-01 and the DNS as 8.8.8.8 and click on Next.
Select security gateway or security management and click on next.
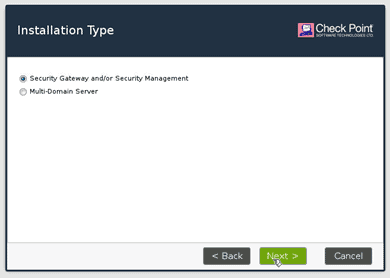
Choose the security gateway this time, which means I am going to install only the firewall services in it, and click on next.
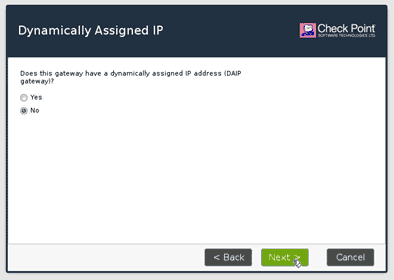
It is also asking whether it uses the dynamically assigned IP address? since I am not using it, I will select no.
Remember I talked about SIC protocol initially ?
The connection protocol between the management server and the security gateway.
We are now setting up the SIC communication. You need to enter the password for the SIC connection to happen.
You will have to enter an activation key, confirm the Same activation key again, and click on next.
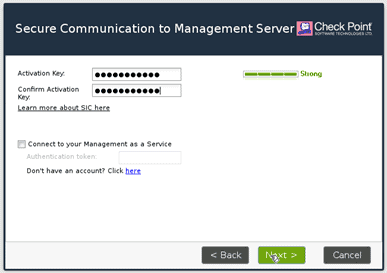
You get a message now, that the security gateway has installed on this device.
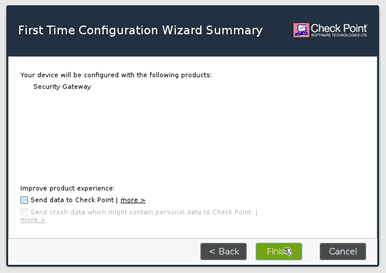
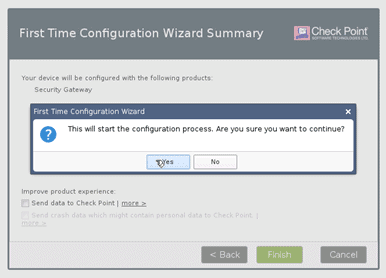
When you click on Finish, you will be prompted with another dialogue box. Click on Yes
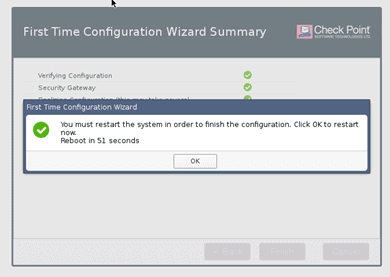
The security gateway services installation will now begin.
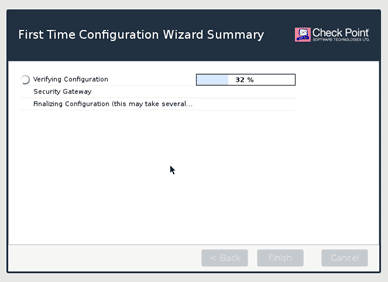
After the installation, you may proceed to reboot the system.
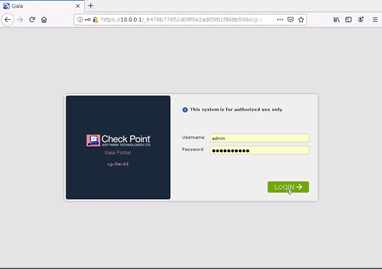
After the security gateway reboot, you will now be presented with the login screen of the firewall again.
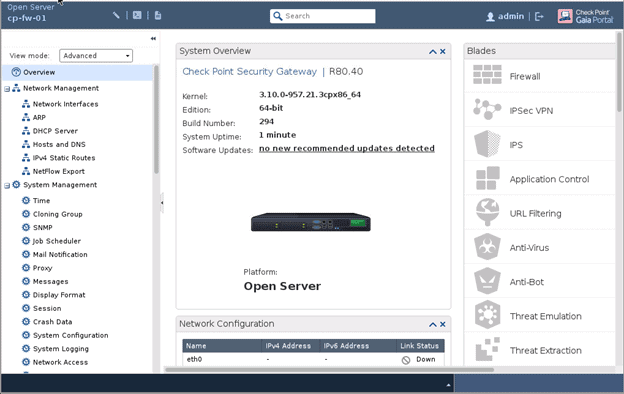
Once you logged in, you should be able to see a nice-looking Checkpoint security gateway GUI.
Step 8. Installation of Checkpoint Smart Console.
Most of the Configuration that we make is via a smart console. To access the smart console, you need to access the WebGUI via your windows machine and download and install the smart console.
You may follow the guide I created here to connect your local machine to the firewall.
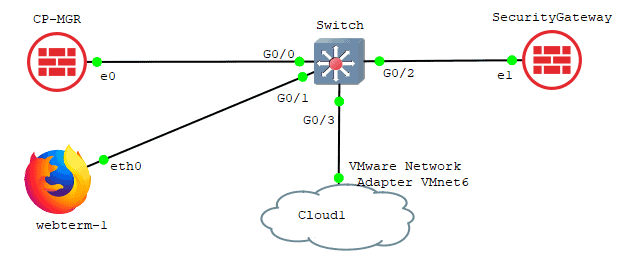
After connecting the firewall to the local machine, try to access the Checkpoint web GUI from your local machine.
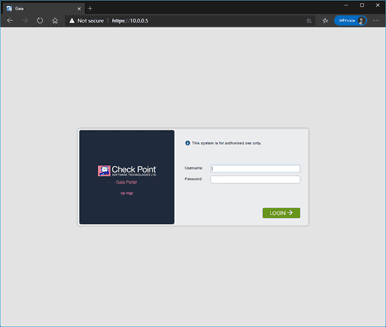
After I logged in, you should get an option to download the smart console.
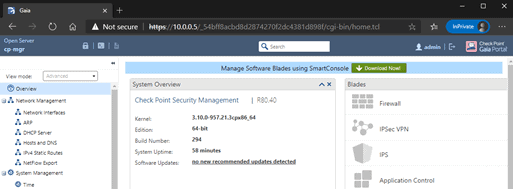
Click on download now
The size of the file is about 483MB, so it might take some time to download.
Double click on the file to install it.
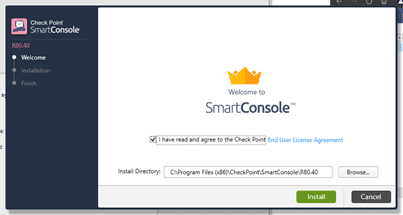
Once installed, click on Finish to launch the smart console GUI.
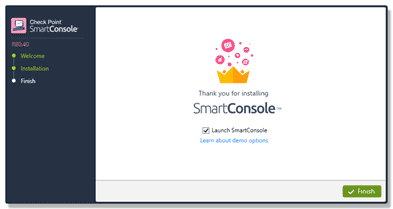
It will prompt you to enter the credentials.
Do you know what credentials that you should use?
As I stated initially, a smart console always connects to the management server, so you have to enter the management server credentials.
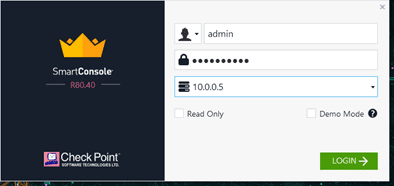
After authenticated, it will show the server fingerprint to verify the authority.
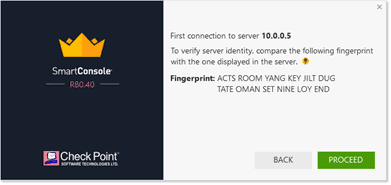
Click on Proceed. After this, you will be able to see a nice, beautifully looking checkpoint smart console window.
As you can see, the checkpoint manager server is already present in the Smart console.
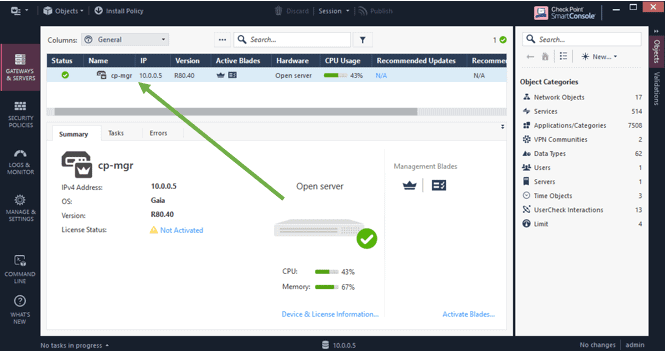
Step 9. Add the security gateway to the smart console.
To add the security gateway to the smart console, you may click on the New button and then Gateway.
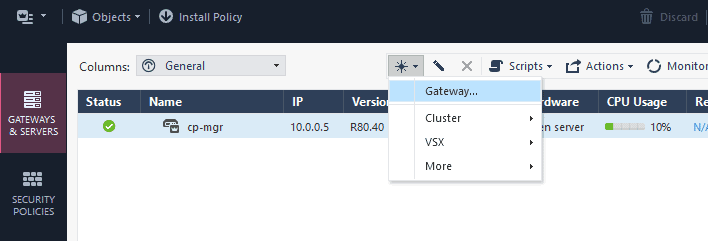
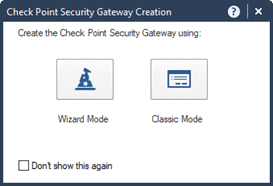
In the prompt, choose either wizard mode or classic mode. I select wizard mode here.
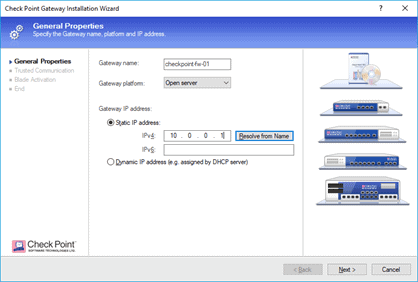
You can give the gateway a name, from the gateway platform, you may choose an open server as the platform and the gateway’s IP address.
Then click on Next.
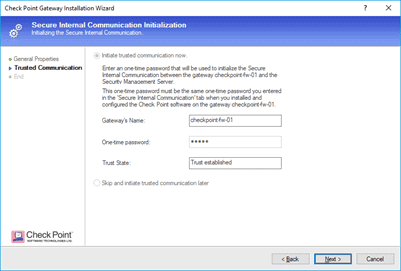
You would get a prompt to setup the SIC communication.
You may enter the one time password now and click on next.
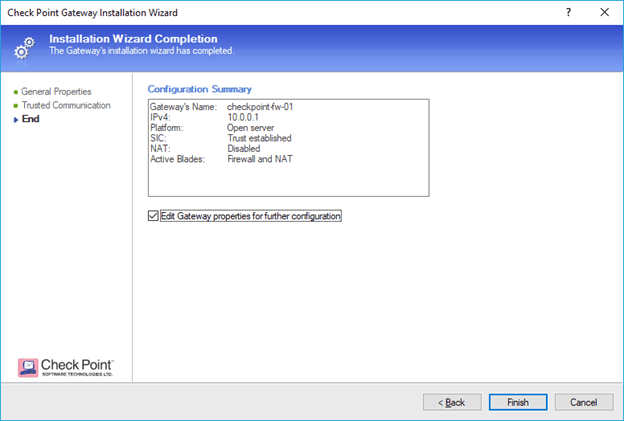
In the configuration summary makes sure everything looks good and then click on Finish.
Step 10. Connect checkpoint firewall to the internet.
Configure the VMnet2 for internet access.
Go to start run and type ncpa.cpl
In the network adapter configuration window, right-click on the network adapter where you have connected the internet on your local PC.
In my case, I have connected to the internet via wired connection. Which is ethernet adapter. so right click on it.
In the sharing tab, check the internet sharing options, and from the dropdown select the VMnet2 adapter.
And then click on, OK.
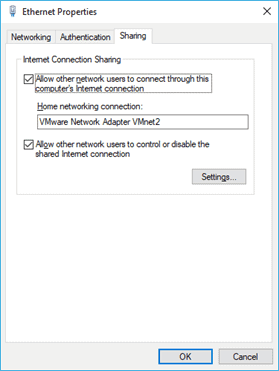
It should start assigning IP address from the range 192.168.137.0/24
Drag and drop another cloud to the topology.
Right-click on the cloud, and configure.
Select VMnet2 from the list by checking the options show special ethernet interfaces and click on OK.
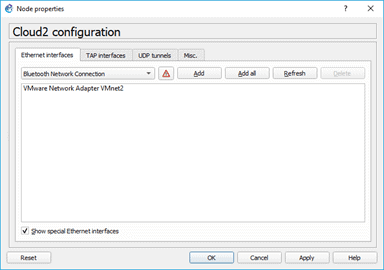
Connect ehternet0 to the cloud on the VMnet2 interface.
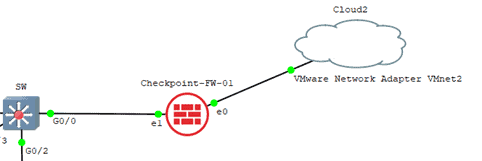
Configure the internet side IP addresses.
On your browser, try to access the interface IP that is connected to the switch.
So the IP address is 10.0.0.1, try to access https://10.0.0.1.
Just like before, when you tried to access the checkpoint manager, it should show you the security warning on your browser.
Just click on accept the certificate and click on Continue.
On the Login prompt, enter the credentials that you have set up during the installation. And click on Login.
After login, The first step that we are going to do is to enable the interface ethernet0 connected to the internet.
Click on Network management and click on network interfaces.
You should be able to see the list of interfaces in the firewall with its status.
Click on the Lock button on the top left.
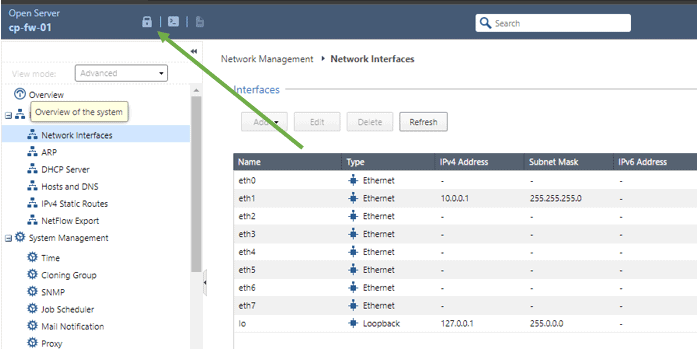
On the prompt, Are you sure you want to override the lock, click on Yes.
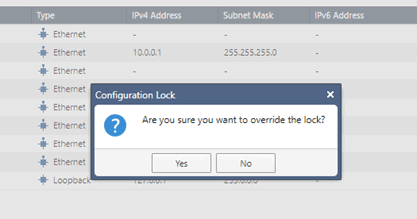
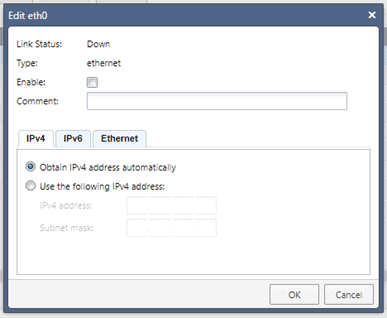
On the same screen, click select the interface ethernet 0 and click on Edit.
In the edit interface windows, check the option which says enable.
And Obtain the address automatically and click on OK.
Click on Refresh now, and you should be able to see the interface ethernet0 with the IP from 192.168.137.0/24 range.
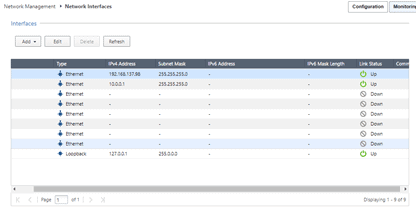
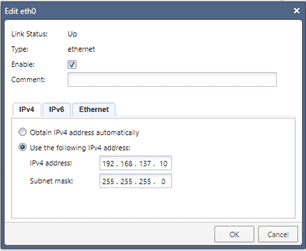
Which means the internet cloud that we added is working as expected, but in our topology, we are using a static IP right, which is 192.168.17.10/24
Click on Edit again or double click on the interface eth0. And this time, change it to static and click on OK. Like below.
Let’s go back to the smart console and enable the same interface on the manager console.
On the smart console, select the checkpoint firewall and click on Edit.
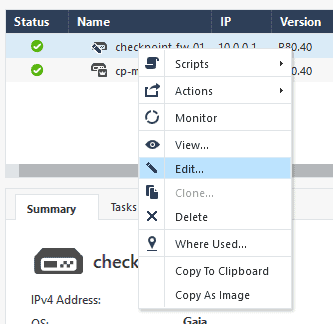
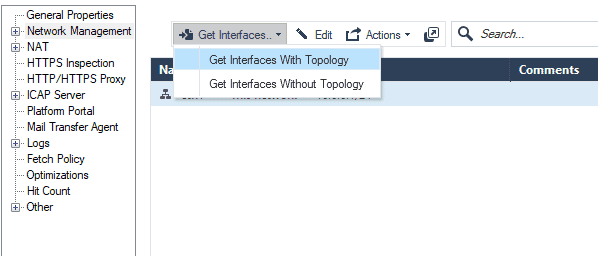
In the new window, click on network management. You should now only have ethernet 1. You have to add the interface ethernet0 to the list of interfaces.
From the Get interfaces dropdown, click on Get interfaces with topology.
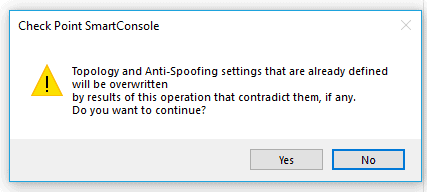
You may get a warning click on yes on that.
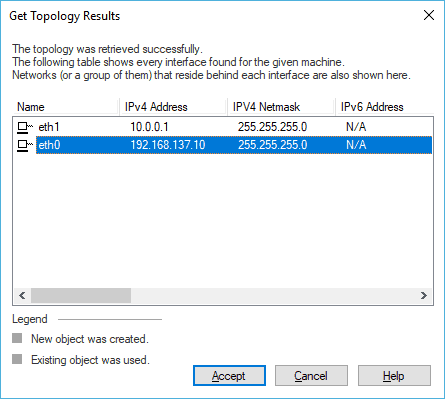
In the topology results, you should see the interface ethernet0 in the list, select that and click on Accept. And then click on Accept on the pop-up.
You should now go back to the console and click on Publish. If you are from the Palo alto side, instead of the commit, you should use Publish

Click on publish on the smart console window.
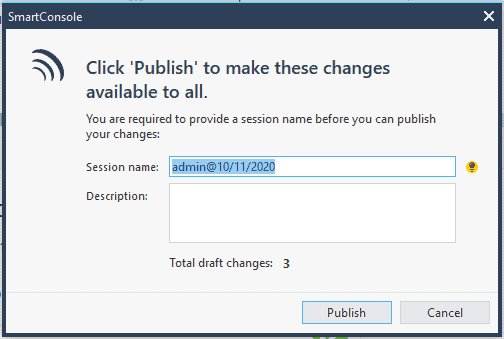
After a few seconds, your changes will be saved.
Well, you configured the IP address on the edge of the firewall, but you won’t be able to get to the internet yet because we have not configured the routing on the firewall.
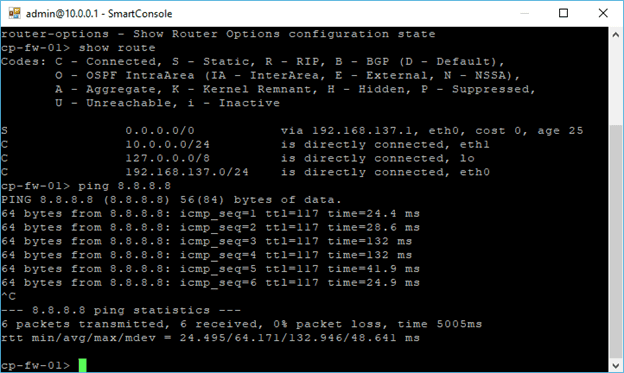
Let’s check the routes on the firewall by typing the command show route.
If you wanted to reaccess the firewall CLI, all you have to do right now is that you just need to right-click on the firewall, click on Action and then click open shell.
It will prompt you to enter the credentials you may enter that now.
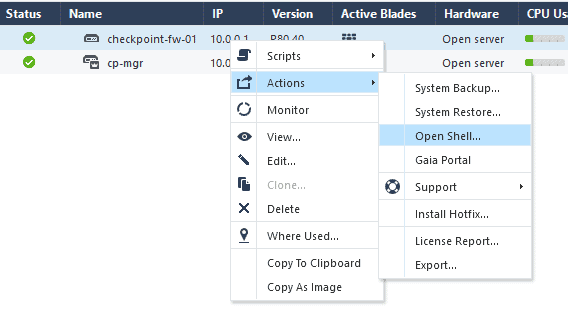
Note: The same way you can access the firewall web GUI and clicking the 4th option, which says Gaia portal.
When I check the routing table, I don’t see the default route configured to reach the internet.

Go back to the Gaia portal, and click on IPv4 static routes.
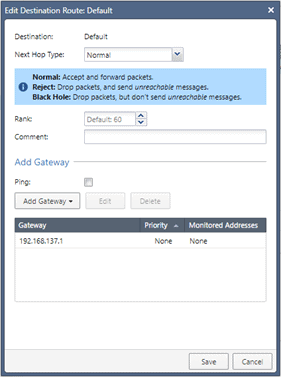
You should be able to see a default route there. Just double click on it.
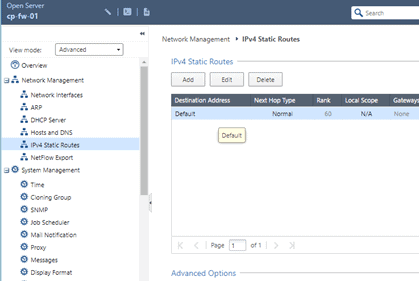
In the gateway section add the default gateway as 192.168.137.1 and then click on Save and then Apply.
Go back to the CLI again and check the routes. You should be able to see the routes added. When you try to ping now to the internet IP 8.8.8.8 you should now get a response for the same.

We are also able to reach the IP address 8.8.8.8 as well
You configured the checkpoint management server, Smart console and security gateway on this GNS3 setup and connected the security gateway to the internet.
I hope you were able to follow along, But I have a question, can your internal users access the internet yet?
The answer is, No! which we will cover in another lab, where we focus more on security policies, natting, and so on.