

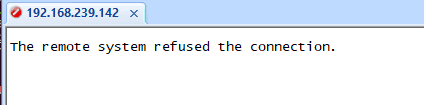
There are a few features that are not available out of the box in Ubuntu. One such feature is SSH. If you ever install Ubuntu desktop on your machine and expect the ssh to work by default, it doesn’t. You would get an error message that says ‘The remote system refused the connection’ However, in the Ubuntu server you would get an option to choose SSH service during the installation.

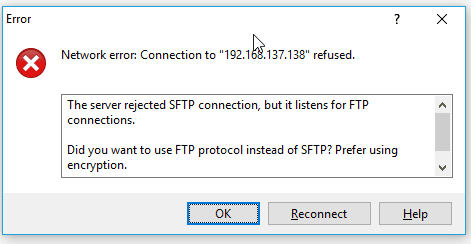
Also if you try to open winscp on your local machine and tried to access the Ubuntu that wont work either.
You will get Network error, connection refused.

Even when you try to transfer the file using the SCP command, it will still not work and throw the same error message that says connection refused lost connection, because SCP also use the same ssh port number 22.


And for me, being from the network background I really needed this ssh access as well as I should have the ability to transfer data over SCP. To fix the SCP access, we have to just enable the SSH on Ubuntu.
In this blog, we are going to enable ssh access on Ubuntu, and secure the ssh access. By doing that SCP access also will be enabled for the users.
Prerequisite
- You must have Ubuntu machine installed with root access.
- Internet access.
What is SSH in Ubuntu?
An SSH (secure shell) is a protocol that lets you securely connect to remote hosts’ command-line interface. Since it is encrypted, no one can read the data between the SSH server and the ssh clients. The default port that is used by the SSH is 22.
Is SSH enabled by default on Ubuntu?
The SSH service is not enabled on the Ubuntu desktop by default. However, when you install the Ubuntu server, you will get an option to install the OpenSSH service during the installation, and if you do not choose that option, ssh service will not be enabled.
You can follow the steps here to install the ssh service on the Ubuntu machine.
We are using Ubuntu version 20.04 for this lab, if you have another version of Ubuntu such as 20.10, 19.10, 19.04, 18.10, 18.04. The steps mentioned here would work just fine.
Steps to enable SSH access on Ubuntu.
- Verify the SSH service installed or not.
- Install OpenSSH service on Ubuntu.
- Check the SSH service status.
- Start ssh on boot ubuntu.
- Verify the ssh access from localhost.
- Verify the ssh access from the remote.
- Secure the SSH access.
- Verify the SCP access.
To enable SSH service on the Ubuntu machine, you will have to download and install the utility called OpenSSH service on your Ubuntu machine. Let’s go ahead and install the OpenSSH utility on my Ubuntu machine.
1. Verify the SSH service installed or not.
When you get the error message that says the remote system refused the connection, which doesn’t mean the ssh service is not installed on the machine. It could also mean that the ssh service may be blocking the connection.
You can check the status by typing service ssh status or systemctl status ssh.


As you can see, in my case, the ssh service is not installed, so let’s go ahead and install the ssh service on Ubuntu.
Note: If you have already installed the SSH service, you don’t have to install the service again, and you can go to the step4.
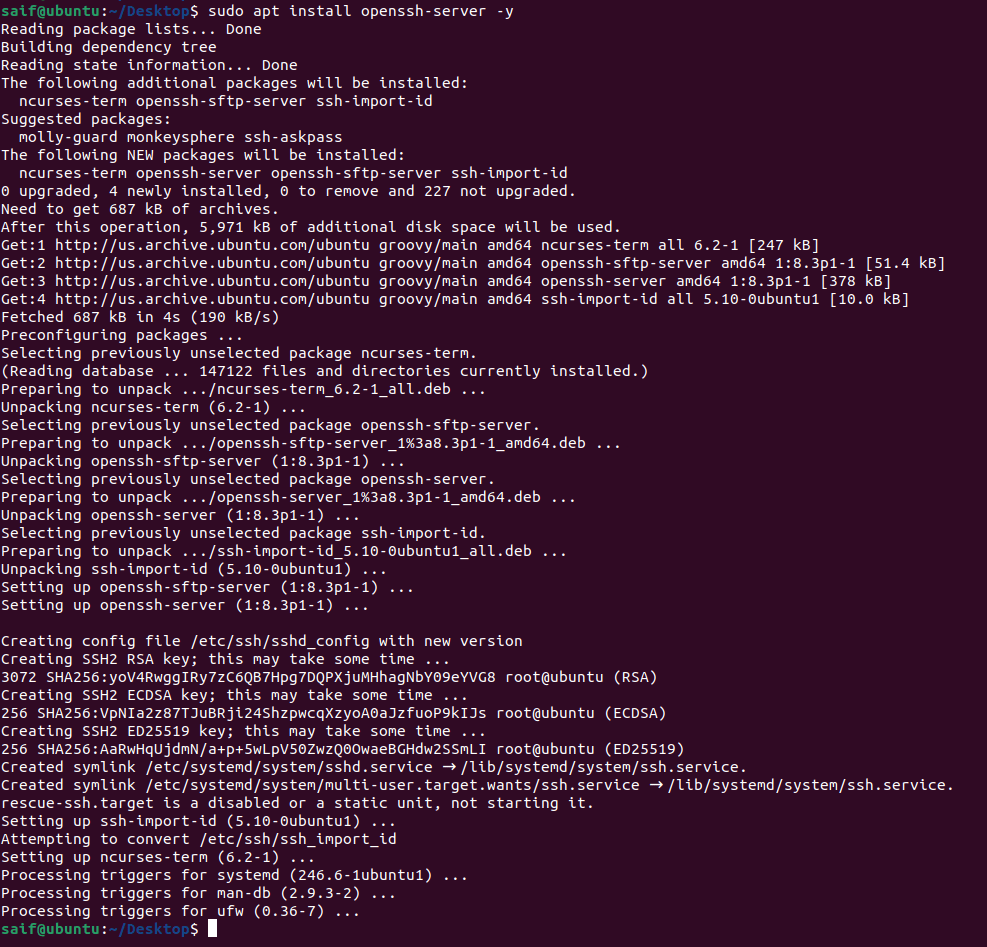
2. Ubuntu enable SSH – By installing OpenSSH-Server.
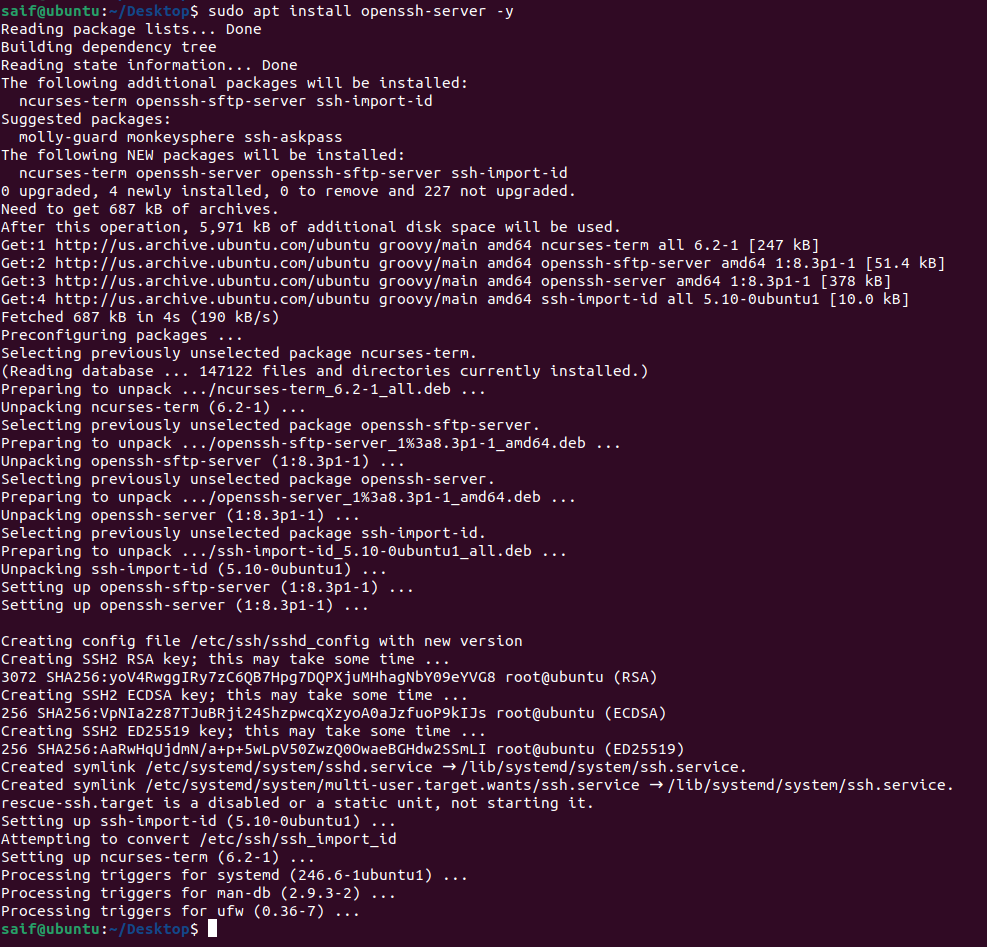
Log in to the terminal and enter the below commands to install the OpenSSH service on your ubuntu machine.
sudo apt update
sudo apt install openssh-server -y
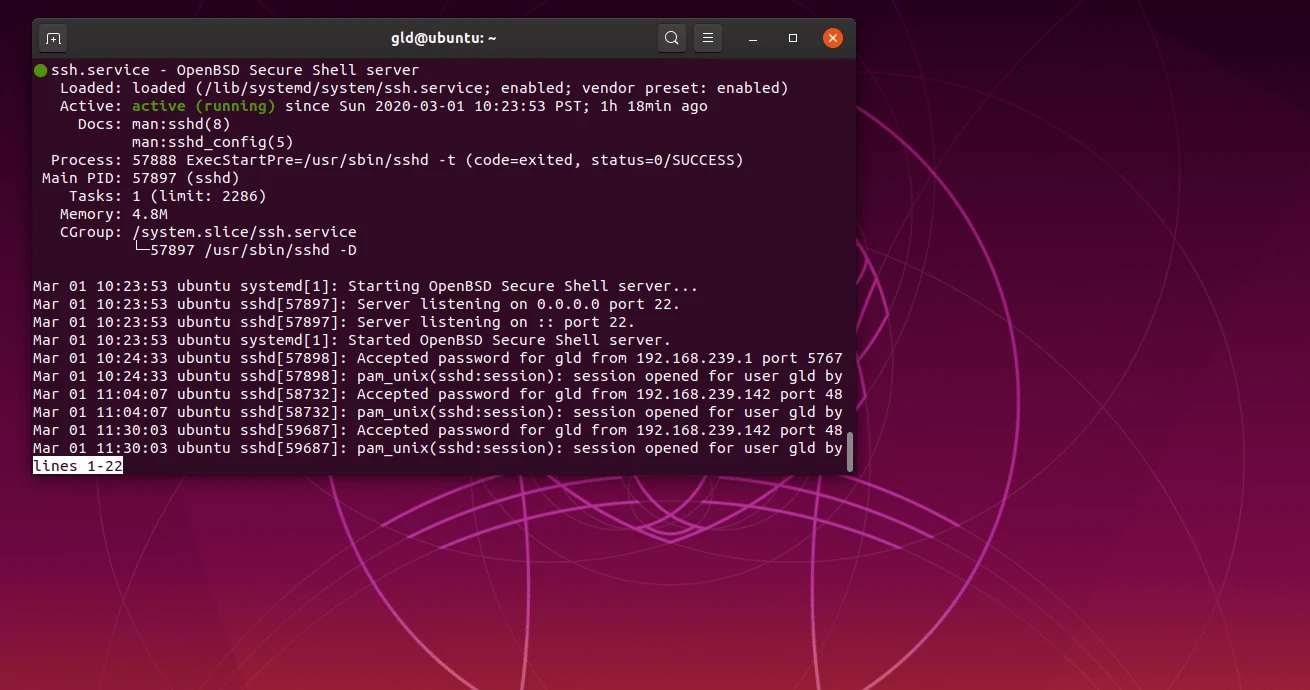
3. Check the SSH service status.
Once the installation is completed, the Openssh service would start automatically. Let’s quickly check the status of ssh service on the machine now by running the command.
service ssh status.
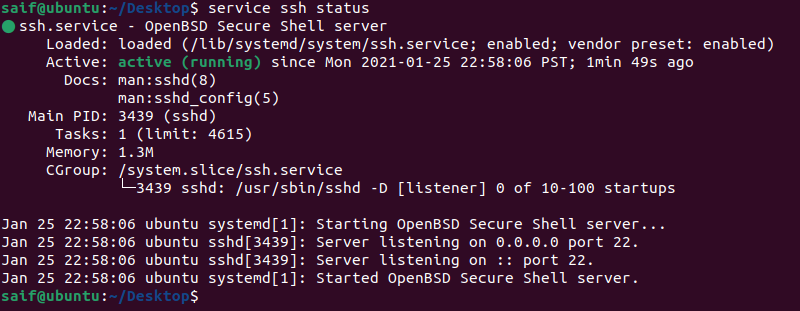
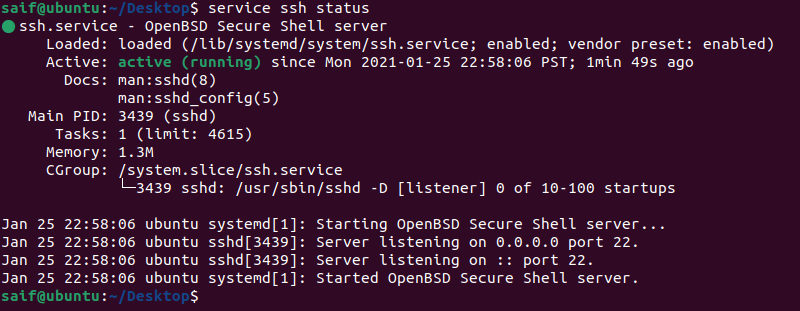
As you can see the ssh service not only installed, it has also been started automatically.
At any point, if the ssh service has not started you can enter the command service ssh start to start the service.
To stop the service type service ssh stop and you can also restart the services by typing service ssh restart just like how you would manage any other services in Linux.
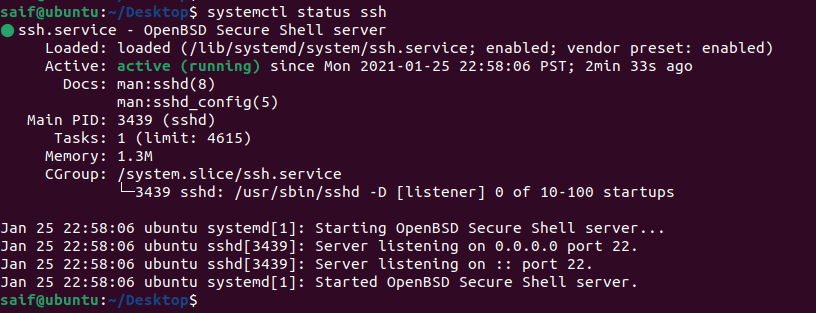
Similar to the above, you can also check the ssh service status by typing the command systemctl status ssh.

4. Start ssh on boot ubuntu.
You also need to make sure the SSH service starts during the boot.
If you don’t do that when the system reboots and you try to access the Ubuntu machine via ssh, you cannot get in, and it will throw an error saying connection refused.
The problem is the SSH service wouldn’t have started during the boot.
To enable the SSH service on ubuntu boot, you may enter the command sudo systemctl enable ssh.
saif@ubuntu:~$ sudo systemctl enable ssh
[sudo] password for saif:
Synchronizing state of ssh.service with SysV service script with /lib/systemd/systemd-sysv-install.
Executing: /lib/systemd/systemd-sysv-install enable ssh
saif@ubuntu:~$
5. Verify the ssh access from localhost.
To verify the SSH access you can do the SSH to the same ubuntu host by typing ssh localhost
As you can see, I was able to ssh into the ubuntu localhost using ssh.

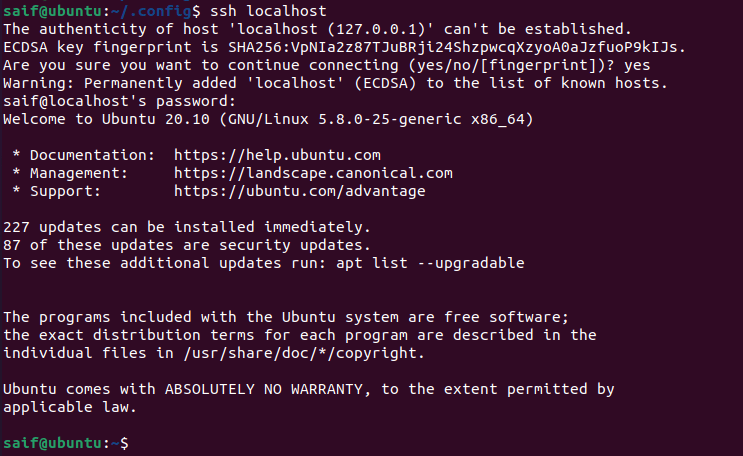
This means, the ssh service is working and you are able to ssh from your local machine.
6. Verify the ssh access from the remote.
Now lets go to any remote host and try to ssh again, this time of course you have to use the IP address of the Ubuntu host.
Type IP addr and get the IP address, first make sure you are able to reach the remote IP by pinging the IP.
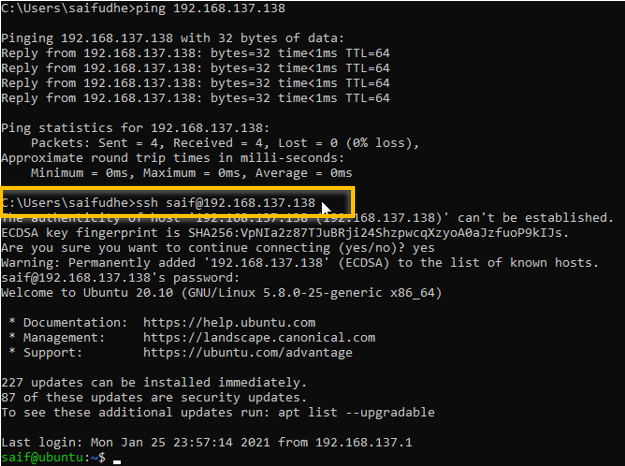

Yes, we are able to reach the ubuntu host from the remote machines.
By this point, you should be able to access the Ubuntu host via SSH. Read on to secure the SSH access and test the SCP connection.
7. Secure the SSH access.
We are able to access the ssh and it works just fine. Next, let’s take a look at how you can secure ssh access.
We can secure the ssh access multiple ways, and we are looking into two options here. First, change the default ssh port number from 22 to something different. In our example, let’s use port number 2222.
Second, Allow only specific users to the ssh, let’s see how we can achieve that.
If you wanted to tighten the security more, you could even allow only a specific IP address to SSH into the host. We are not going to do that here.
a. Change SSH port to 2222
Changing the default ssh port number is very easy. You have to open the ssh sshd config file and replace port number 22 with a different one.
The ssh configuration file is located in /etc/ssh/sshd_config
Edit the configuration file using an ubuntu editor nano.
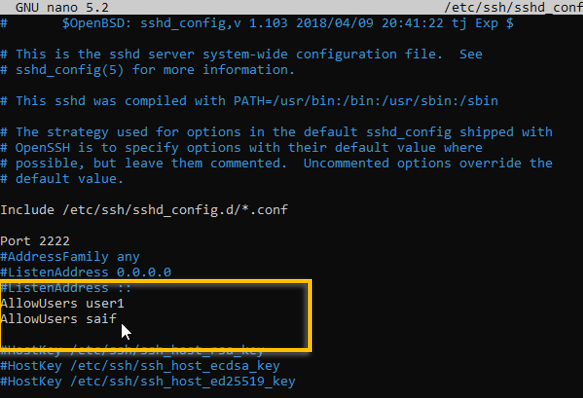
sudo nano /etc/ssh/sshd_config
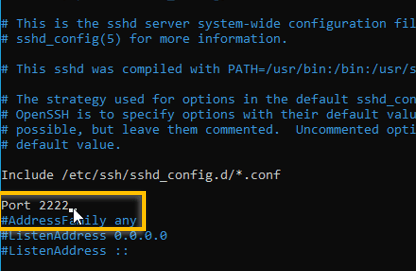
You should be able to see the port 22 is commented, you have to uncomment that line and change the port number.
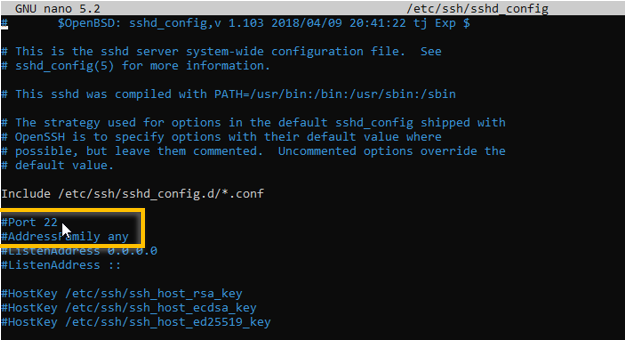

For this test, I am using the port number 2222.
After you made the change, go ahead and restart the ssh service in Ubuntu.

The current session would continue even if you change the port number and restart the services. You can now exit out of the current session and try to ssh again.


As you can see, when I tried to ssh again, it didn’t let me in.
That’s because, by default, the ssh service would start the session with port number 22. So anytime you want to ssh into this box, you will have to add the ssh port number manually before proceeding.
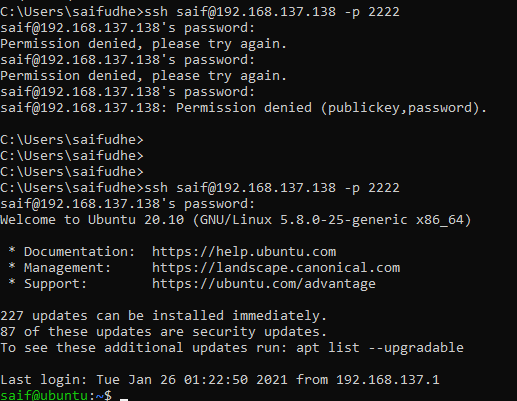
To manually enter the ssh port number, you can type -p and the port number in windows as well as in linux.
for example ssh [email protected] -p 2222

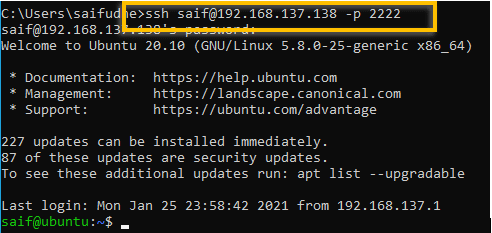
And we are able to ssh into the Ubuntu machine successfully this time after modified the port number.
b. Restrict the access to specific users.
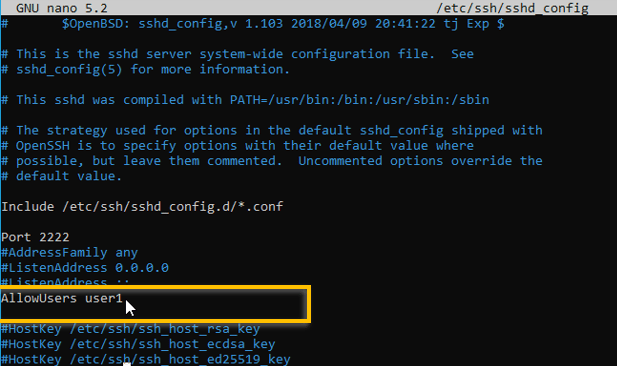
To restrict the access to specific users in Ubuntu you can add a line that says Allowusers and the username.
For eg: Allowusers user1
After you made the change, you can go ahead and restart the ssh service.

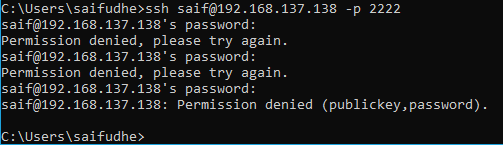
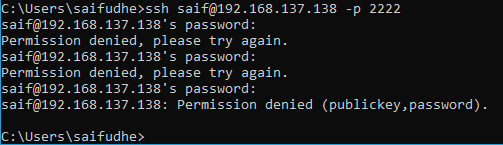
Try to ssh with the old username and see if you can still access the system via ssh.
I have tried to ssh and it prompted me for the password three times and it failed, though I enterered the currecct credentails.
Which means we restricted the access on the user level.
How do I allow the old user again?
You can add the old username to the allow list. Just below the allowusers line you can add the same line, but this time with the old username.
If you have multiple users, you can keep adding the usernames in here.

As soon as I made the changes and restarted the ssh services, I am now able to to authenticate using the my old username.

8. Verify the SCP access.
Now that we have configured the SSH access, we should be able to start transferring files over the SCP protocol as well.
Open the WinSCP and try to access the Ubuntu machine, and you should be able to access it.
Note : Remember to put the port number 2222 while accessing it.

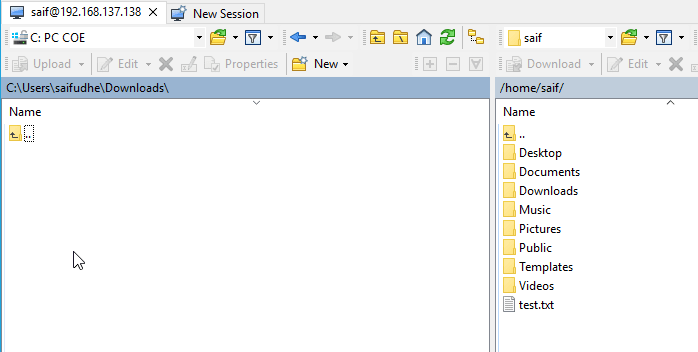
I am also able to transfer files using SCP on CLI.

