Your C drive is fully utilized and you decided to extend your hard disk, so if it is a physical box you will get a brand new hard disk and plugin to the system, or if it is a virtual machine, you extend the virtual hard disk. Once the physical or virtual hard disk is in place, you go to the device manager and extend the hard disk, very easy, isn’t it?
But what if you got to the device manager and realize that you are not seeing the option to extend the C drive, basically it is disabled or grayed out.
So how do you still extend your hard disk, when the extend option is grayed out? Let’s take a look at that in this blog post.
The reason you are seeing the extend option grade out is that there is a recovery partition between the C drive and the unallocated space.
As you can see below, I have already extended the virtual hard disk size in the backend of the hypervisor and you see the 20GB as unallocated space, and I am unable to extend C drive on my disk manager.
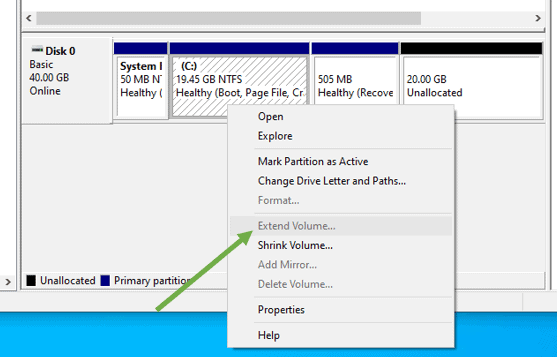
Even if you try to delete the partition in the middle, the windows default disk manager will not let you. It would just show you a help option.
What does the recovery partition do?
The Windows operating system creates the extra Recovery Partition during the windows installation. That holds the windows recovery environment. So in the event of any windows system-related issues, and you wanted to restore the windows machine to its original state, you can use the recovery option.
Is it safe to delete recovery partition in Windows 10/11?
For an average user, I don’t recommend deleting the recovery partition on your windows machine. Otherwise, you will have to carry around the windows bootable image either on a CD or USB any time you want to do the restore option. But for VM’s, we can rely on snapshots.
So you got two choices, either
Move the recovery partition to another disk and extend the c drive.
or
Create another drive from the unallocated space, which I covered here. In this blog, we are going to look at the first option.
How to move the recovery partition to another disk and extend C drive?
As we have looked at above, You cannot delete, modify, or move the recovery drive with the default windows device manager.
So we will use a software called EaseUS partition manager for this purpose. As the name suggests, it is effortless to use, and you can get your partition expanded in a couple of seconds.
This partition manager will help you move that extra partition (recovery partition) and extend the C drive as well.
In my windows VM, I have given only 20GB of virtual hard disk during the installation. Now I am struggling as I don’t have enough storage.
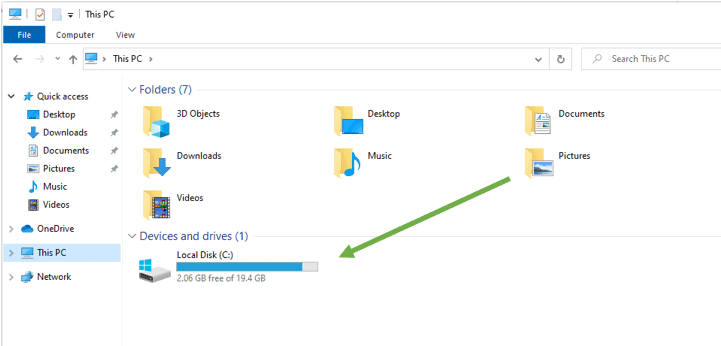
You can see my C drive is almost full, and I already extended the windows KVM image following the article here. And I have given an extra 20GB.
qemu-img resize win10.qcow2 +20G
Let’s see how we can extend the partition when there are other partitions in between.
- Download and install the partition manager.
- Open the partition manager.
- Move the recovery partition to another drive.
- Expand the C drive.
- Execute the operations.
- Verify the changes.
1. Download and install the partition manager.
Click here to download the easeus partition manager.
Note: Though the trial version will help you save the operation, you need to have a license to execute the operations.
2. Open the partition manager.
Once you have the software downloaded and installed, you may go ahead and open it.
You should be able to see the list of partitions in your windows machine.
3. Move the recovery partition to another drive.
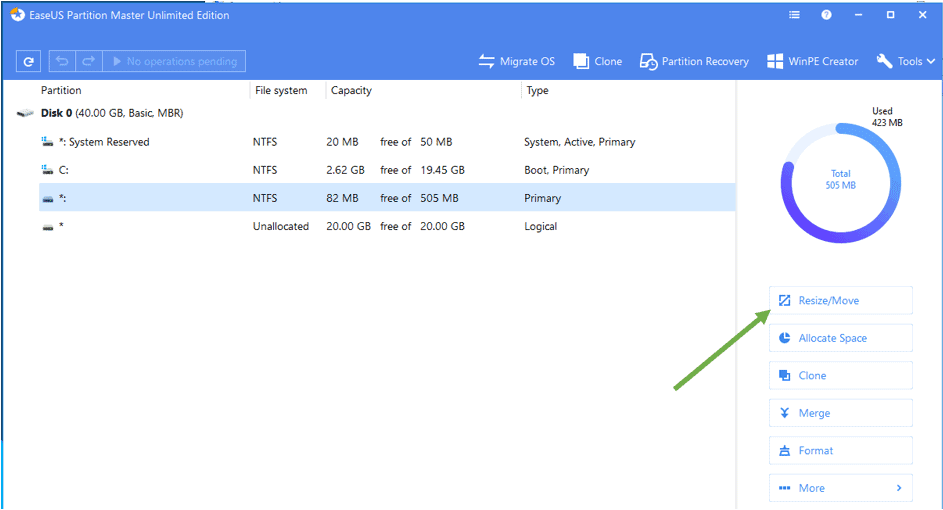
We will now move the recovery partition, which sits in between the C drive and the unallocated space, to the end of the hard disk.
Select the recovery partition, which is around 500MB, and click on Resize/Move. The third one is in my case.
Move the recovery partition all the way to the right.
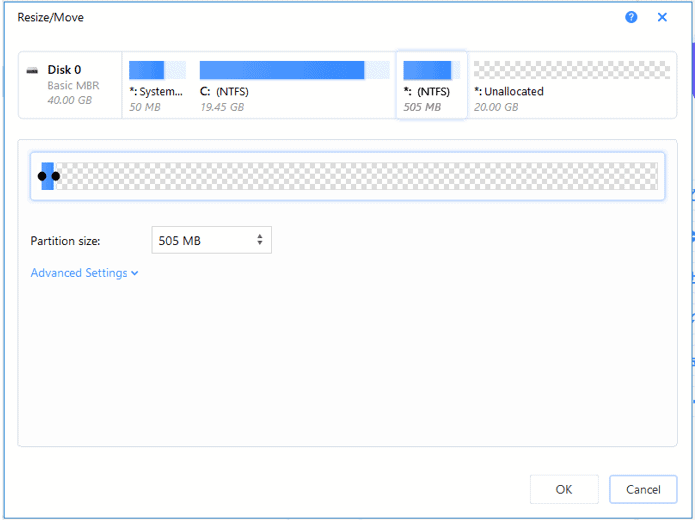
You can see the unallocated size of 20GB moved to the left, as in when we moved the recovery partition to the right. Click on OK here.
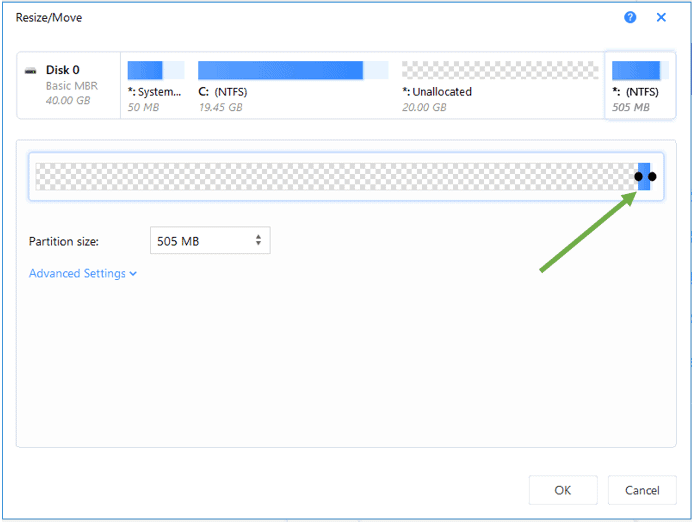
You should now see the recovery partition moved from the third to the fourth, which is good.
And the task has now been added to the operation.

4. Expand the C drive.
After the recovery partition has been moved, let’s go ahead and extend the C drive.
Click on the C drive. As you can see, the size is almost full.
On the right, you should be able to see an option that says Resize/Move. Click on that.
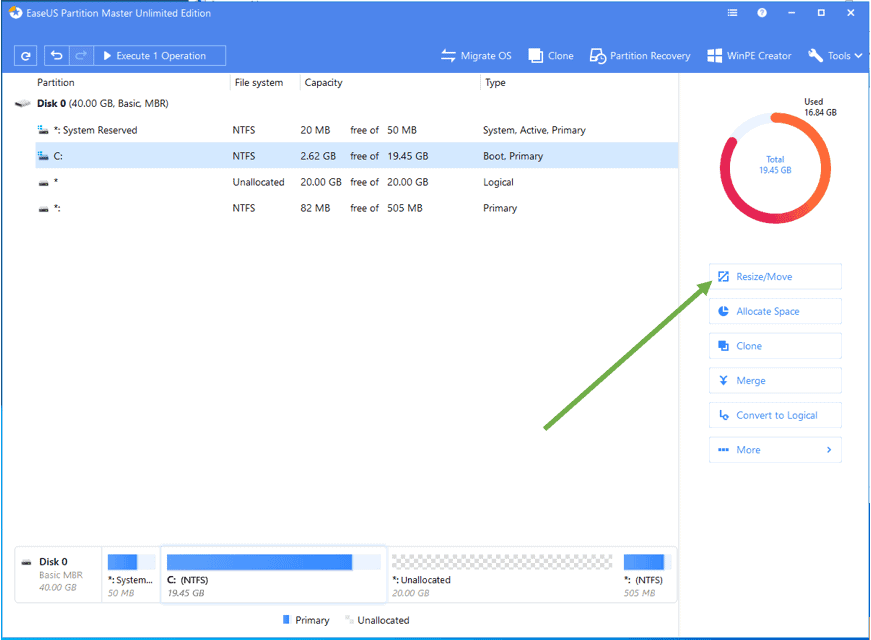
You will get another prompt, which will help you to extend the hard disk easily.
On the expand the screen, resize the C drive to the size that you prefer.
Just drag the dot to the right; it depends on how much space you need, then click on OK.
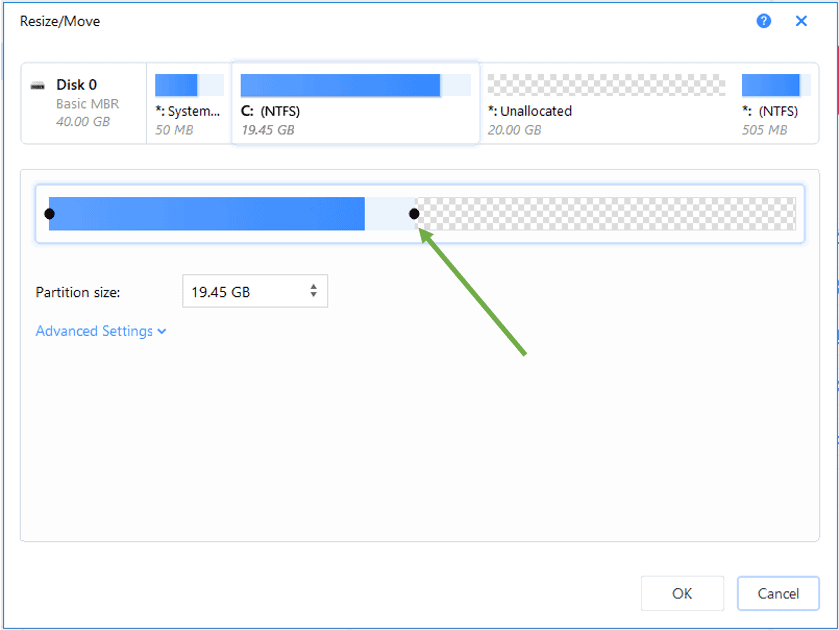
I prefer to use the whole 20 GB of unallocated space for my C drive, so I selected the entire disk and clicked on OK.
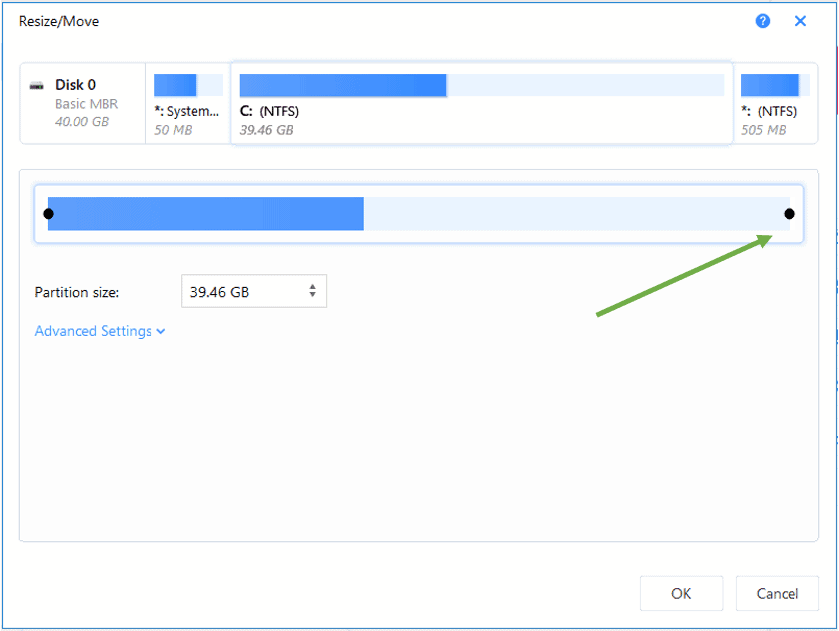
As soon as you clicked on OK, you can see the C drive is expanded in the software, and this task has also gone to the operations queue.
And you should be able to see two operations in the queue first for moving the recovery partition to the end, and the second is for expanding the C drive.
5. Execute the operations.
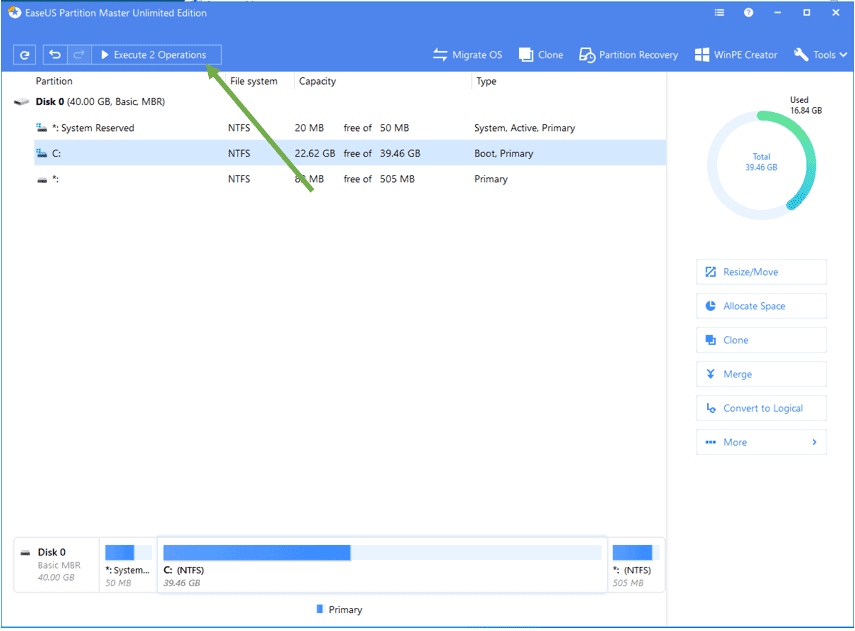
Both the operations are not completed yet; we are going to do that now. To do that, click on Execute 2 operations option.
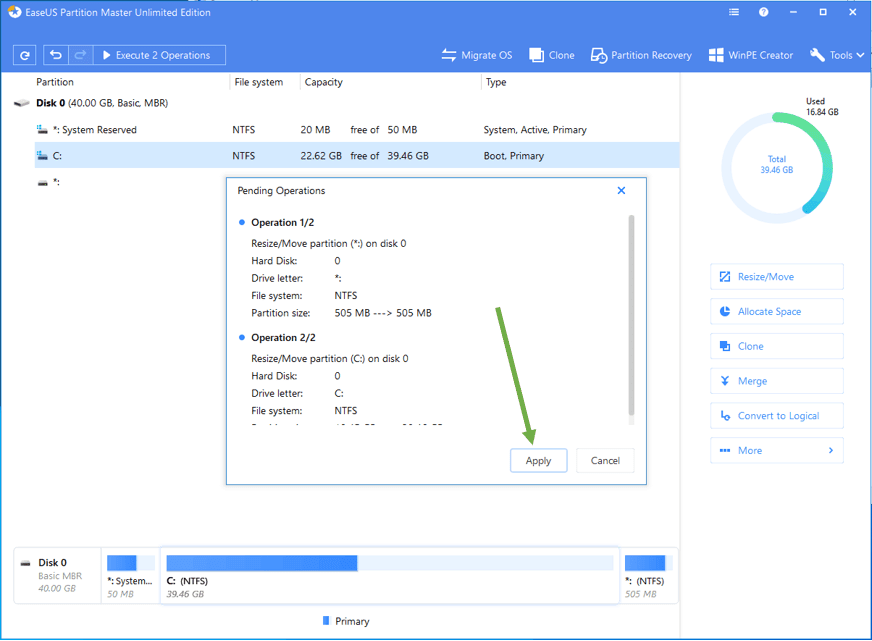
A new window will pop up, which shows you the changes you will make. Click on Apply.
As soon as you click on Apply, it should start its work in the backend.
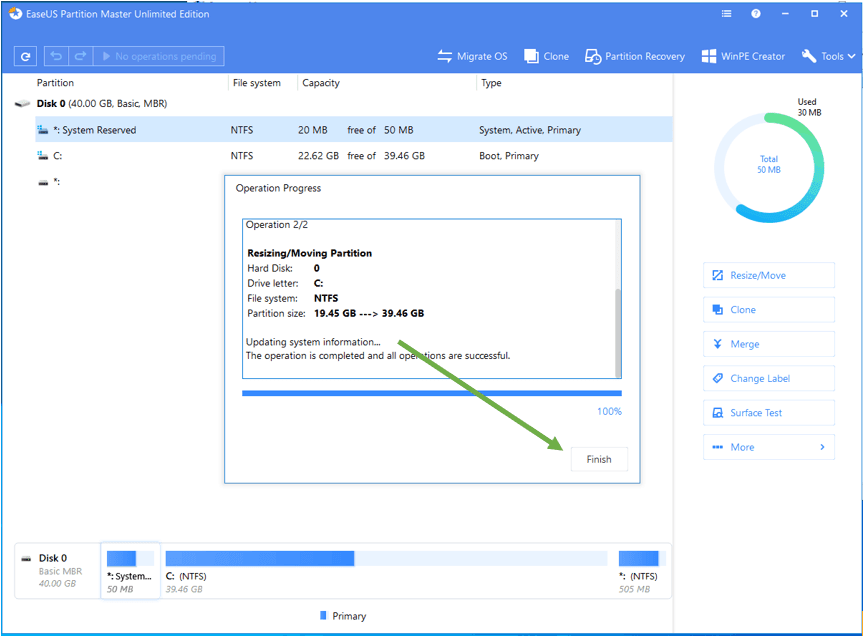
Alright, both the operations are now completed. Click on Finish.
6. Verify the changes.
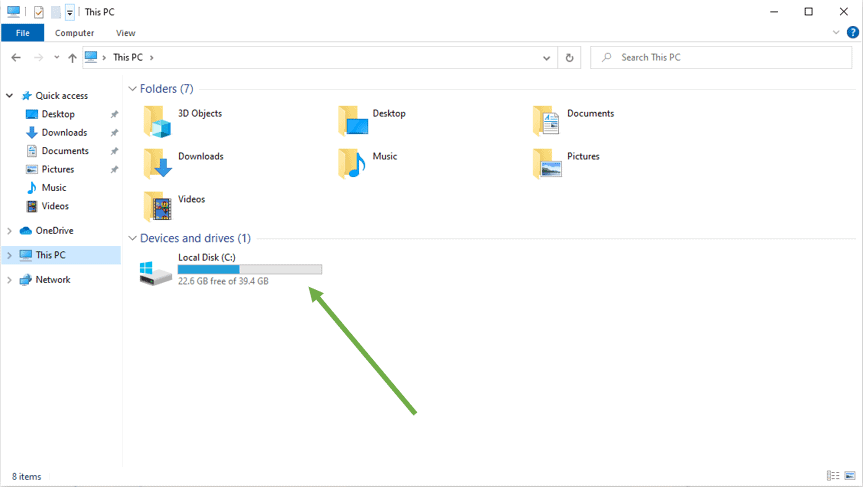
We have successfully moved the recovery partition to the end of the hard disk now and also expanded the C drive to 40GB as well, which we weren’t able to do it using windows disk manager before.
To confirm the changes, open your windows file manager, and you can see the C drive is expanded successfully.
You can also see the recovery partition under the disk manager as well.
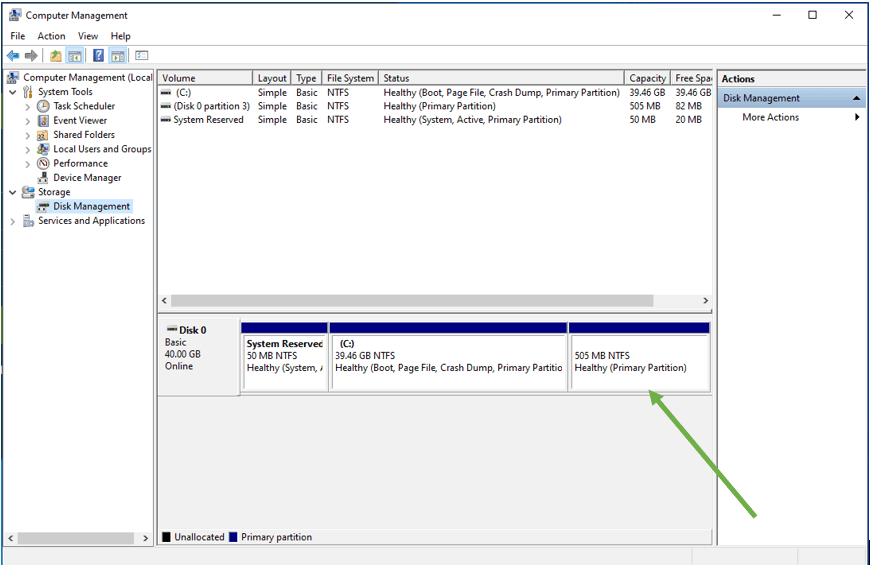
Though you don’t need to reboot the machine after the change, it is recommended to reboot the windows host as well, so please go ahead and reboot the machine and continue to use the system with more storage 😊